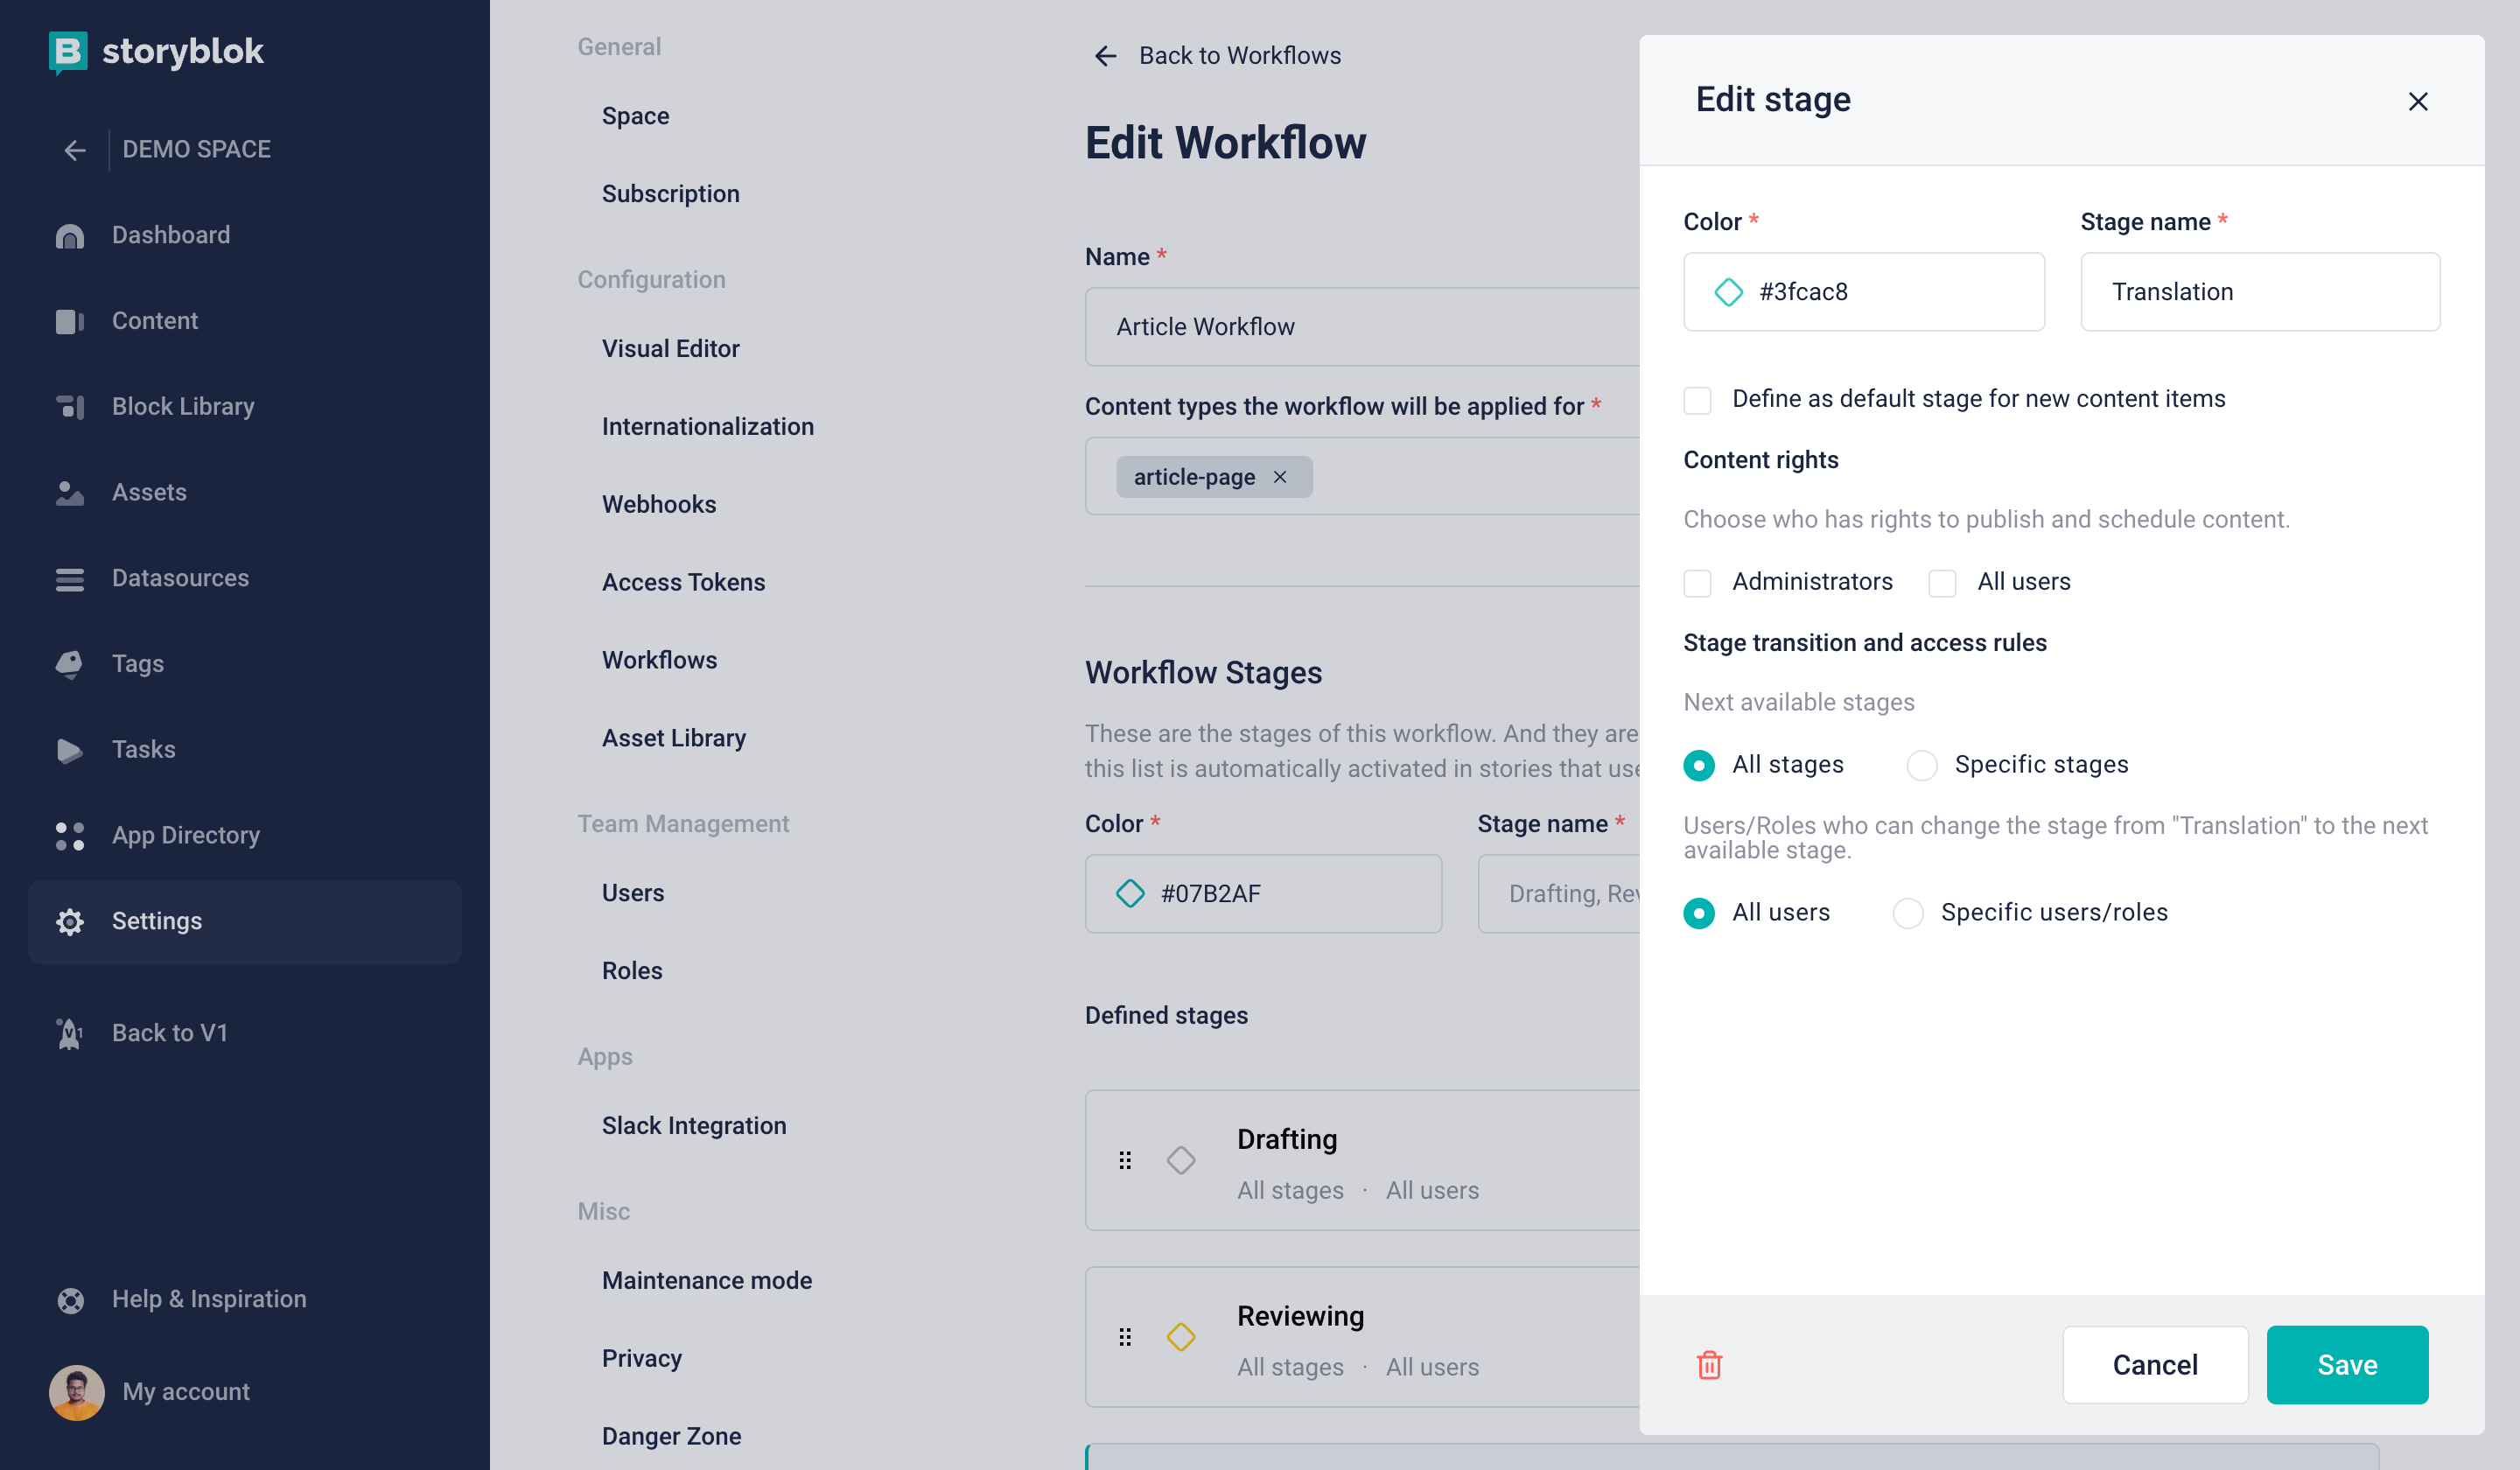
Workflows: Basic, Custom
Based on your subscription plan, there are different options for workflows:
Basic Workflow
Basic Workflow is included in all plans and offers 3 main stages with predefined settings:
| Workflow Stage | Description |
|---|---|
| Not Defined / Undefined | In the case of the Free Plan, or deletion of the used workflow stage, the stage of the story will be changed to an undefined stage. |
| Drafting | The initial state of the story if the content authoring is enabled. At this stage, users are working on the draft version of the story and are not allowed to publish. |
| Reviewing | Story is sent to review to one or multiple reviewers (users of the space). |
| Ready to publish | Story is ready to be published and any user of the space may publish it. |
Custom Workflows
Adding multiple workflows and creating custom workflow stages is available in higher-tier plans. For further information, please refer to the Storyblok Pricing page.
Using the Custom Workflows functionality you are able to define your own content authoring process for a specific content type.
Create new Workflow
You can create a new Workflow in the Settings section, in the Workflow tab.
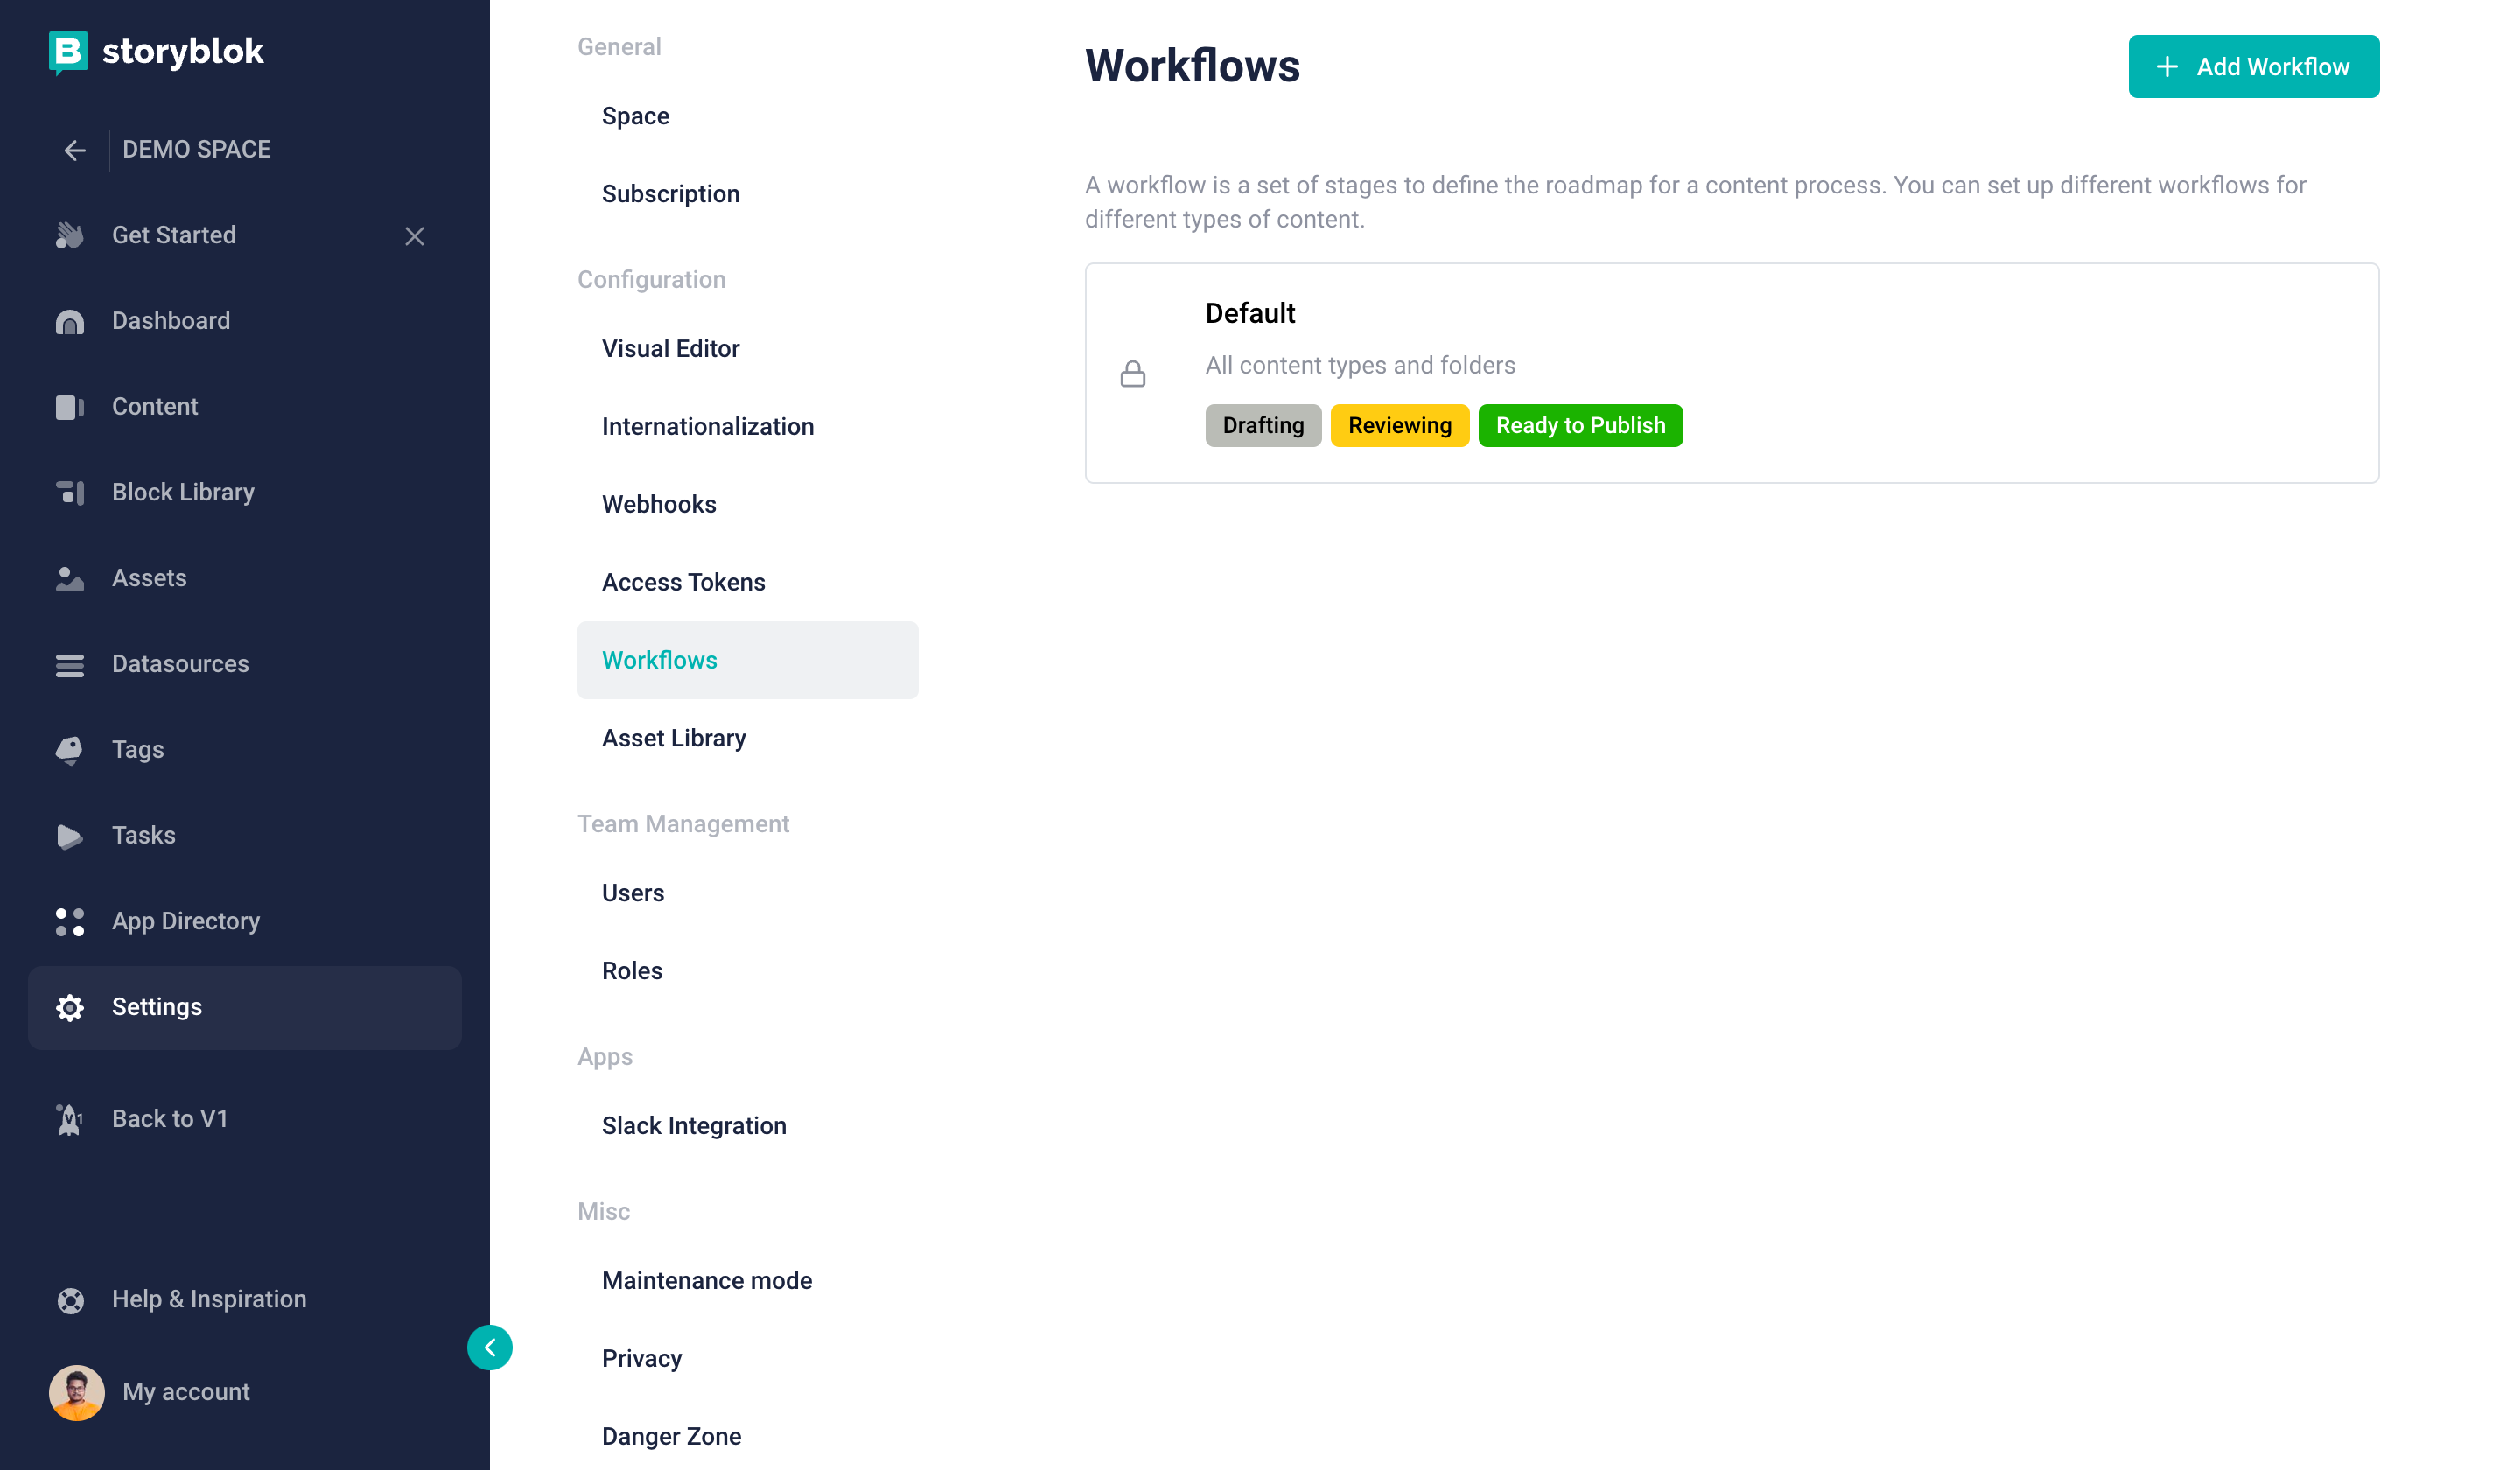
Create new workflow
In order to create a workflow you have to fill in two required fields. Follow the below image steps.
- Name{1}
- Content types the workflow will be applied for{2}
- Save Workflow{3}
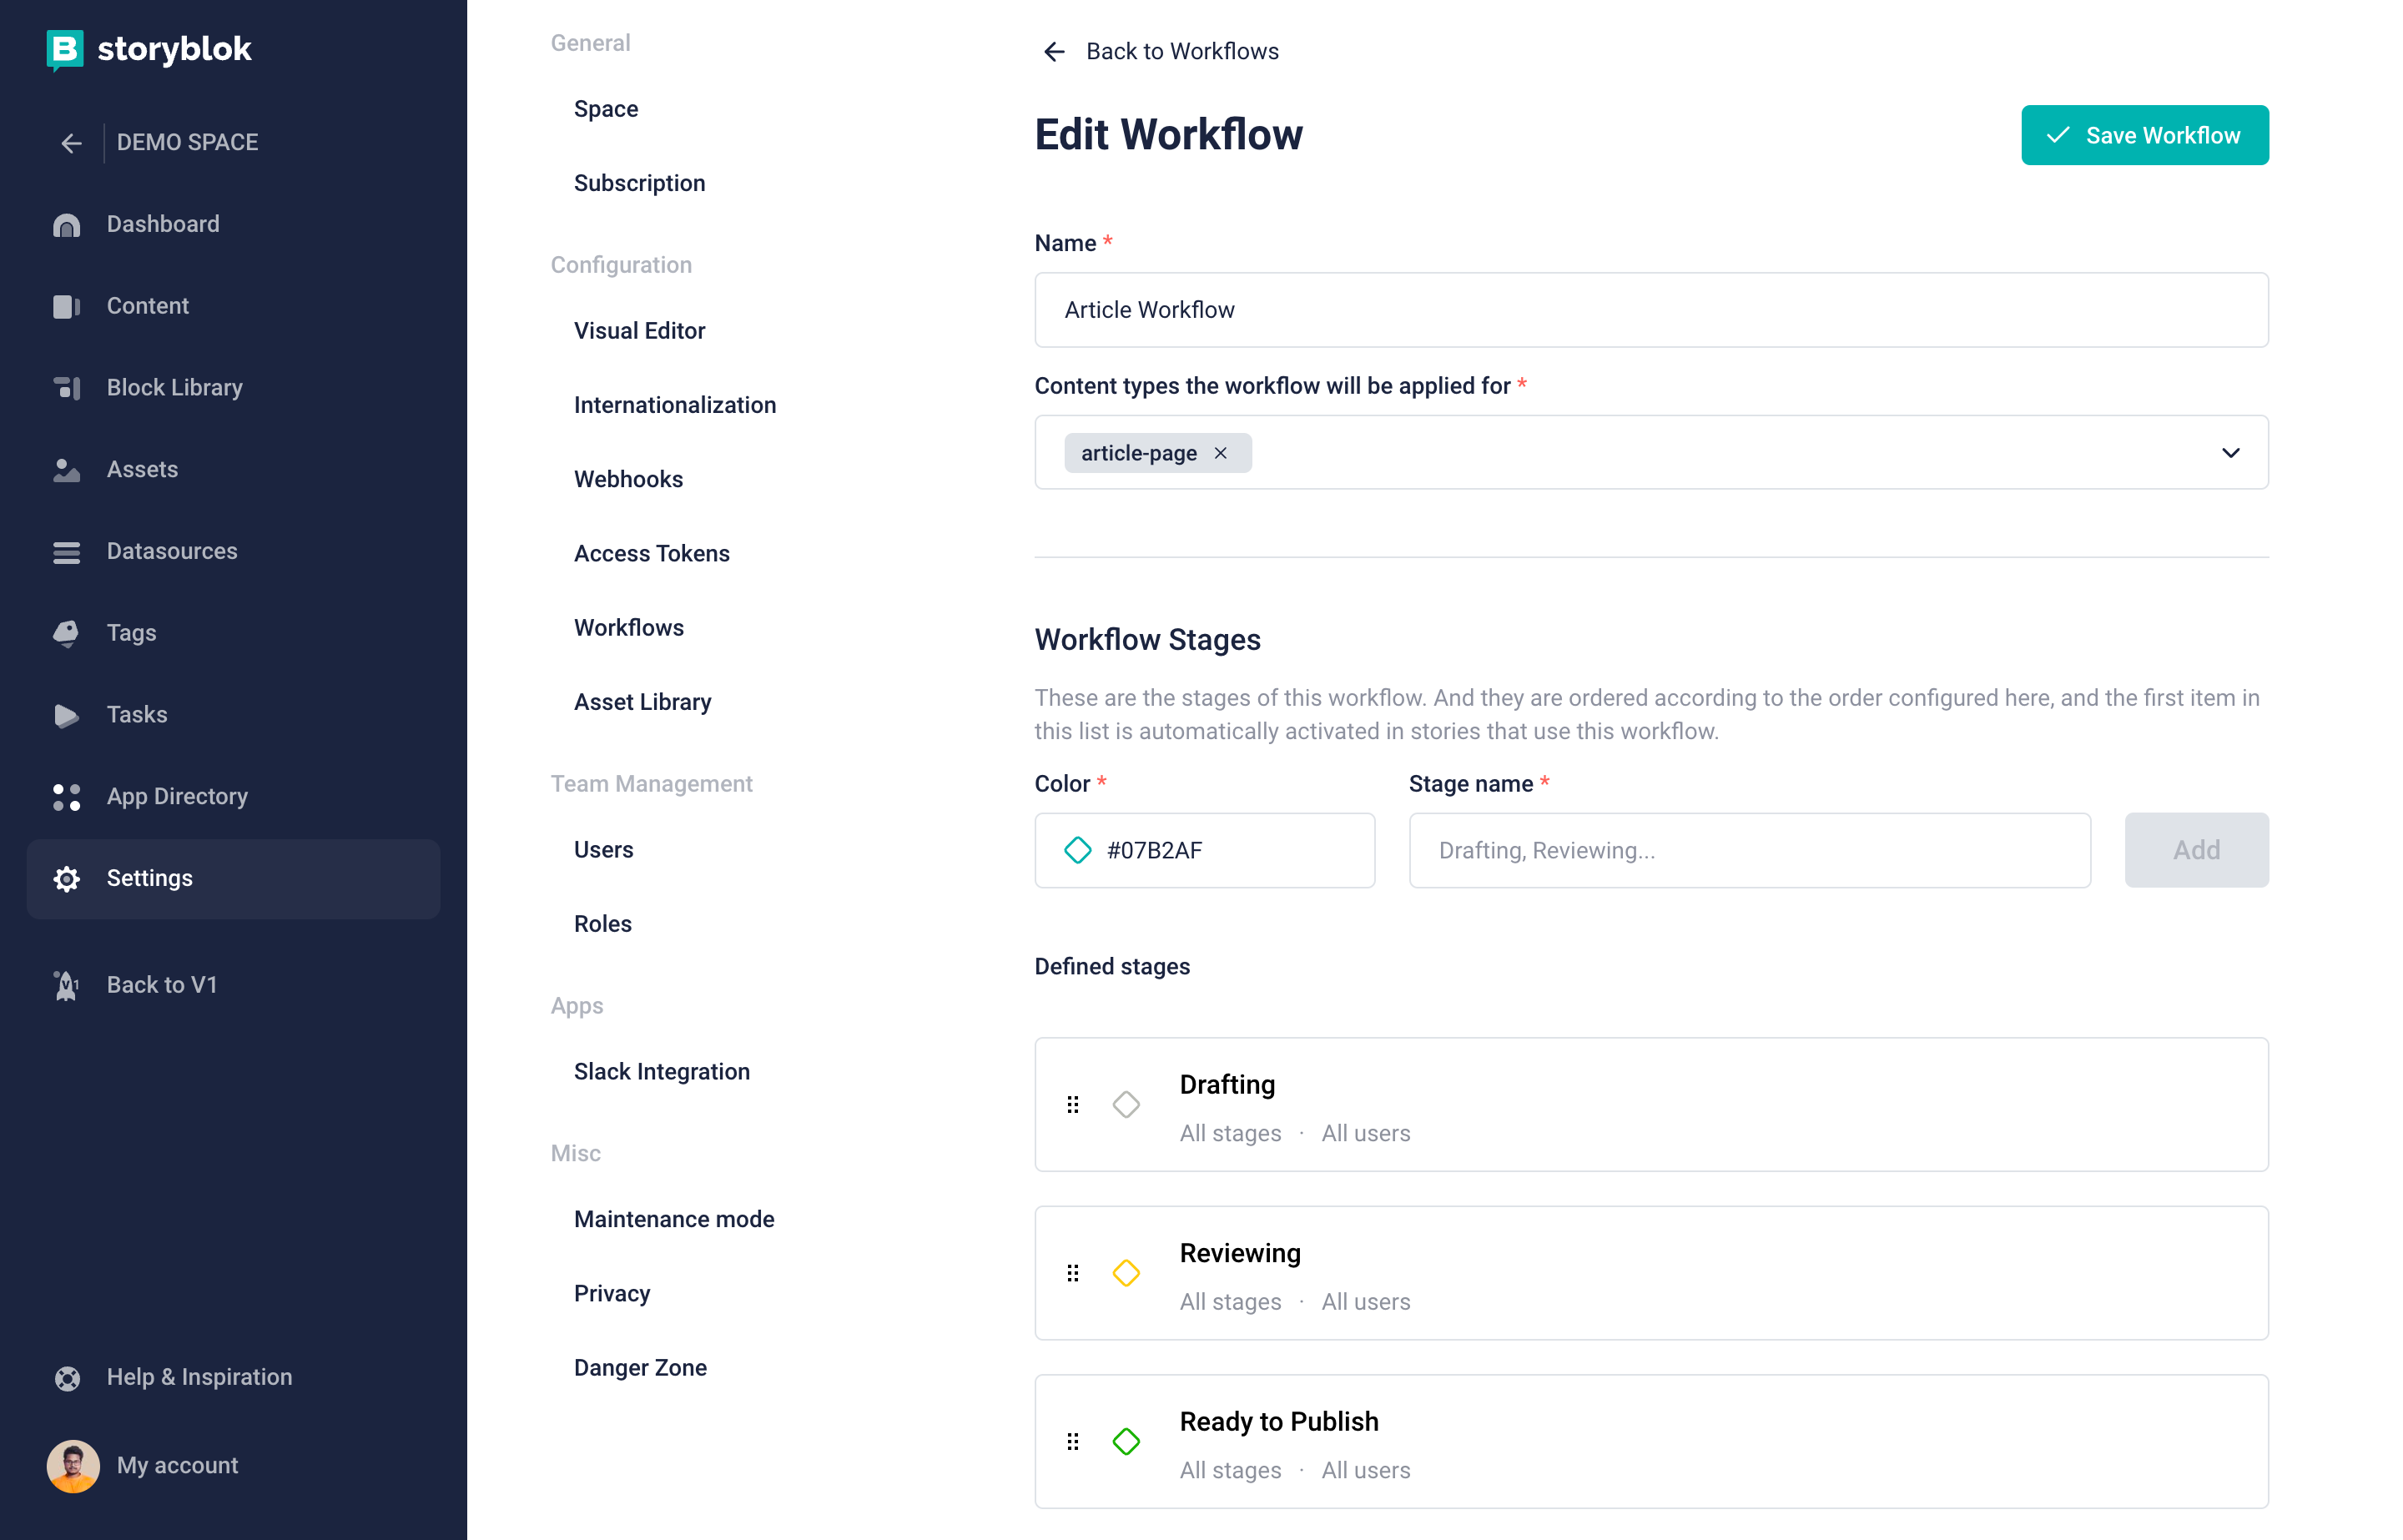
Configure a Workflow
Creating a stage for a Custom Workflow
You can create a new stage by first going to Settings {1} inside a Space, and then opening the Workflow tabs {2}.
After assigning a name and a color, you can create your new stage using the Add button {3}.
Next, you can customize it by clicking on the Edit gear {4} on the right side.
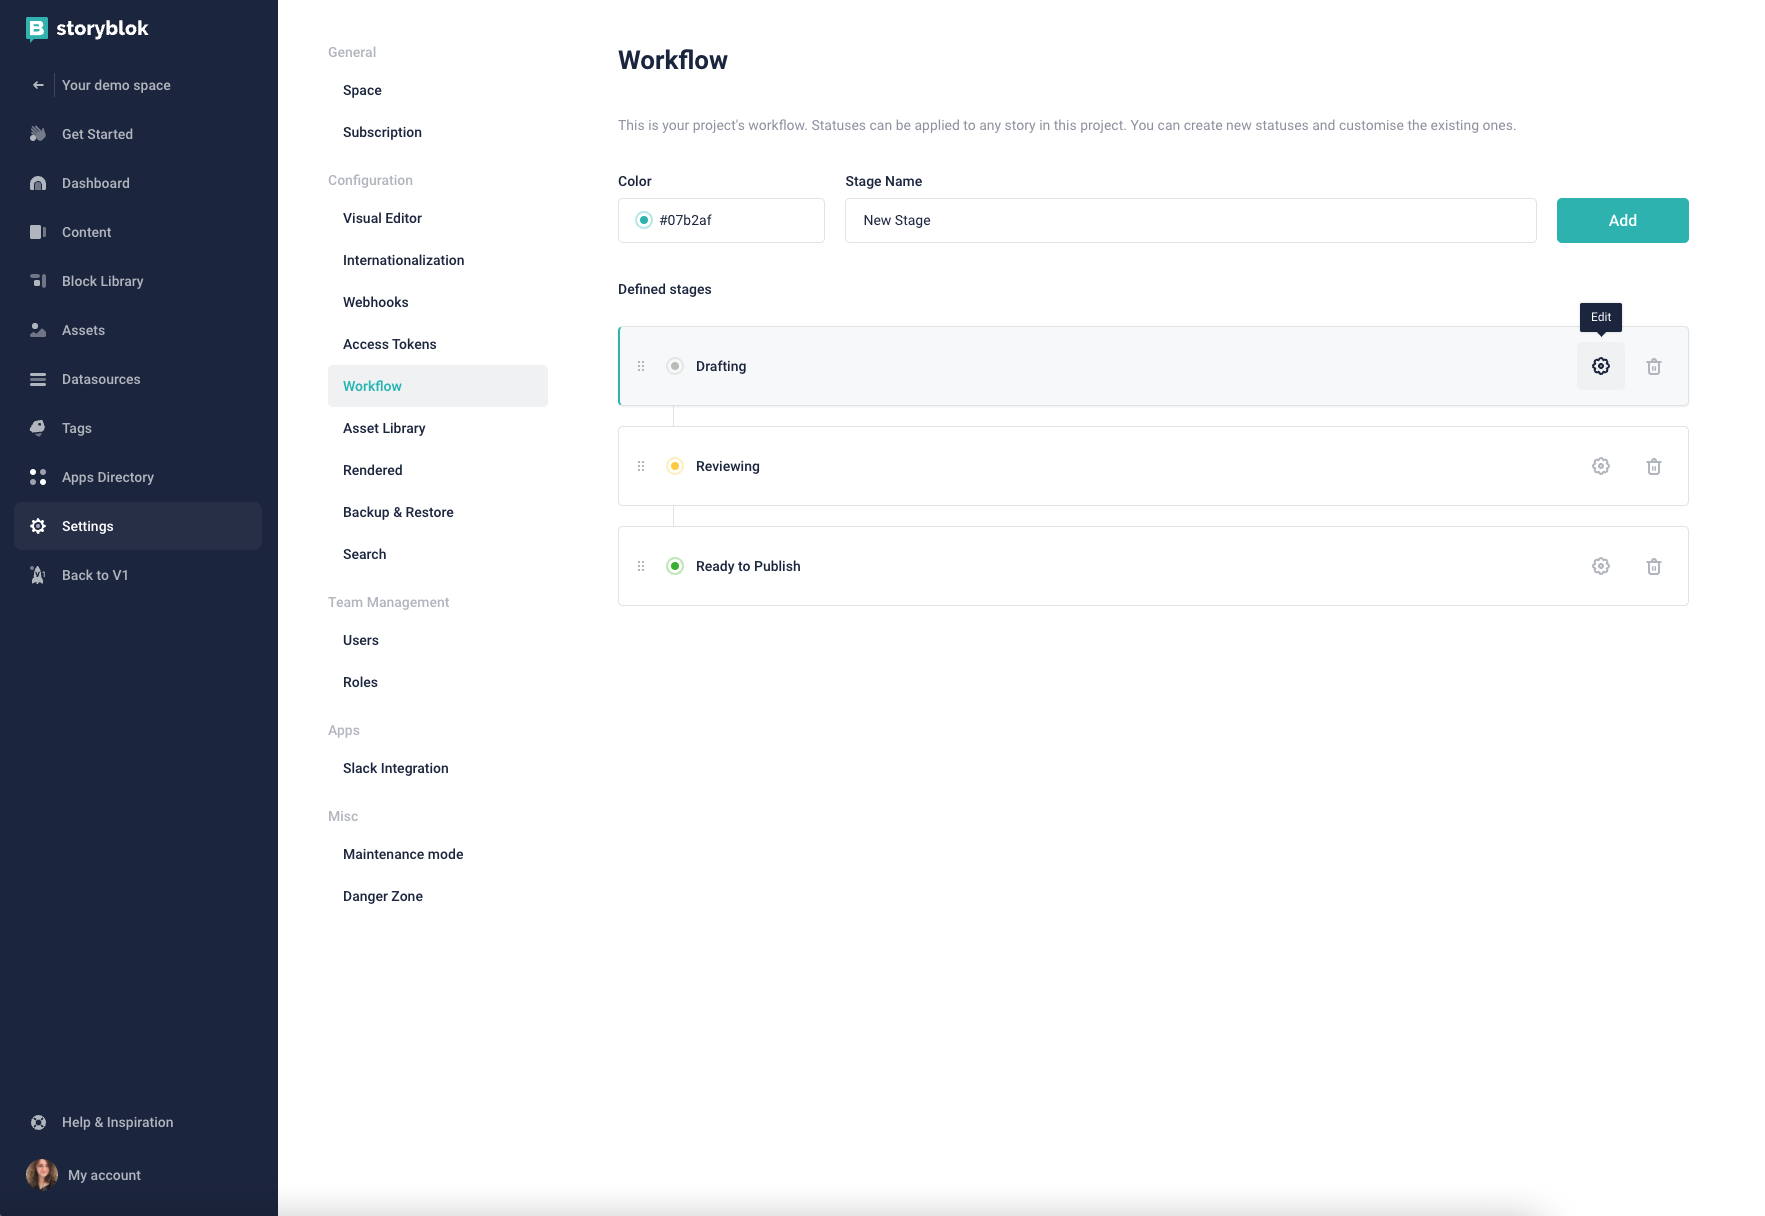
| Property | Description |
|---|---|
| Stage Name | A label used to identify the stage. |
| Color | A RGB code of the color representing the stage. |
| Define as default stage for new items | If active, all new Stories will be created within this stage. |
| Content Rights | If active, choose who has the right to publish and schedule content. |
| Next available stages | If active, you may specify the list of stages that are available as next stages, from the current stage. |
| User(s)/Role(s) who can change a stage to the next available stage | Specified list of users or roles, they are allowed to change the stage from the current stage to one of the next allowed stages. |
Workflows: Commenting, Approval
Storyblok offers two types of commenting: comments on Blocks and comments on Workflows.
Commenting on Blocks
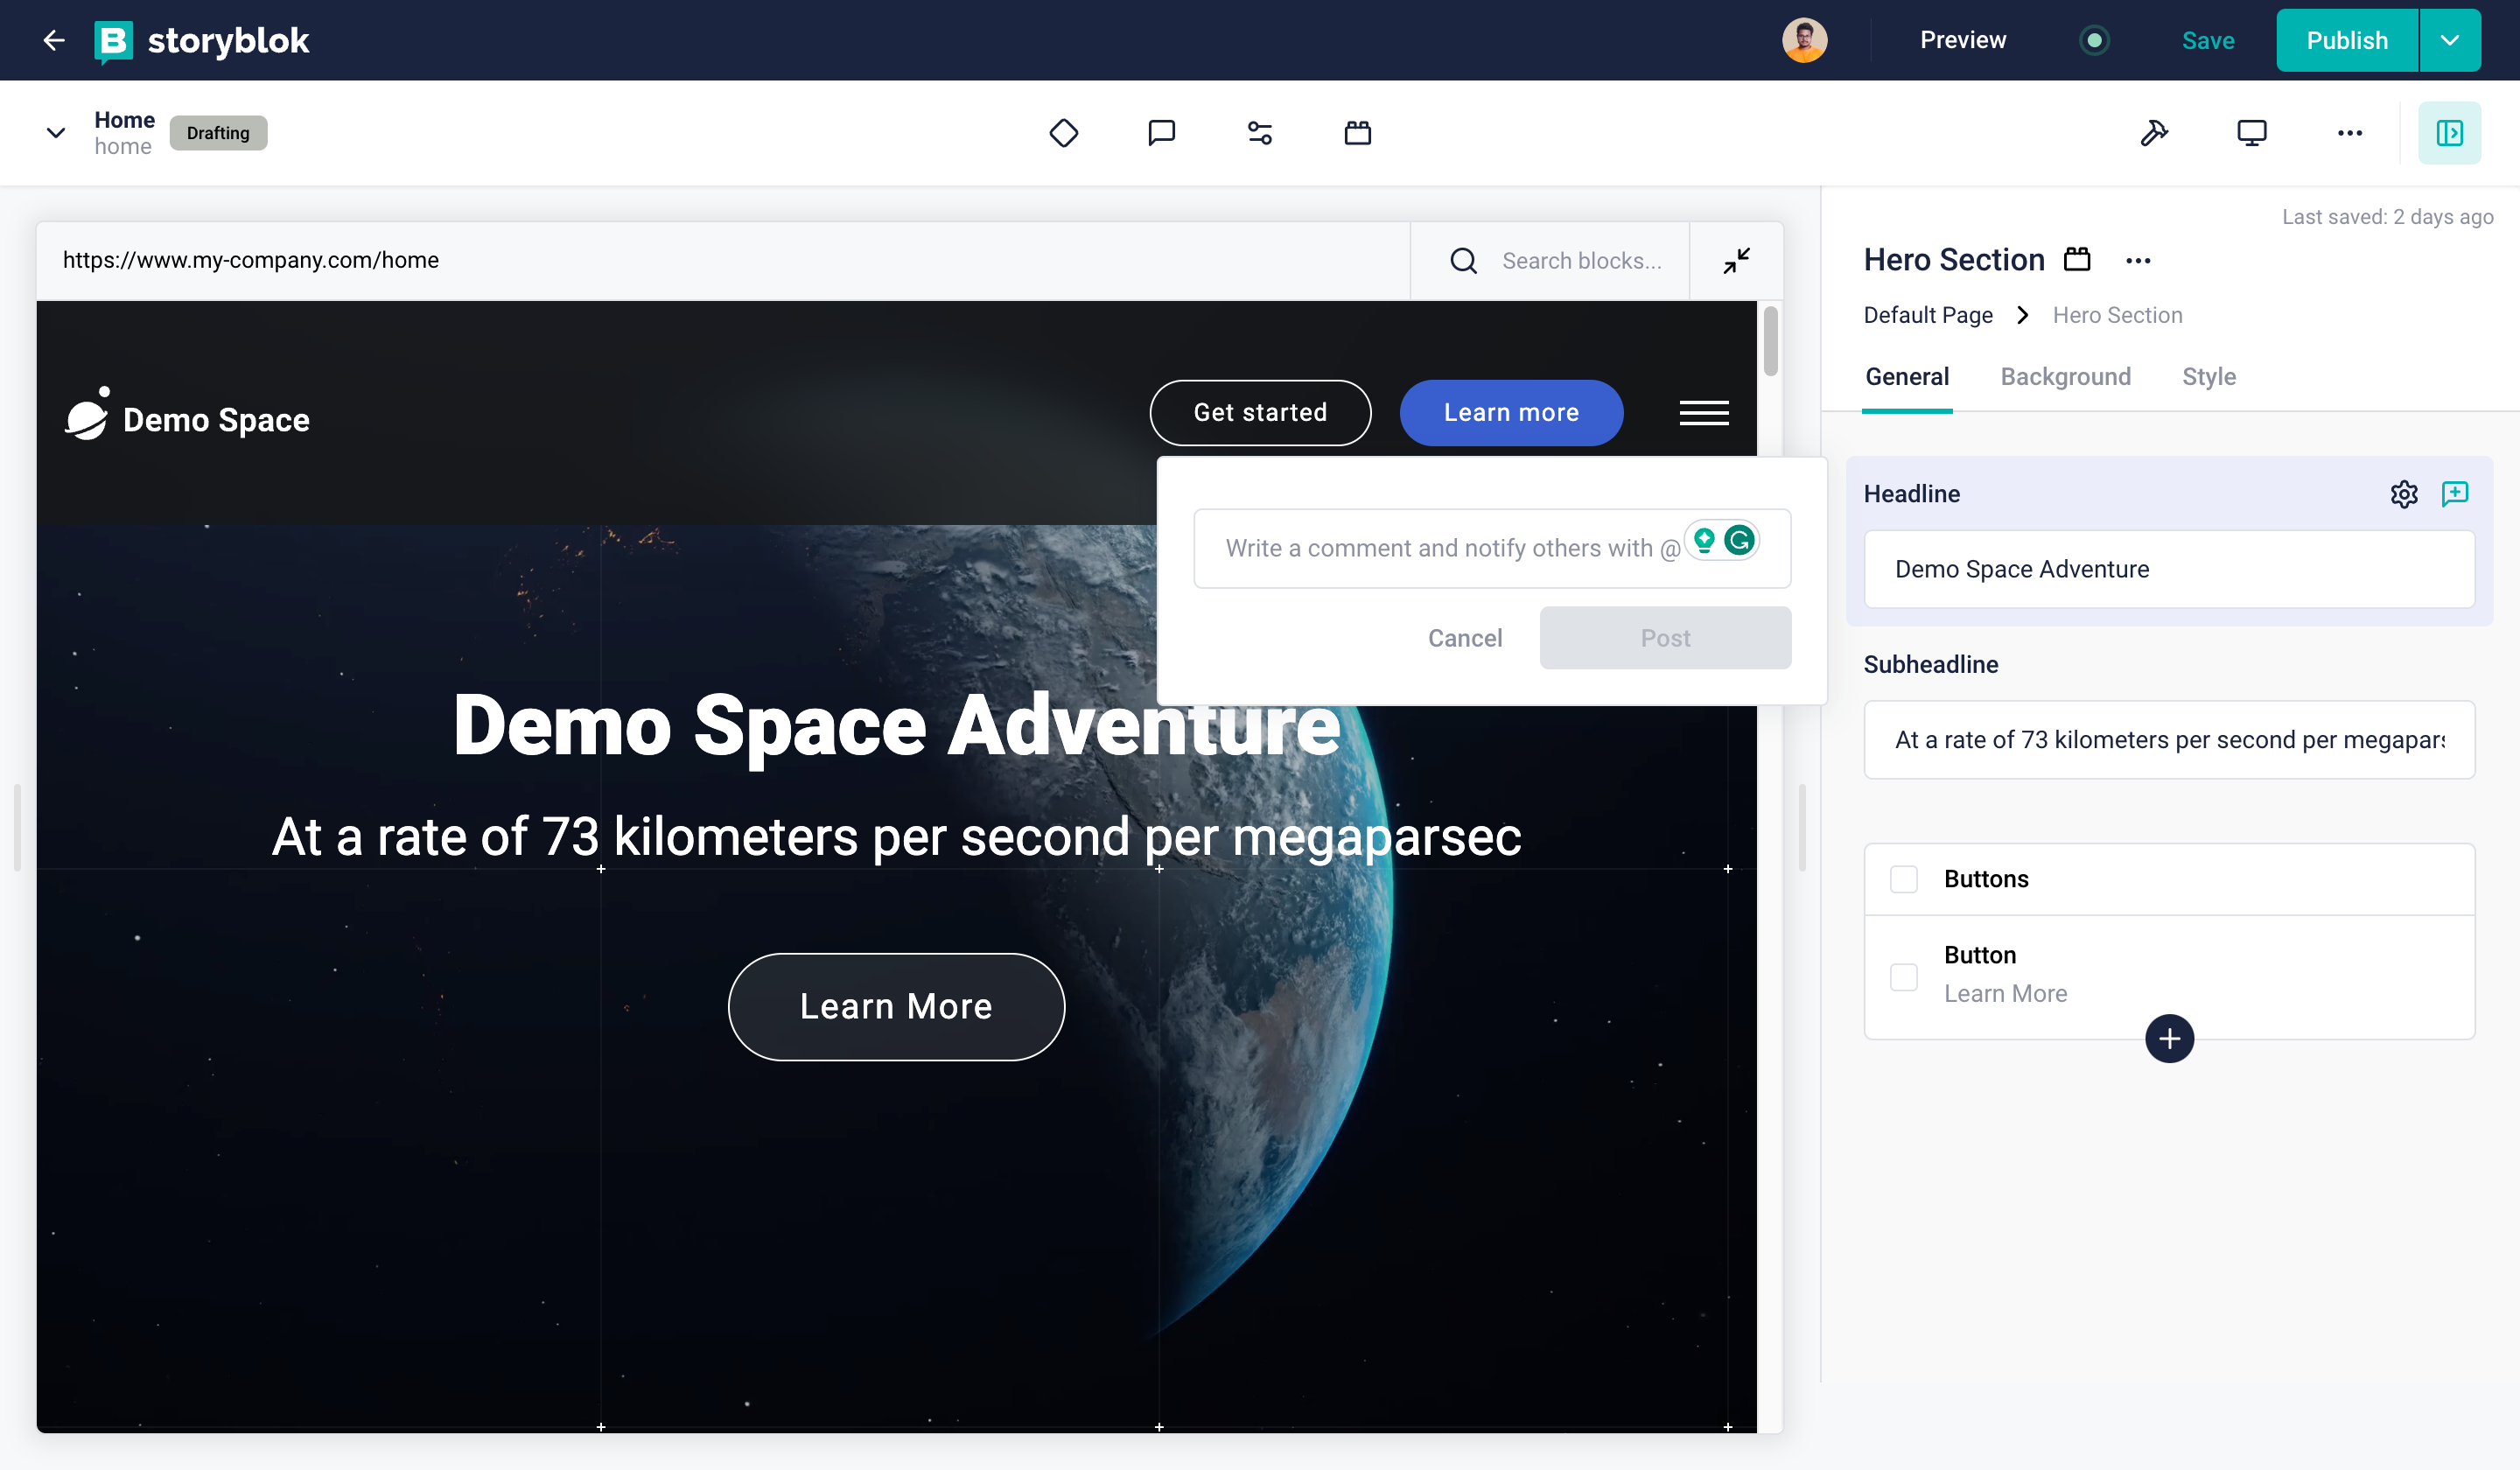
To comment on Blocks, you’ll use the Discussion function. Click on the Block you want to edit. Scroll over the section you want to comment on and select the Start a discussion button {1}. Then, write your comment in the box and click Post {2}.
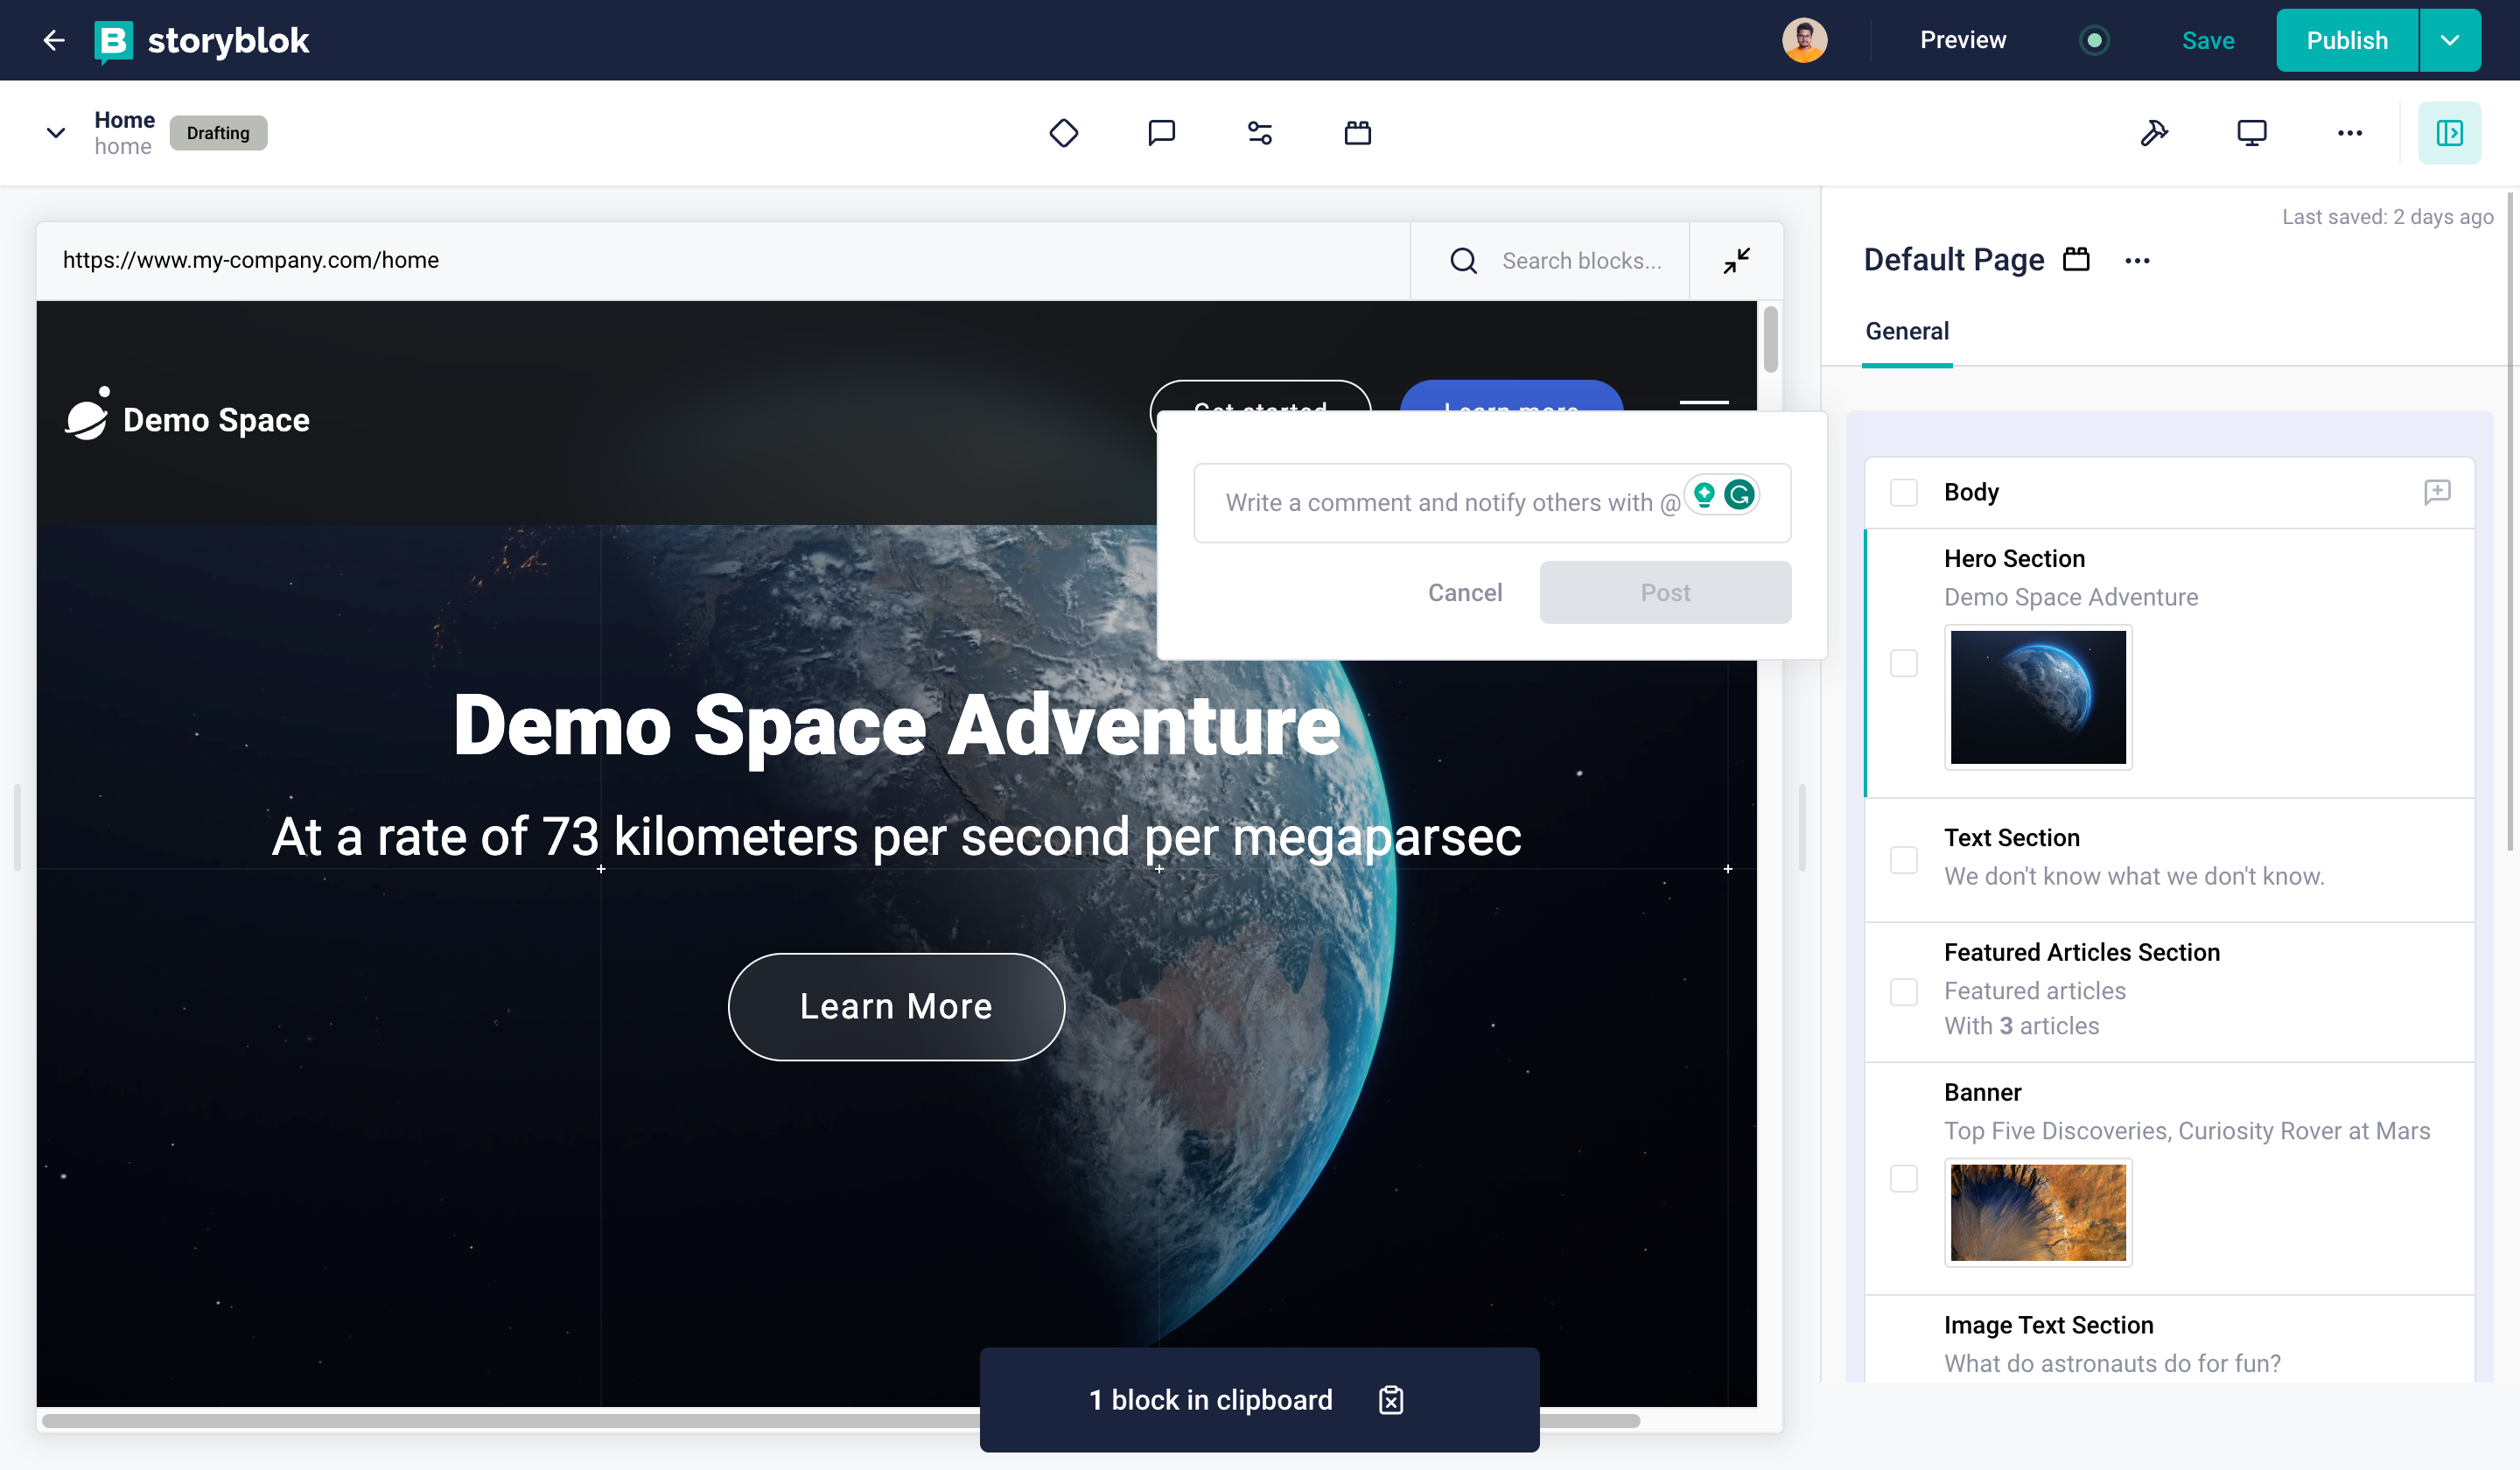
You can also comment on entire sections of Blocks. To do so, scroll over the section and click the Start a discussion button {1}. Then enter your comment and click Post {2}.
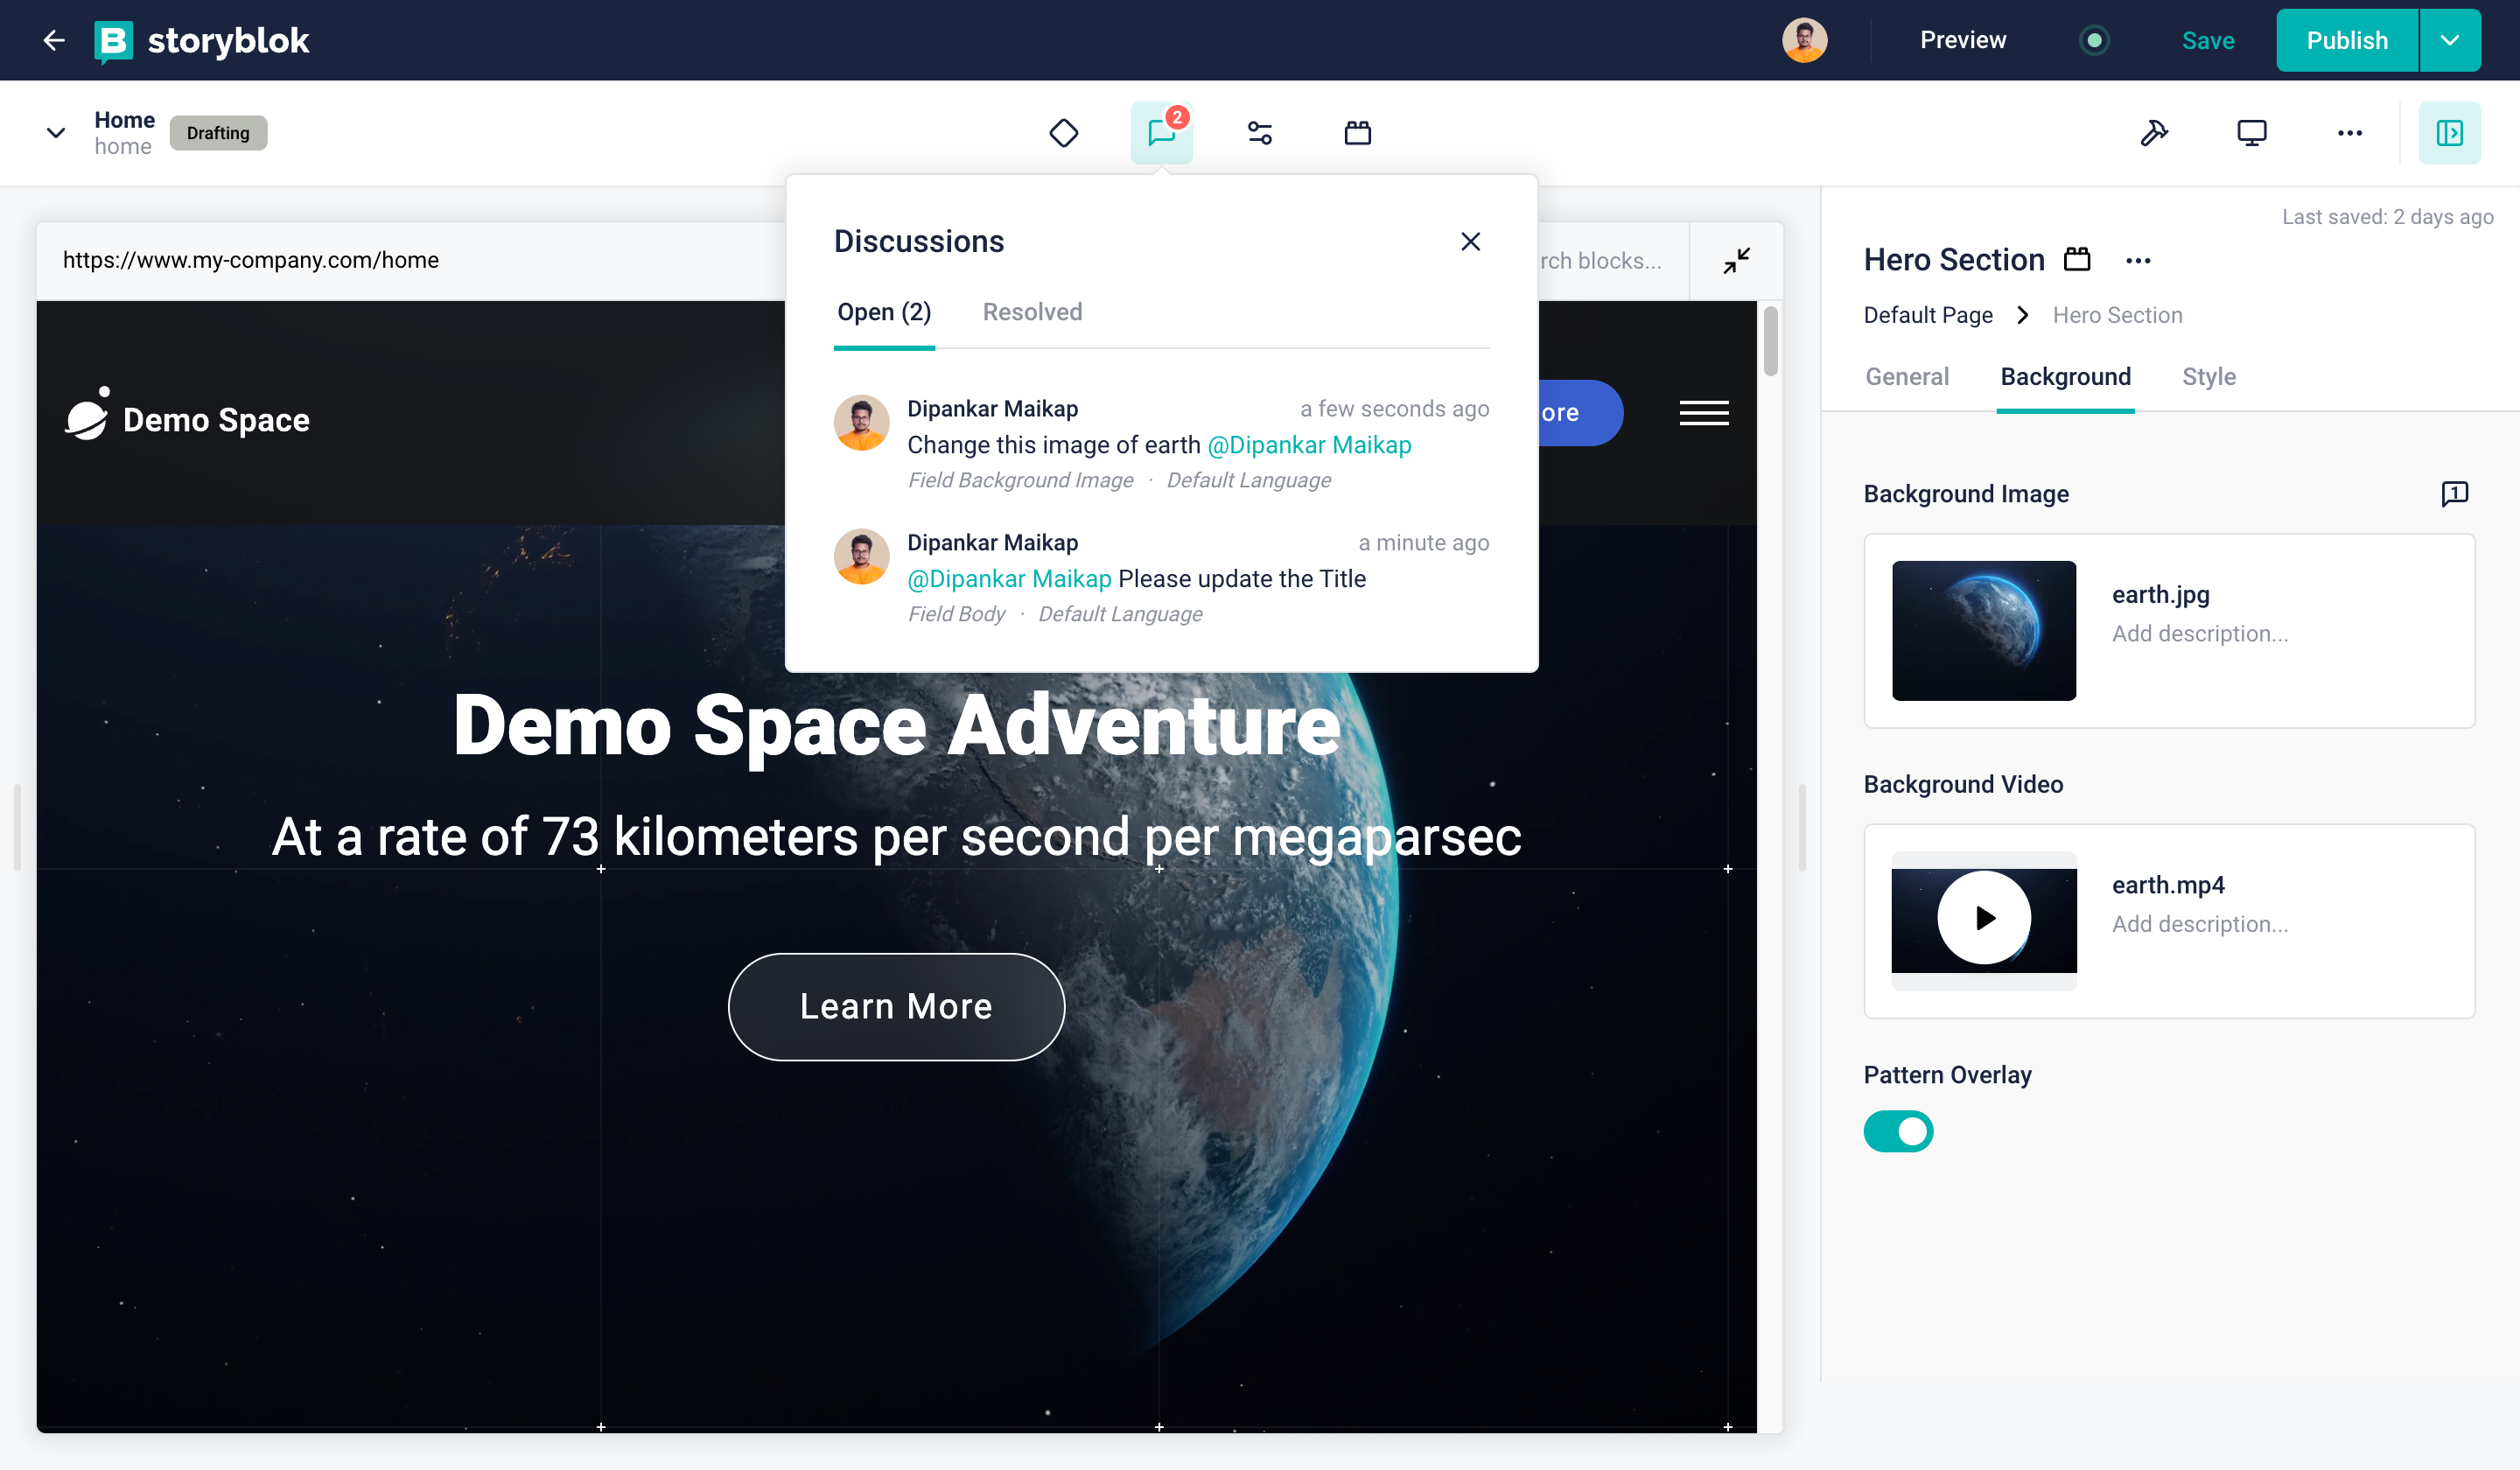
If you want to see all comments on your Blocks, select the Discussions tab at the top of the page {1}. From there you can click on comments to edit or resolve them. Switch between the Open {2} and Resolved {3} tabs up top to see each type.
Commenting on Workflows
You can also comment on entire Workflows. Enter the Story you want to edit. Click the Workflow stages button at the top of the page {1}. After you assign a Workflow stage, Click Add a custom comment {2} to leave your input. Then click Save.
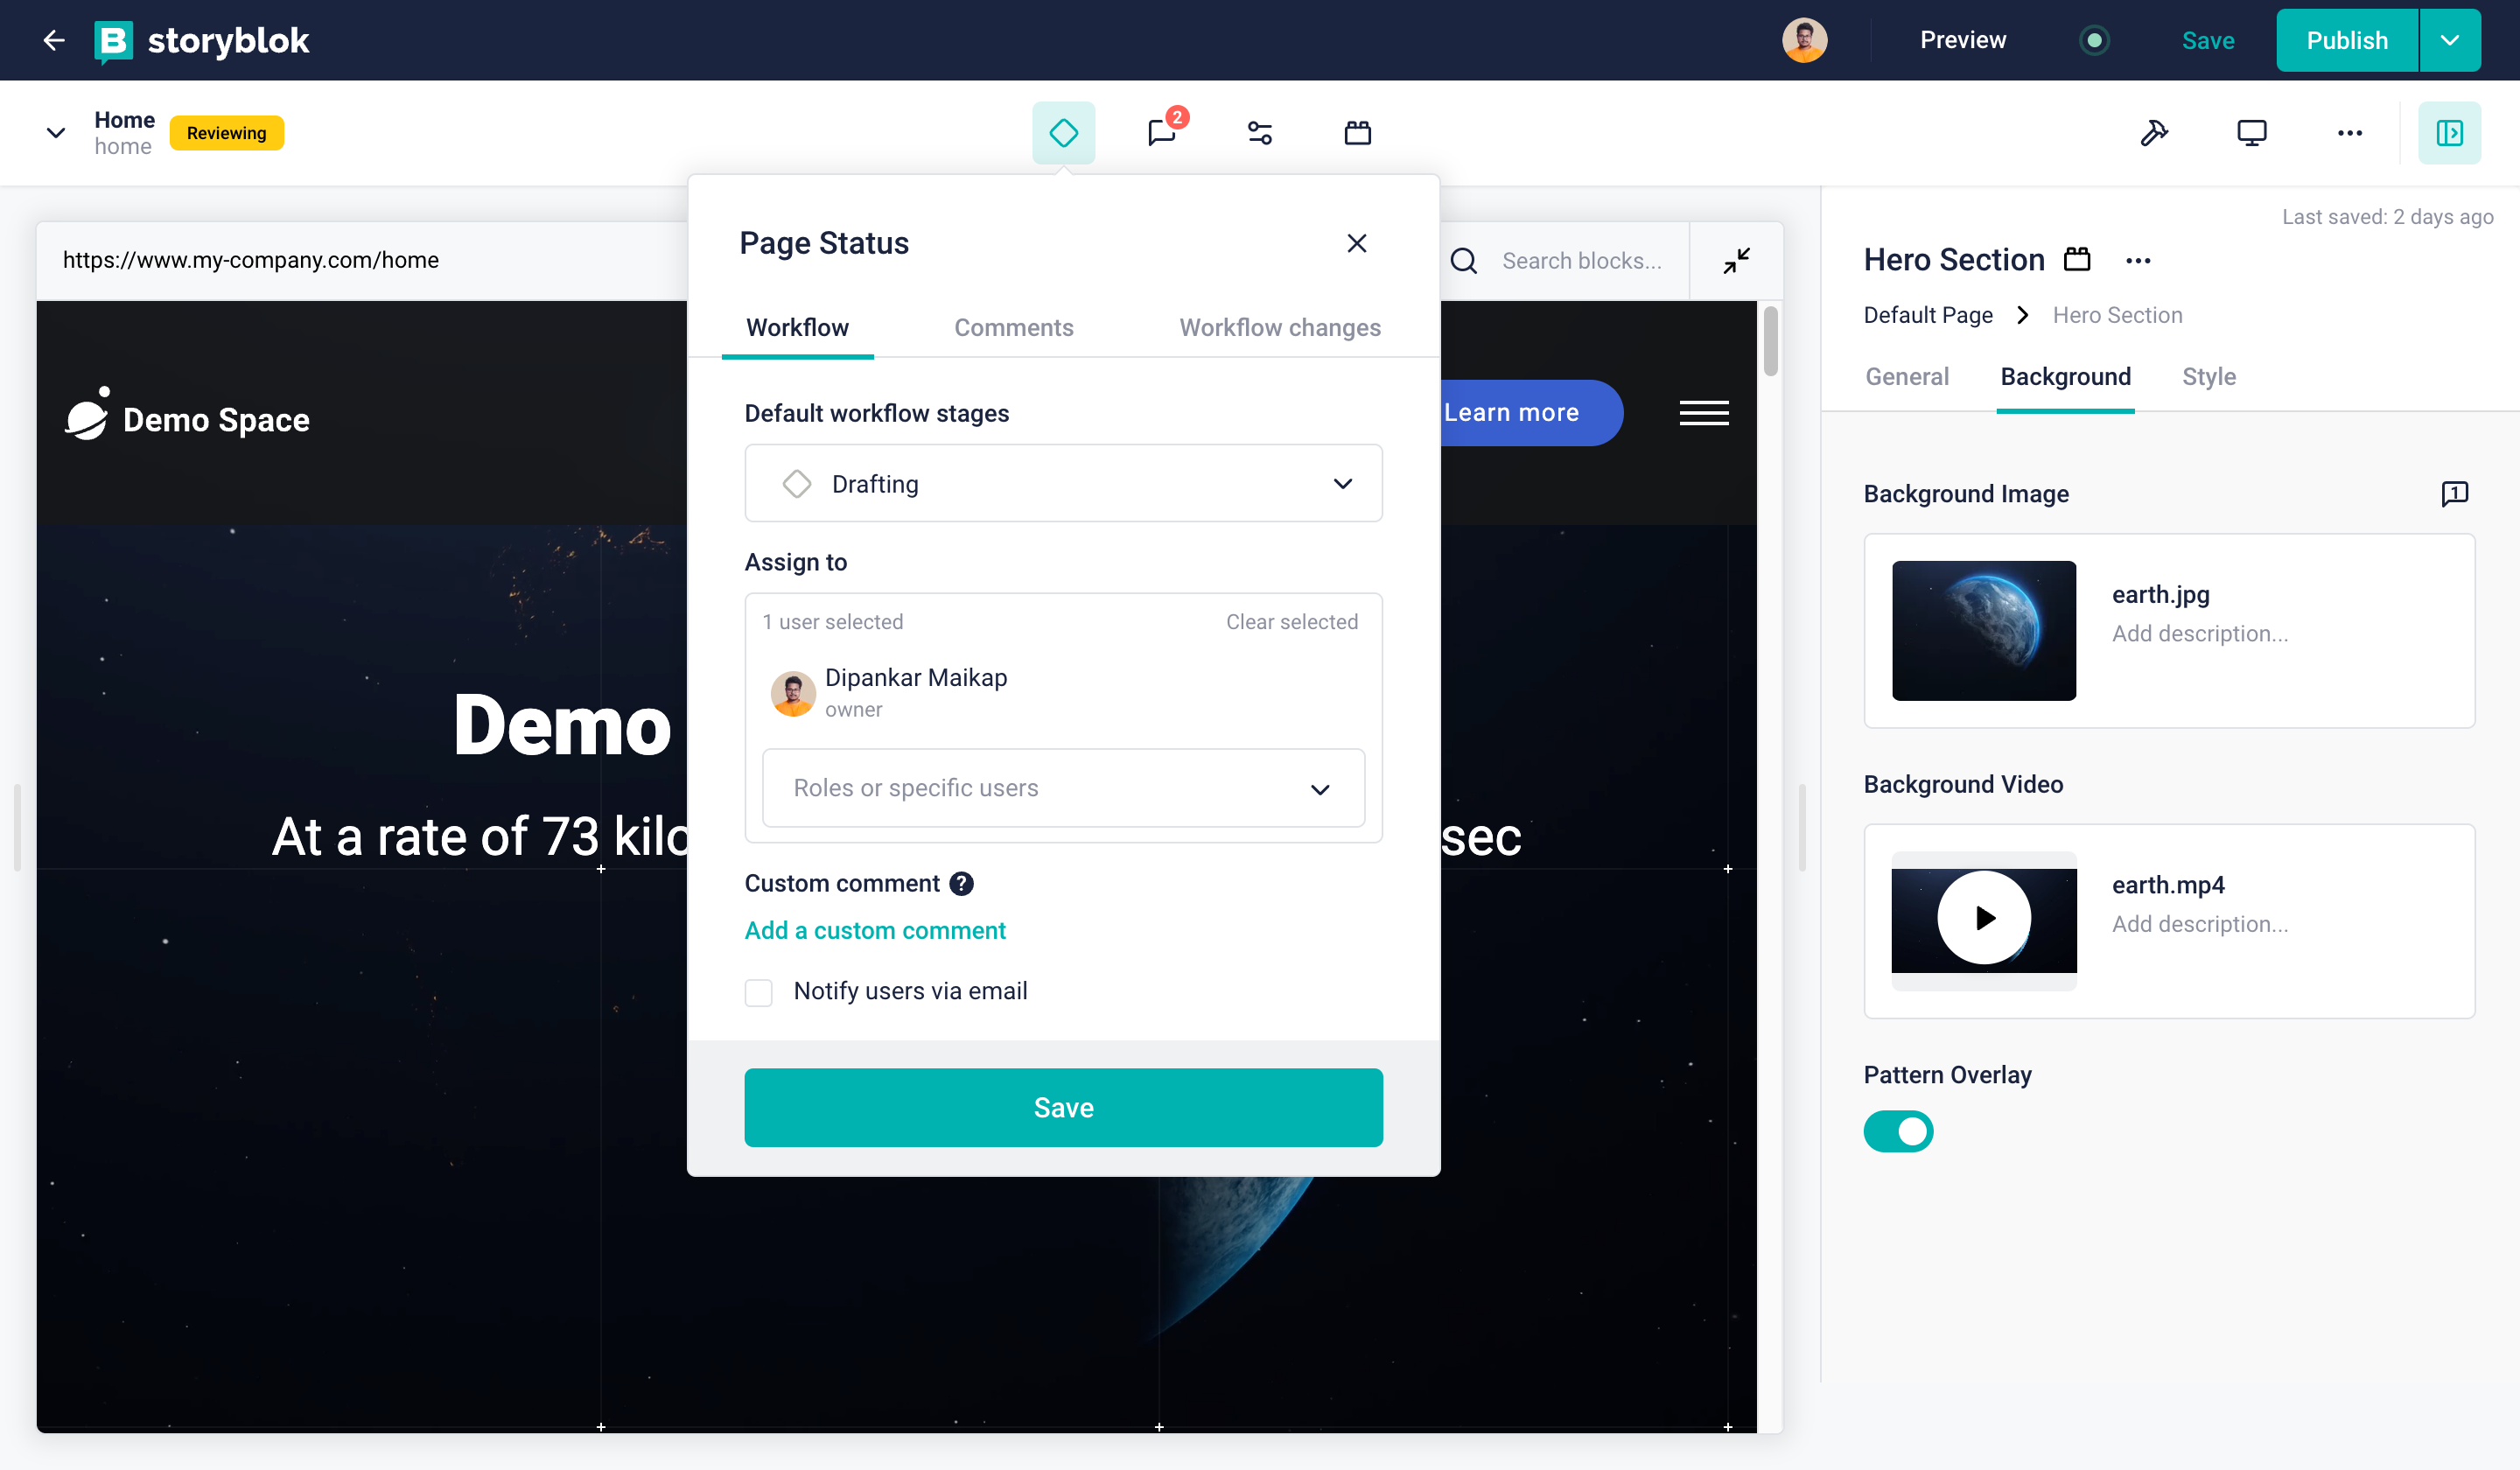
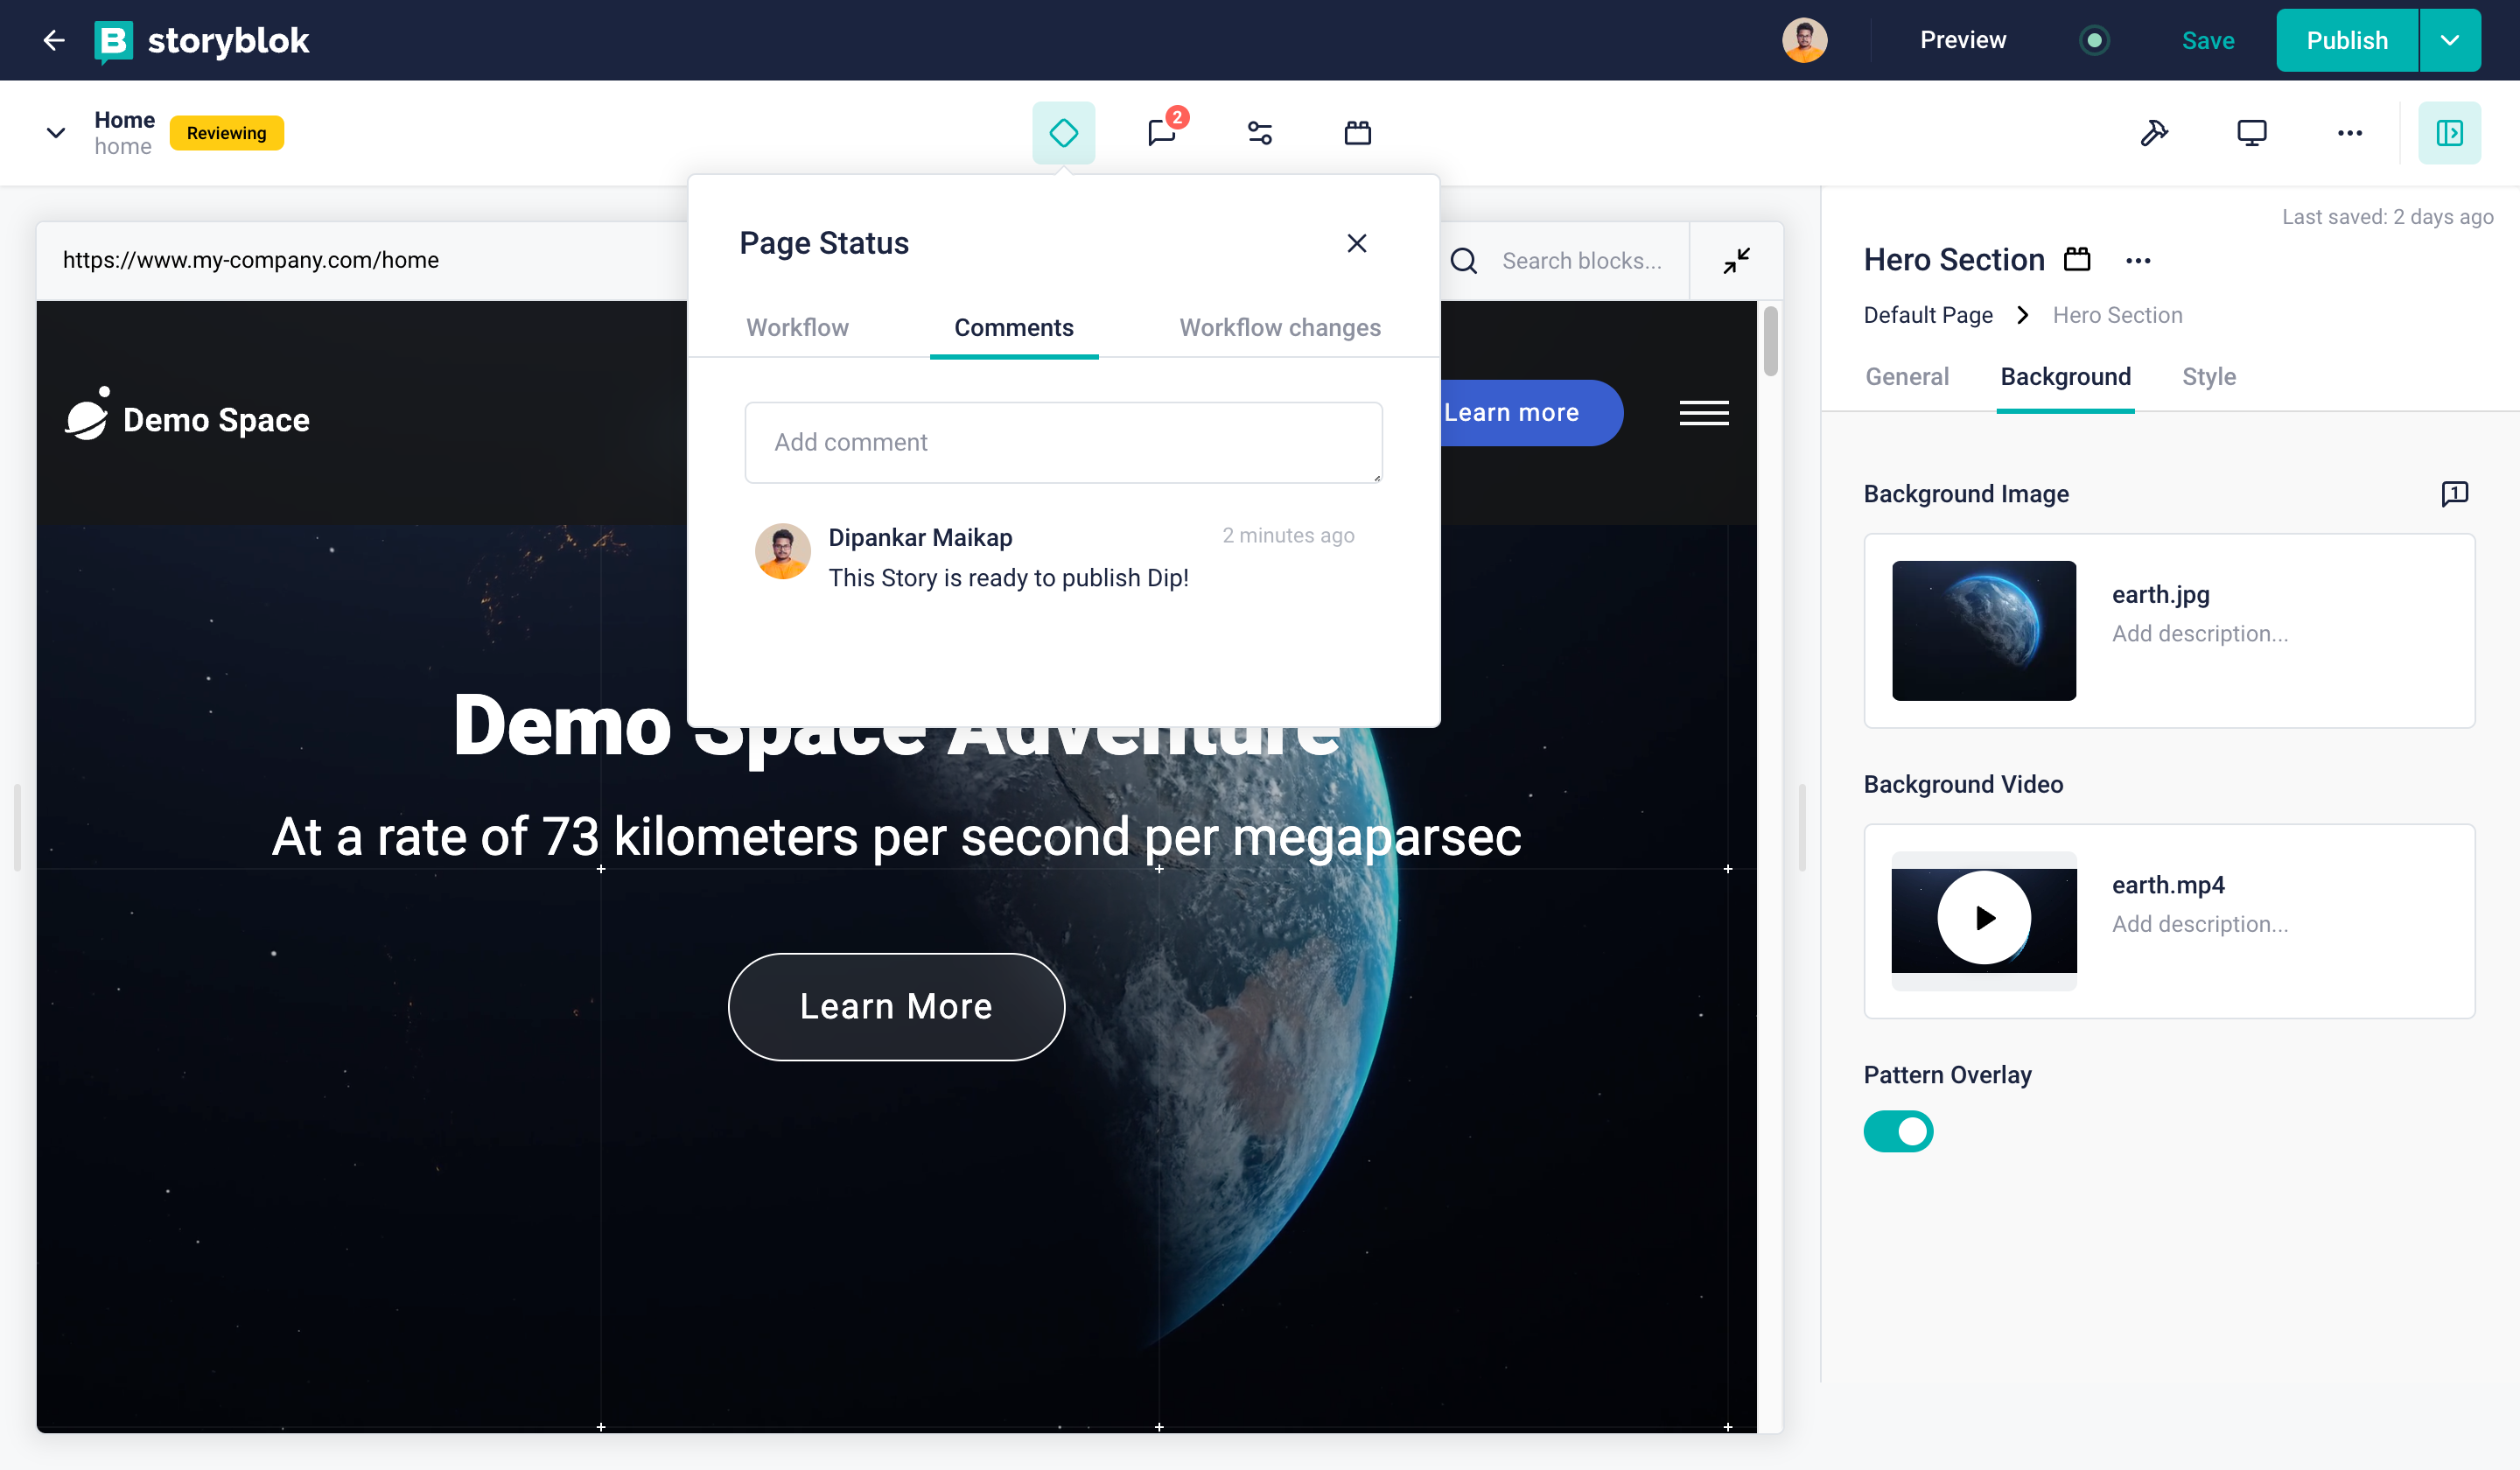
You’ll be able to see your comments under the Comments tab {1}. You can also add comments here by filling in the box {2}.
Approvals
As you are changing the stage of the Story you may assign a user or a role to approve the changes and move the Story into the next stage.
- Open Page Status tab{1}
- Select Roles or specific users{2}
- Notify users via email{3}
Storyblok will notify the user(s) assigned to the Story by email if you activate the checkbox{3}. Otherwise, the assigned user(s) will find the notification in the Assigned to me section of the Dashboard only.

You can assign multiple users/roles in the approval process.
