Create and Render Blog Articles in Storyblok and SvelteKit
Storyblok is the first headless CMS that works for developers & marketers alike.
In this tutorial, we will see how to add and render blog articles to our SvelteKit website. We will also add an ArticleCard component to show all the articles on the blog article overview page, along with popular articles in the home story. While building this, we will also take a look at what the resolve_relations parameter of the Content Delivery API is, and how we can resolve relations in Storyblok.
If you’re in a hurry, you can explore or fork the code from the SvelteKit Ultimate Tutorial GitHub Repository.
Requirements
This is part of the Ultimate Tutorial Guide for SvelteKit. You can find the previous part of the series here. It shows how to create custom components in Storyblok and SvelteKit. We recommend going through these tutorials in ascending order for maximum benefit.
We will be using the code from the previous tutorial here as a starting point. You can find it here.
Adding a Blog folder
Let's create a Blog folder, which will be used to store all the articles and an overview of all of them.
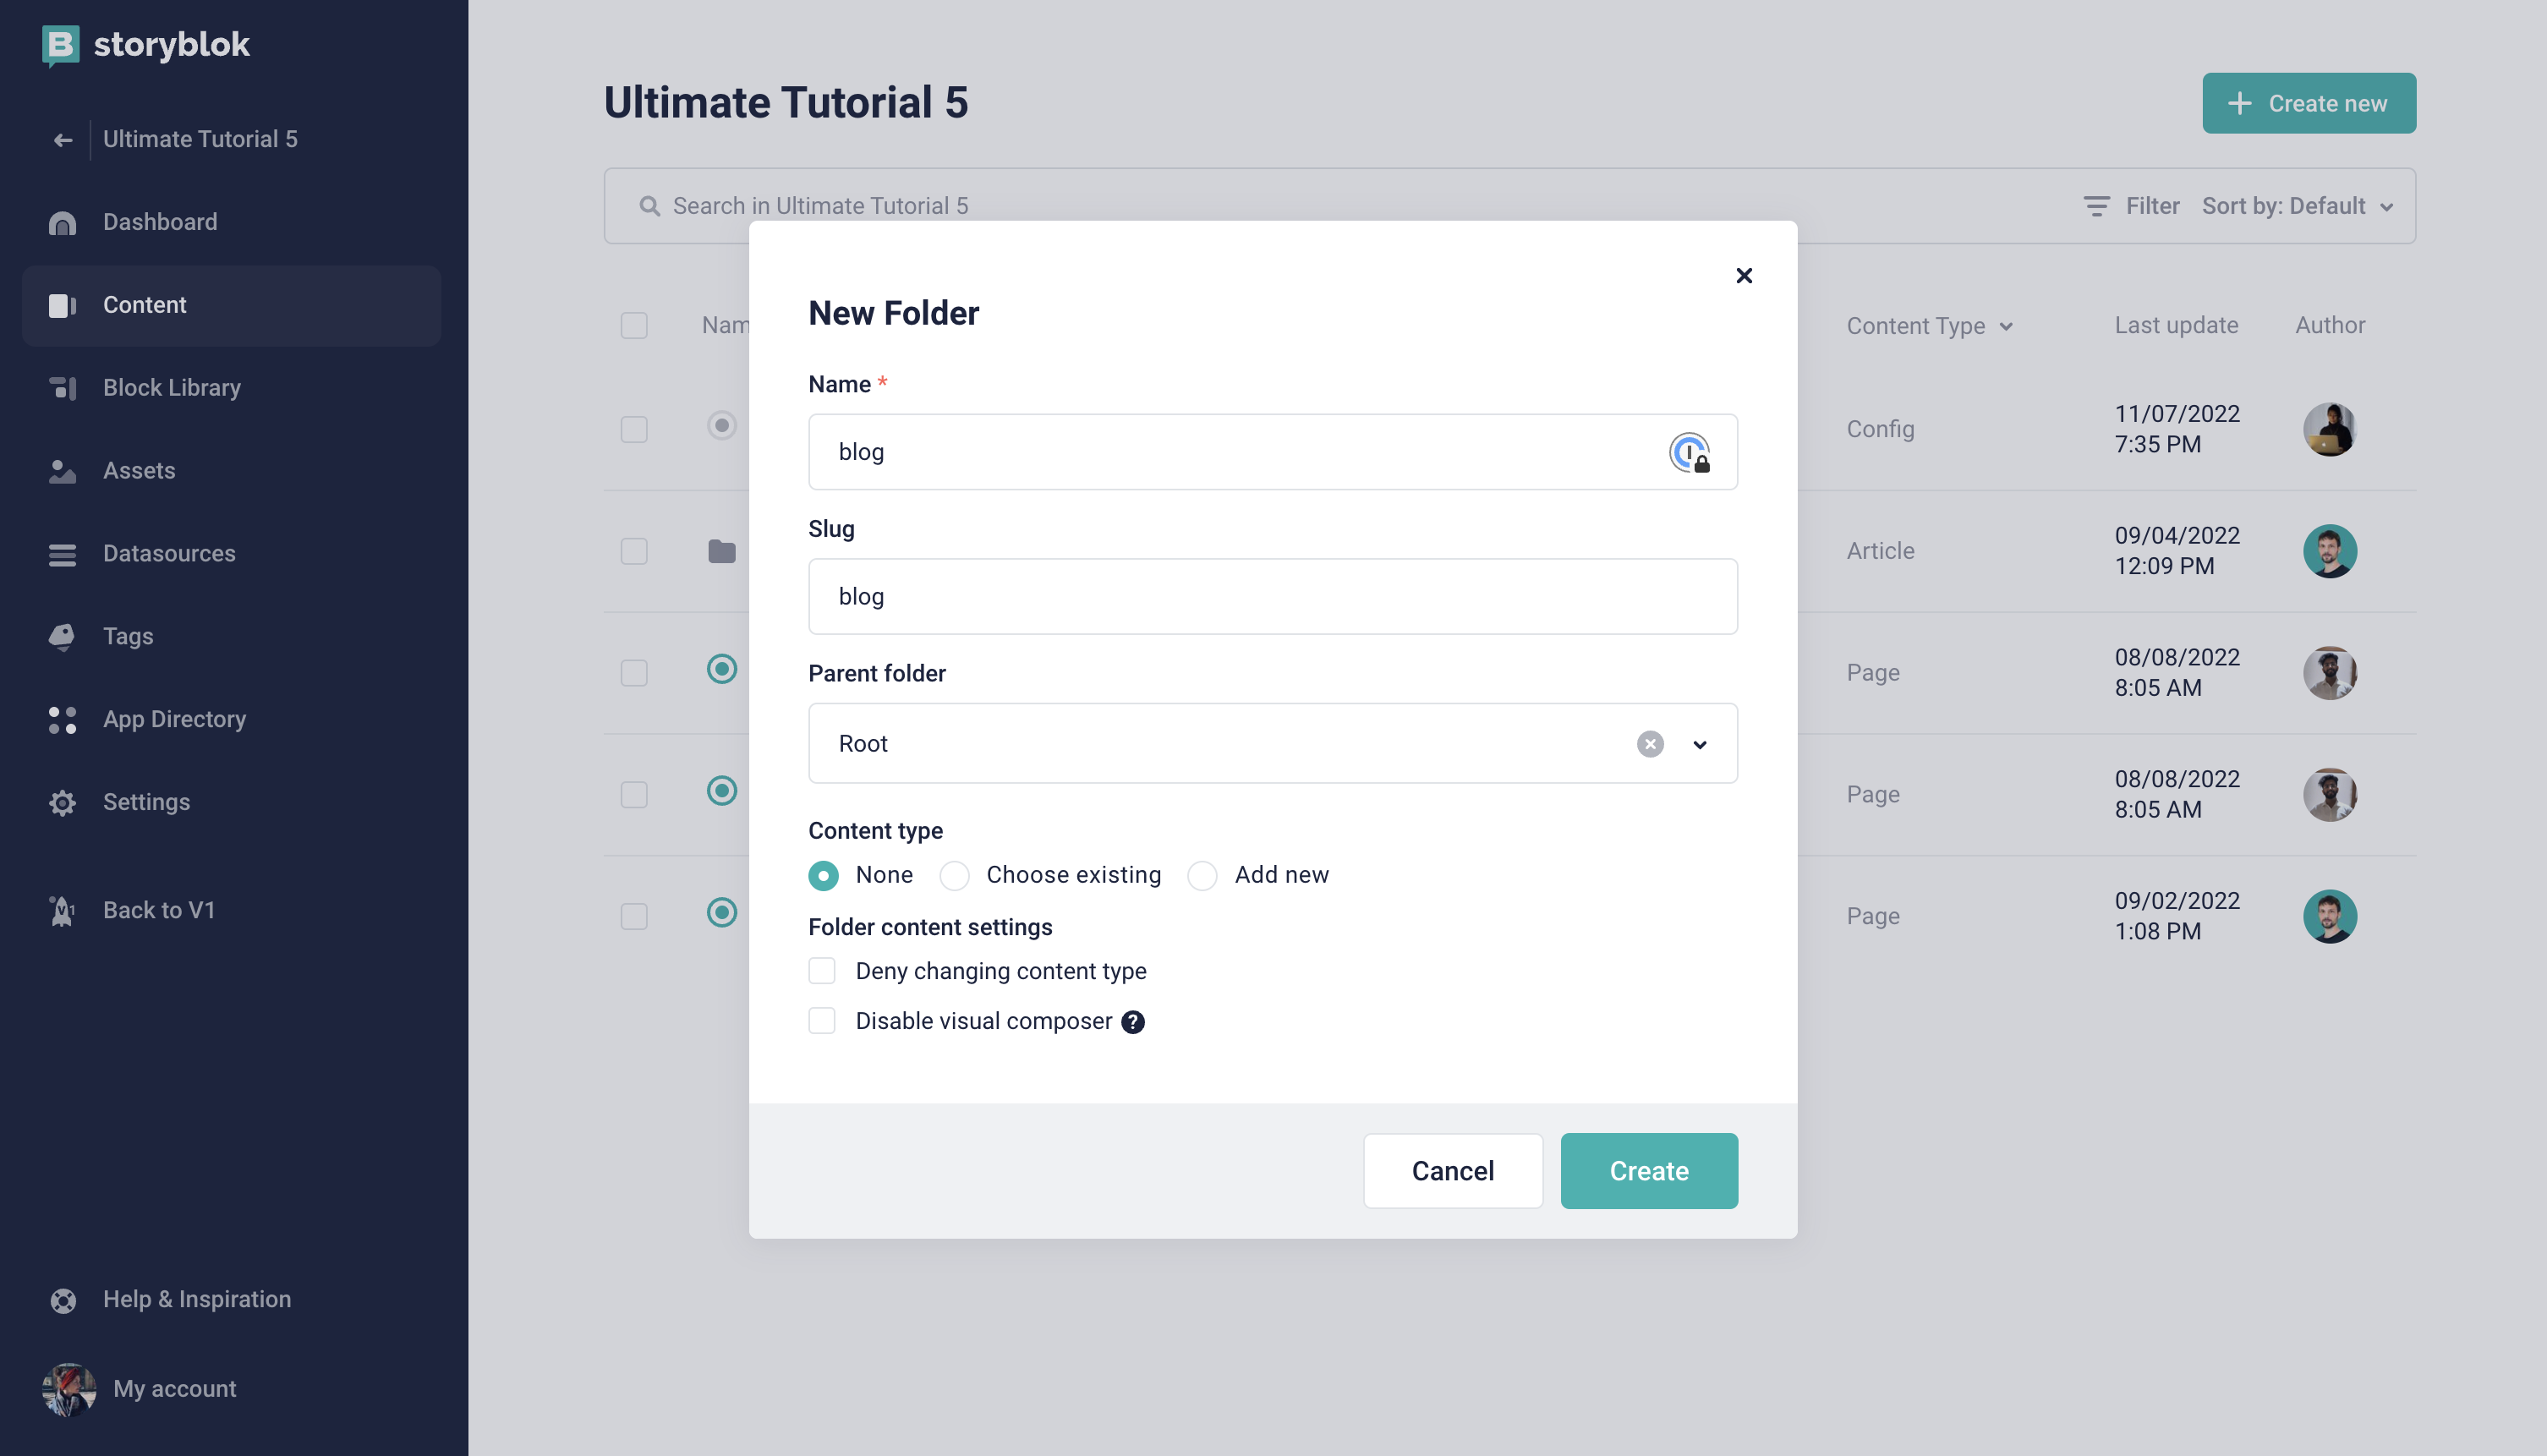
Adding Blog Folder
We already have a Blog page, let's move it inside the newly created folder and change the name to Home. This will be our overview page for blog articles, and we will display teaser cards for all the blog articles. Let's change the body and remove the Teaser component which is already there.
In the Content section, you will see a checkbox along with all the stories. You can click on the checkbox for Blog story and you will see the option to move it just below the search bar. Click on move, open the Blog Article folder and move it there.
As this is the home story for the folder, let's go to the Entry configuration {1} and check the box that says Define as root for the folder. This will automatically change the slug to / and you will also see a home icon in the blog articles folder on the Home story.
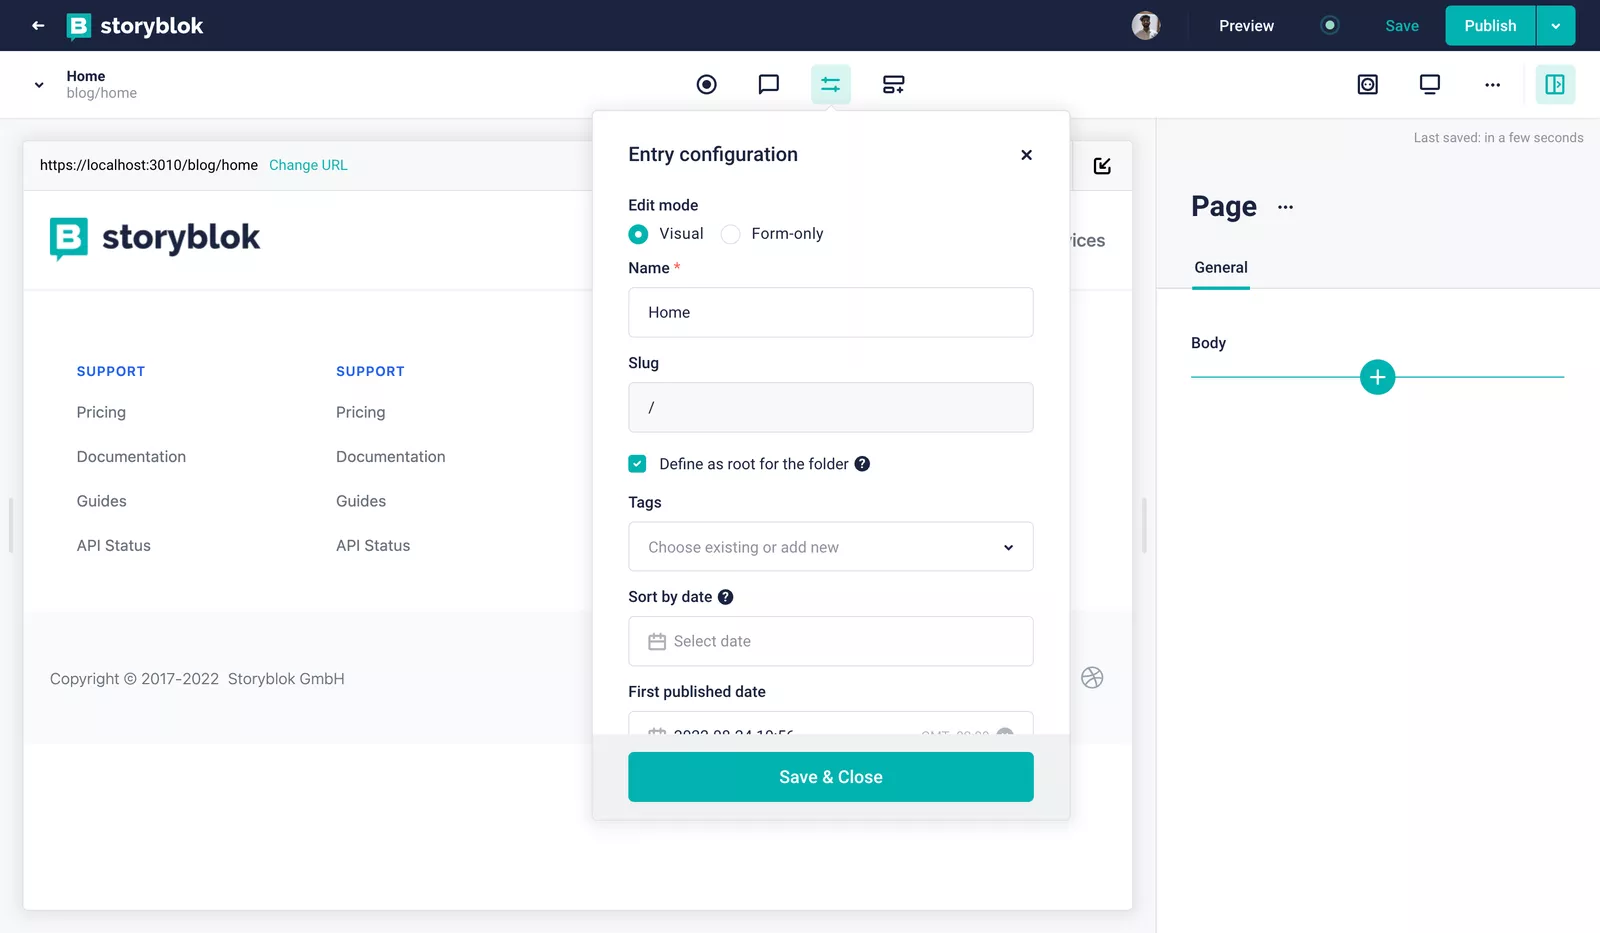
We will come back to this story for adding all the blog teasers, let's add individual blogs first.
Adding Blog Articles
Let's now add a block named Article which will be a Content type block. We will use it for Blog Articles. It should have to following fields :
1. title of type text.
2. subtitle of type text.
3. content of type Richtext.
4. image of type asset (image) : similar to the way we added in the previous tutorial (opens in a new window).
5.teaser of type textarea.
We now need to add the same in our frontend as well. Create a new file named Article.svelte in the components folder and add the following code to it.
<script>
    import { storyblokEditable, renderRichText } from '@storyblok/svelte';
    export let blok;
    $: resolvedRichText = renderRichText(blok.content);
</script>
<div use:storyblokEditable={blok}>
    <img
        src="{blok.image.filename}/m/1600x0"
        alt={blok.image.alt}
        class="w-full h-[360px] lg:h-[450px] object-cover"
    />
    <div class="container mx-auto mb-12">
        <h1 class="text-6xl text-[#50b0ae] font-bold mt-12 mb-4">{blok.title}</h1>
        <h2 class="text-2xl text-[#1d243d] font-bold mb-4">
            {blok.subtitle}
        </h2>
        <div class="prose">{@html resolvedRichText}</div>
    </div>
</div>You will also need to add this component to the components list in +layout.js
Now, let's create a few blog articles with this inside the blog folder. While creating a blog story, make sure to select the content type as Article {1}.
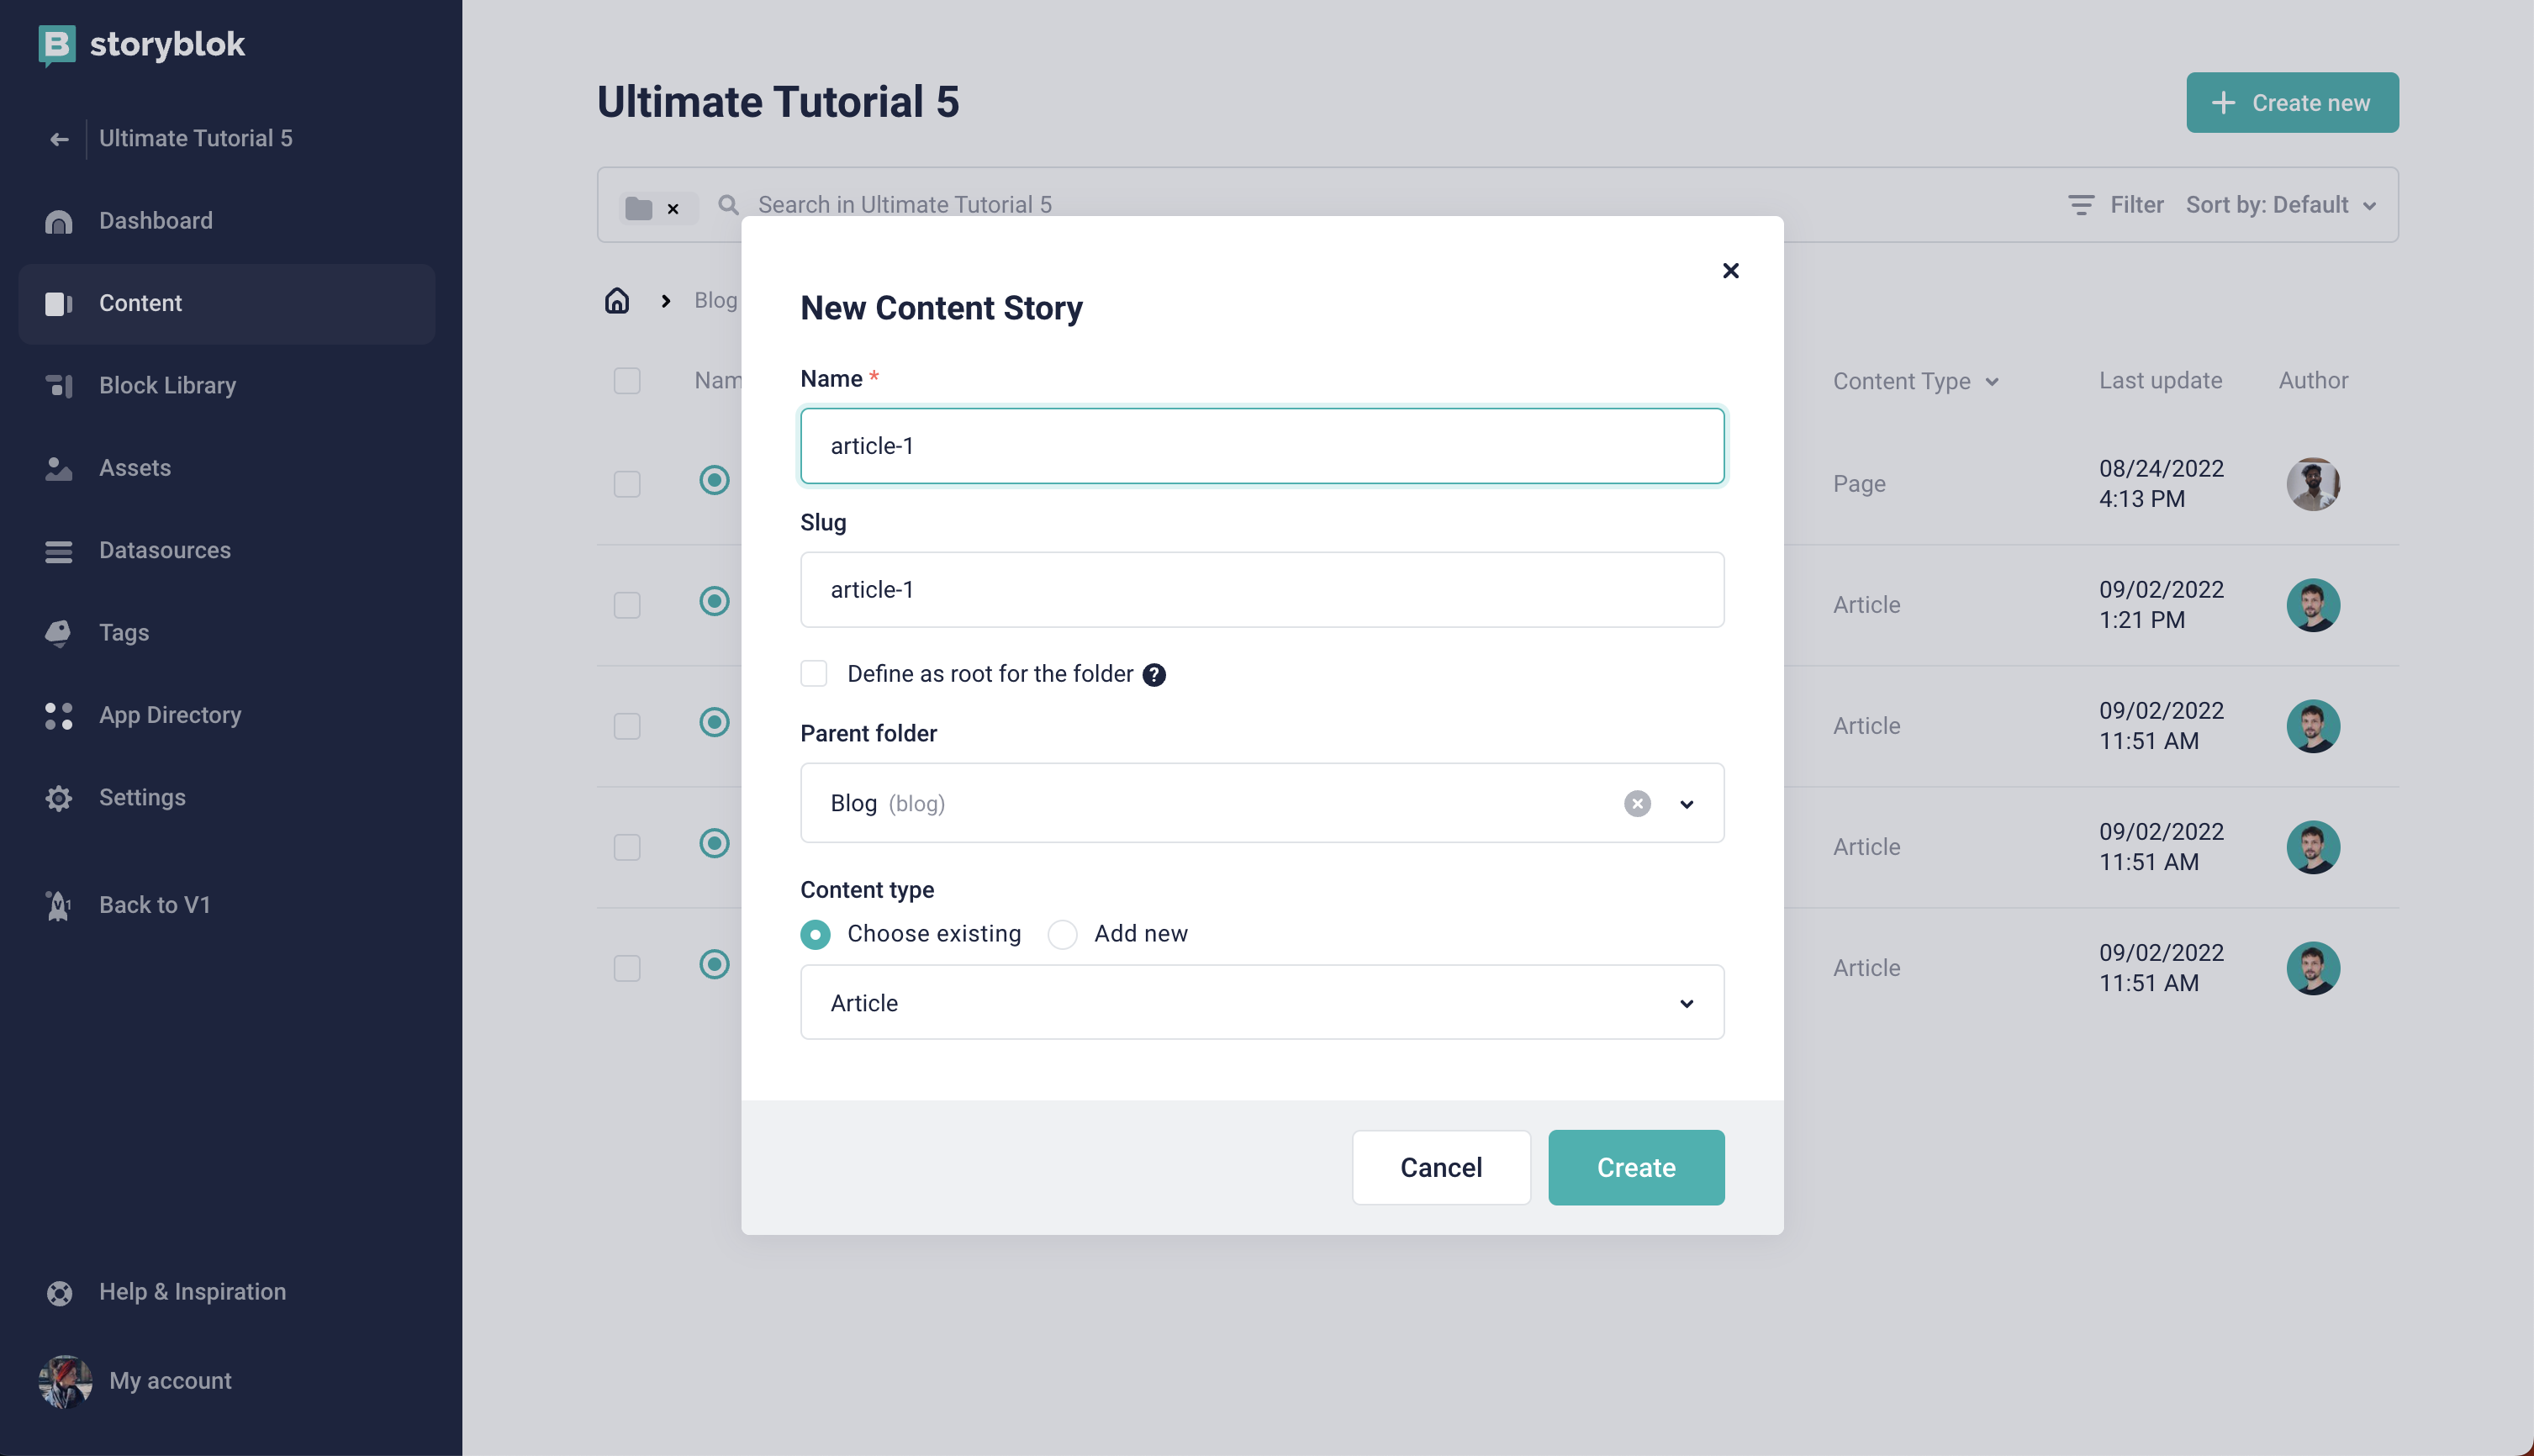
Create New Blog Article
You can add any data to the fields you'd like, the blog stories should look something like this.
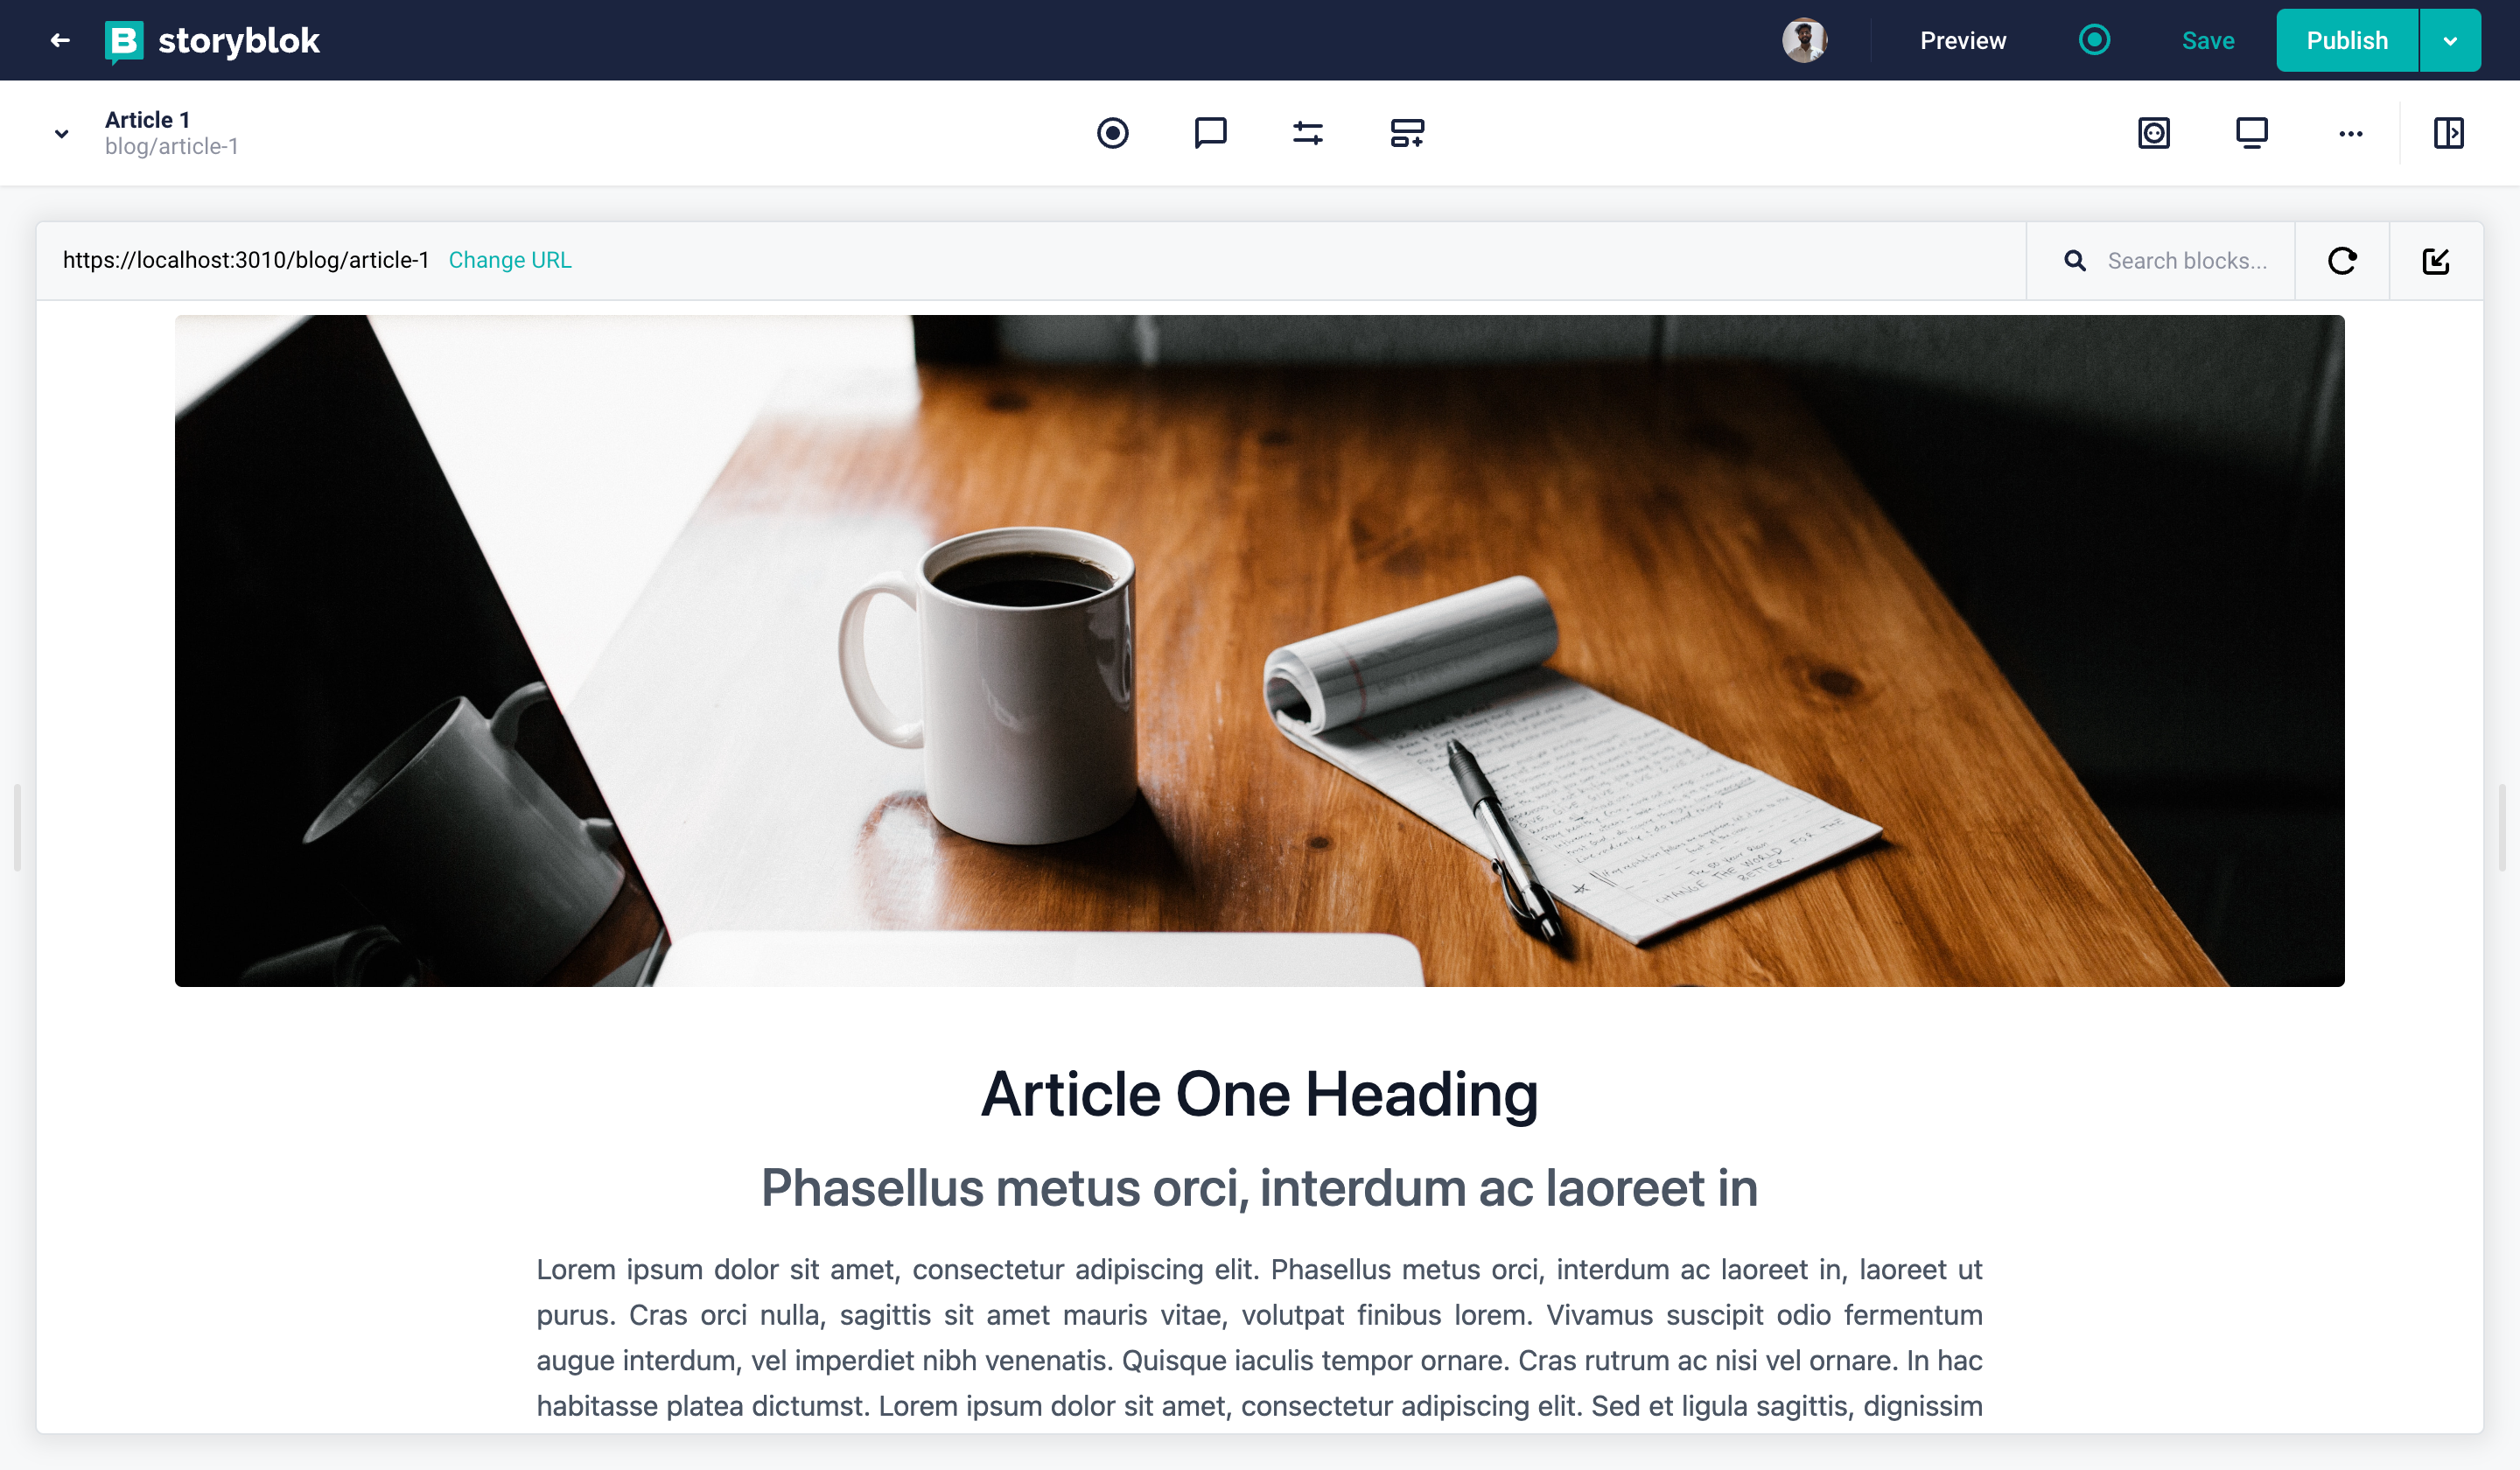
Blog Article
As we will need to show the popular articles on the home story as well as all articles at the blog home, we recommend you create more than 4 blog articles.
Displaying Article Teasers
Now, let's take a look at how to show all the article teasers on the Blog Home story. Each blog teaser will be styled as a card to show the details about the blog article along with a link to it.
Create a new component in the components folder named ArticleTeaser. Add the following code to the ArticleCard.svelte file.
<script>
    import { storyblokEditable } from '@storyblok/svelte';
    export let article;
    export let slug;
</script>
<a
    href="/{slug}"
    use:storyblokEditable={article}
    class="w-full h-full bg-[#f7f6fd] rounded-[5px] text-center overflow-hidden"
>
    <img
        src="{article.image.filename}/m/600x0"
        alt={article.image.alt}
        class="w-full h-48 xl:h-72 object-cover pointer-events-none"
    />
    <div class="p-4">
        <h3 class="text-xl text-[#1d243d] font-bold mb-3">
            {article.title}
        </h3>
        <div class="line-clamp-4">
            {article.teaser}
        </div>
    </div>
</a>
This teaser component will just be in our front-end, as we will pass the blog article data as props. Now, let's create an all-articles block (Nested block) in Storyblok with only one field named title of type text. We will now add this to the home story inside the blog folder. You can add any title you'd like for the block.
To make this work, let's now create a new component in our SvelteKit project.
Add the following to the AllArticles.svelte file :
<script>
    import ArticleCard from './ArticleCard.svelte';
    import { onMount } from 'svelte';
    import { useStoryblokApi } from '@storyblok/svelte';
    export let blok;
    let articles = [];
    onMount(async () => {
        const storyblokApi = useStoryblokApi();
        const { data } = await storyblokApi.get('cdn/stories', {
            version: 'draft',
            starts_with: 'blog',
            is_startpage: false
        });
        articles = data.stories;
    });
</script>
<div class="py-24">
    <h2 class="text-6xl text-[#50b0ae] font-bold text-center mb-12">{blok.title}</h2>
    <div class="container mx-auto grid md:grid-cols-3 gap-12 my-12 place-items-start">
        {#each articles as article}
            <ArticleCard article={article.content} slug={article.full_slug} />
        {/each}
    </div>
</div>
Here, we are fetching all the stories from the Blog folder and excluding the Home story. The first parameter starts_with , helps us to get all the stories inside the blog folder. We are also excluding the Blog Home with the second parameter, which is is_startpage . We are setting it to false. The Blog Home is the start page of the blog folder as we made it the root of the folder. Furthermore, we are looping through all the blog articles and rendering the ArticleTeaser component.
Additionally, we are also adding the slug to the content of the blog to use it for the link in ArticleTeaser. Now in our Blog Home, we should see all the article teasers like this.
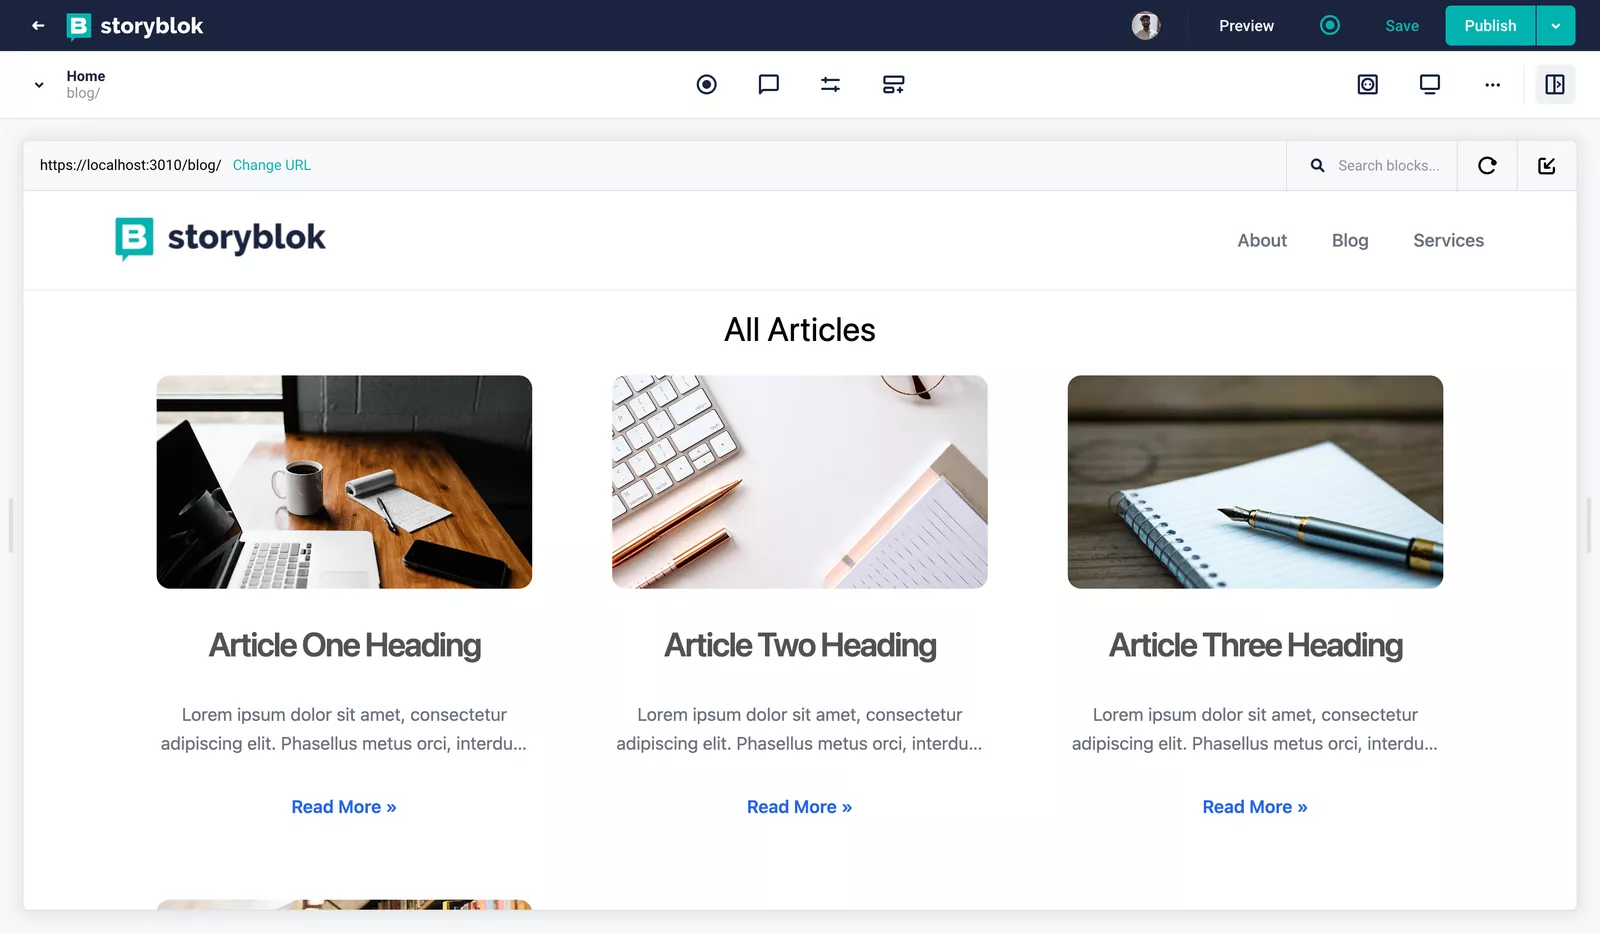
All Articles
Displaying Popular Articles
Let's now see how we can use all the existing blog articles and reference them in the Home story of our space (root folder). For this, we will need to create a new nested block named popular-articles. It will have just one field named articles. This field should be of the type Multi-Options {1}
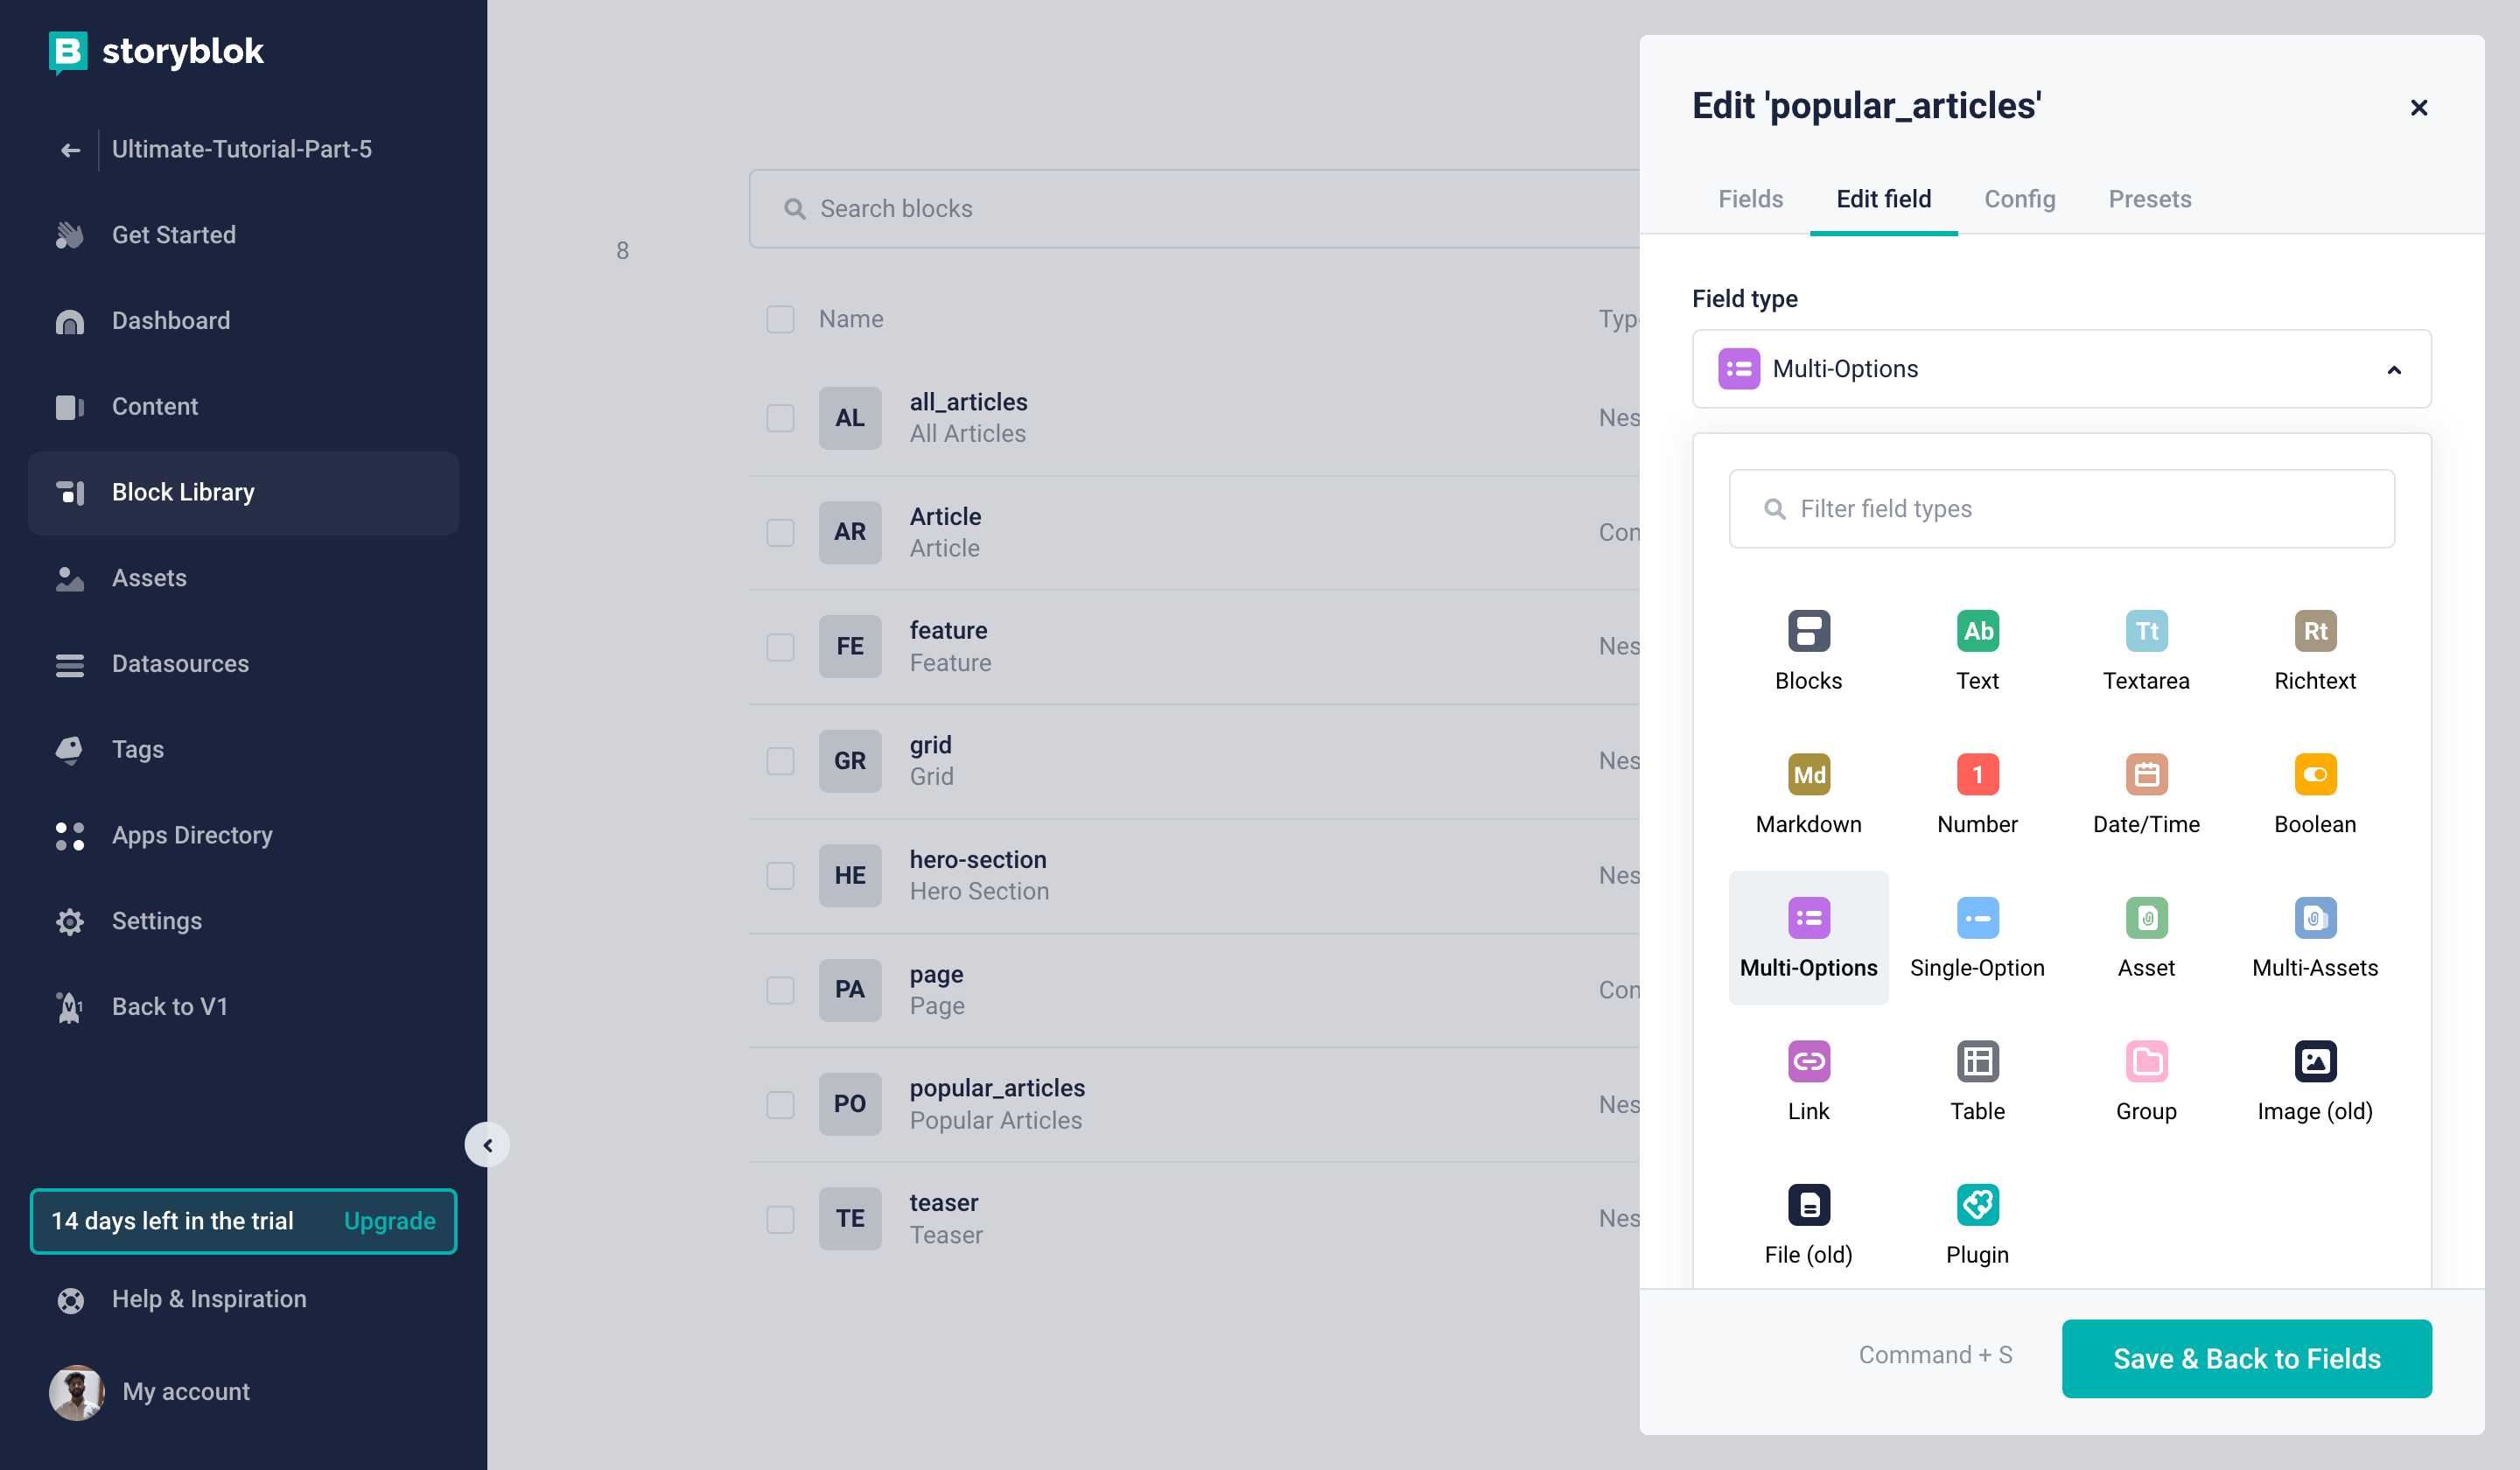
Popular Articles Field
Let's change the Display name to Popular Articles {1} and change the Source to Stories {2}.
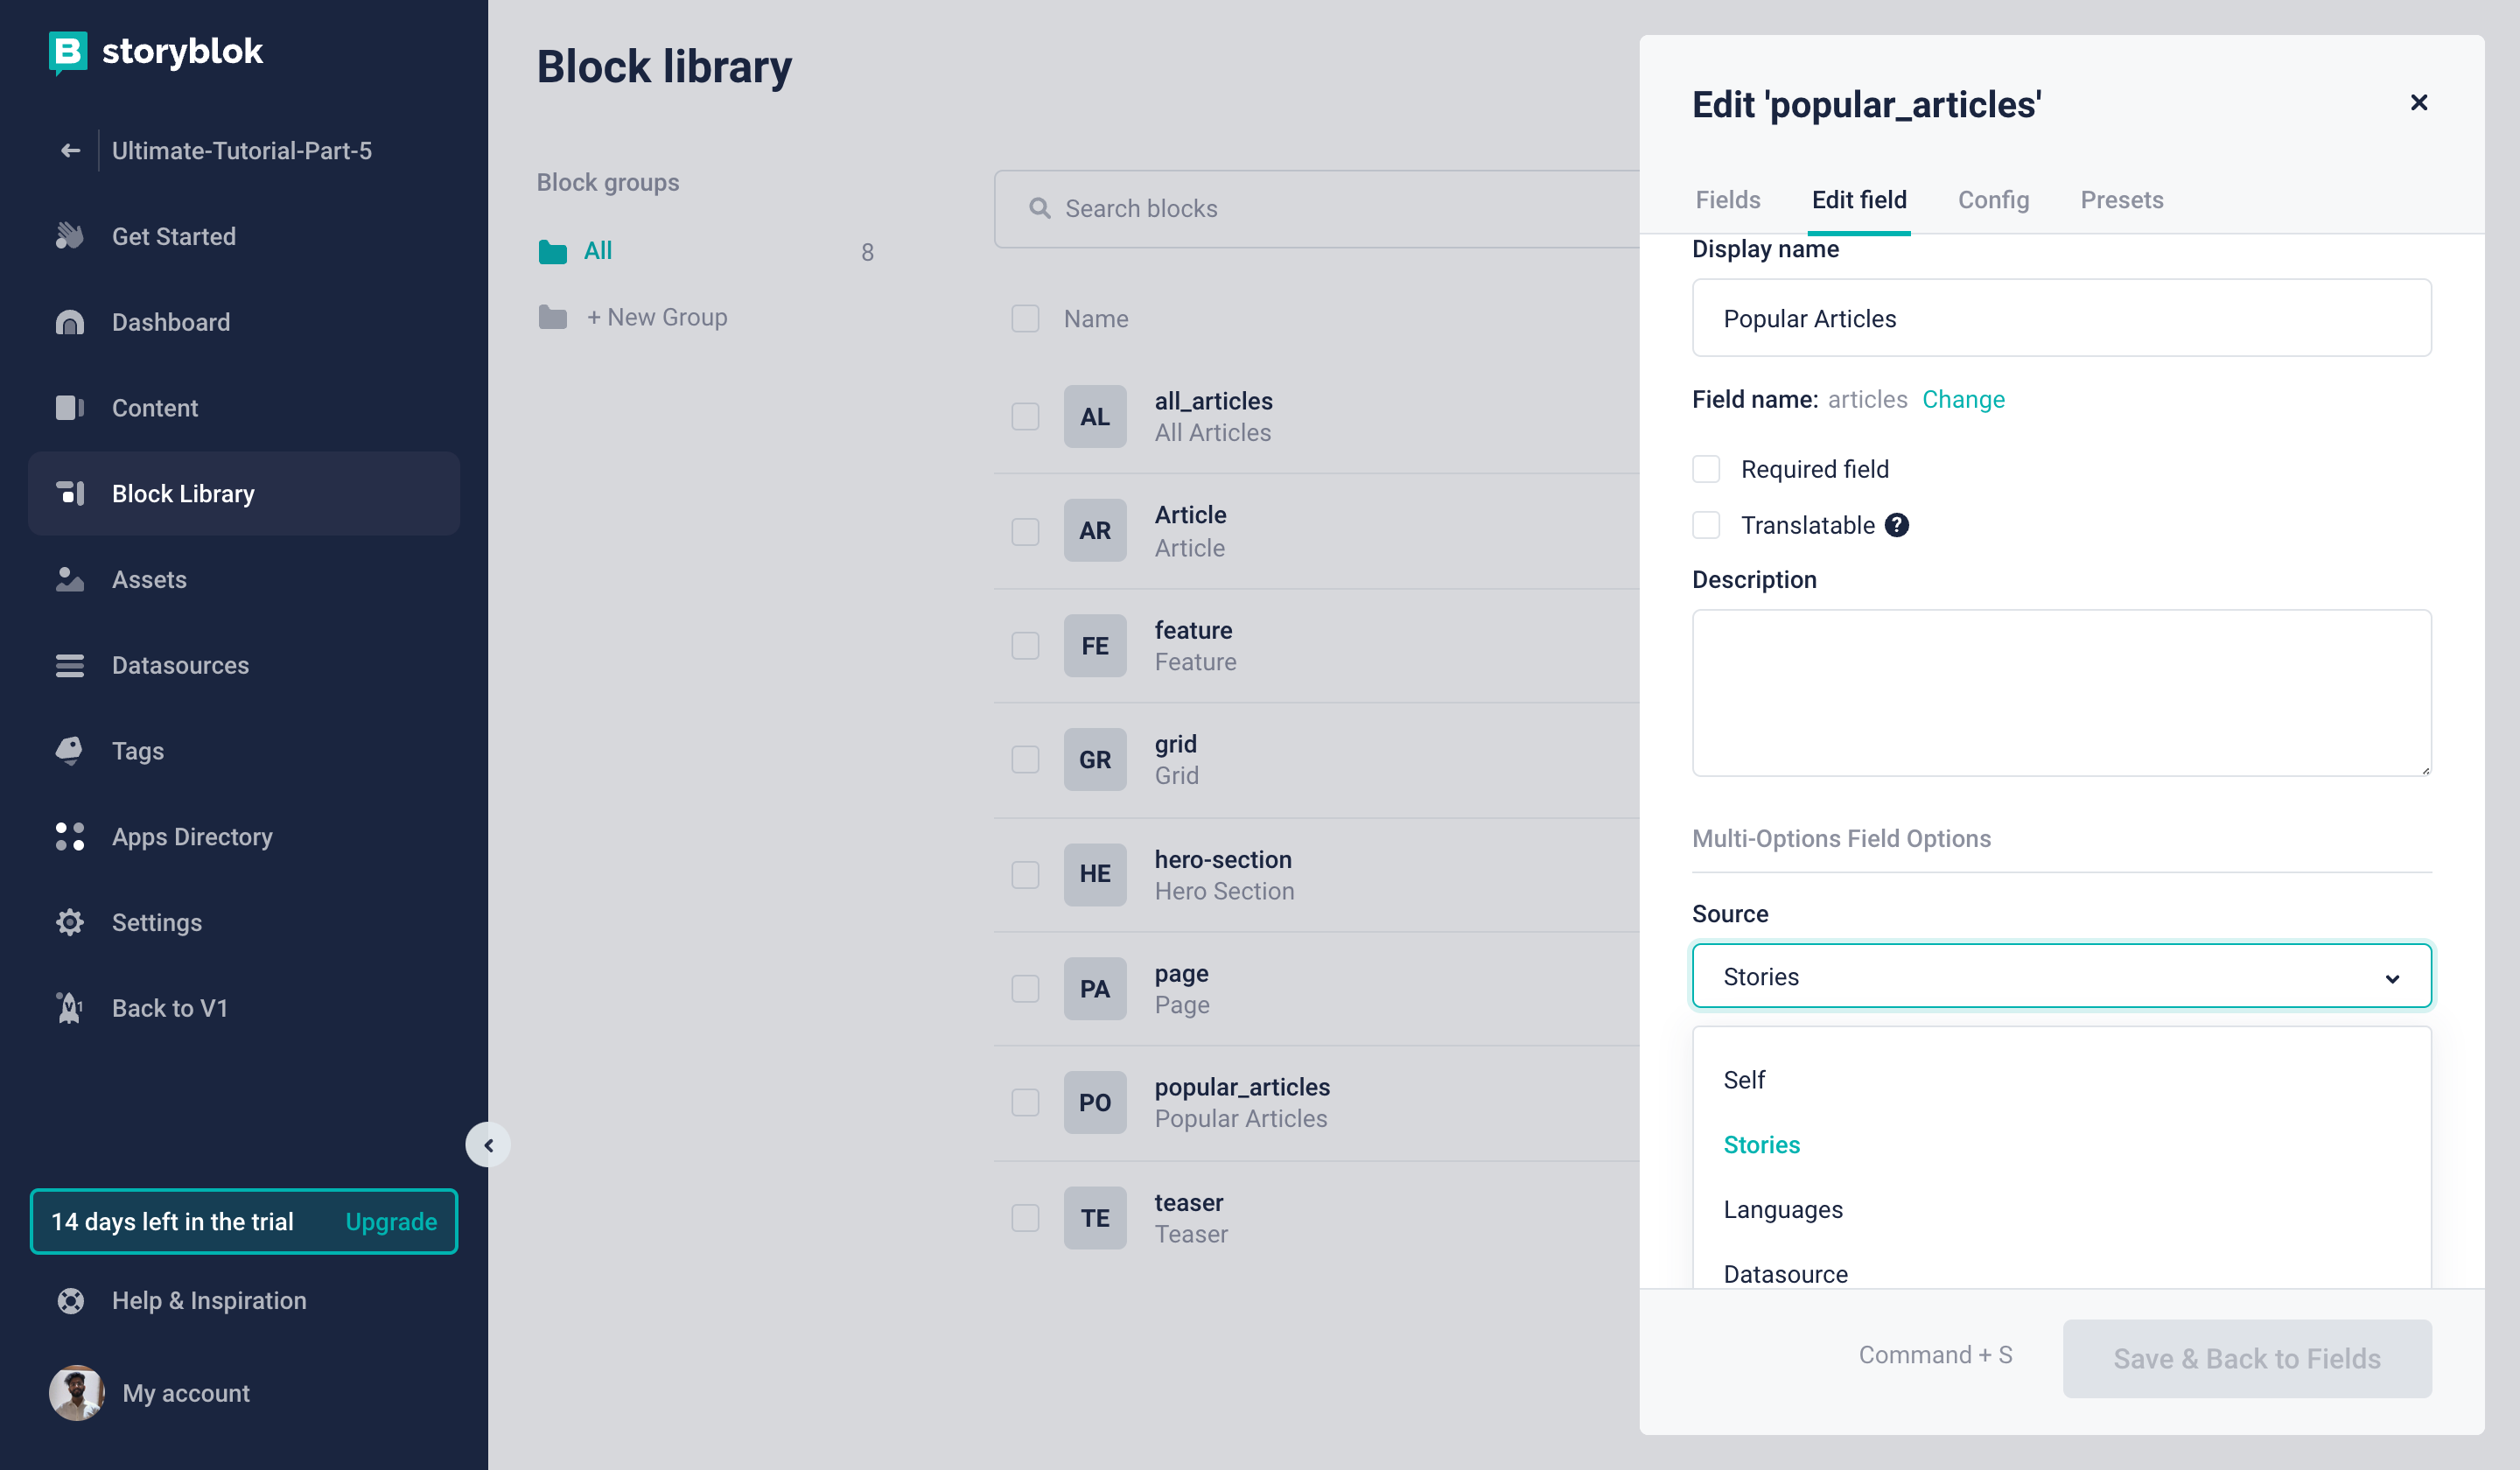
Field Settings
We will also need to set the path of the folder for stories, which will be blog/ {1}. And let's also restrict the content type here to article {2}. Lastly, let's set the maximum number to {3}.

Field Settings
This will allow us to select 3 blog articles from the list of all the blog articles. Let's go ahead and add it to the Home story. You should see something like this:
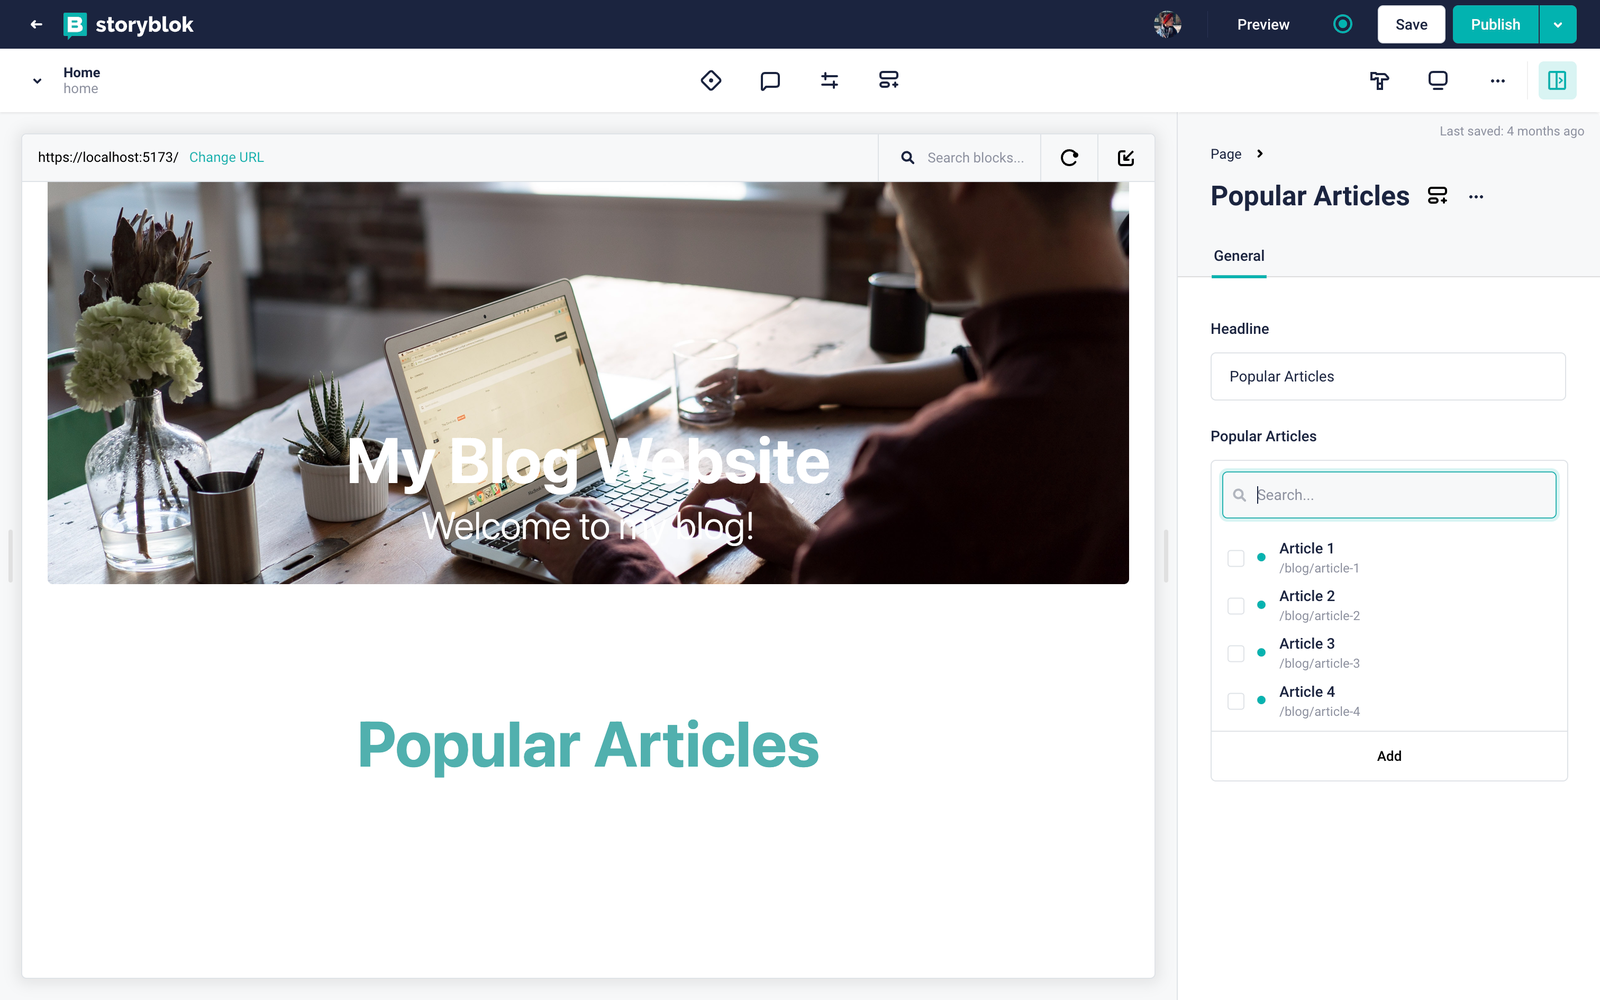
Popular Articles Selection
You can go ahead and select any three articles you'd like from the list of Articles. We won't be able to see anything yet, as we still need to add a component to our frontend. But before that, if you'd take a look at how our draft JSON looks after selecting the blogs, you will see something like this in the articles array.
"articles": [
    "8c9877f0-6ef5-4cd0-9f7d-abc88ceaab14",
    "aafc0ccb-0339-4545-b7dd-6a5879ffa059",
    "81c1f9f8-fdb8-4e3b-ab7e-56648adb51ac"
],You can see the draft or published JSON simply by clicking the dropdown button next to the publish button and selecting the option. You can even check the page history from there.
This is the array containing the _uids of the selected articles. At this point, the API parameter resolve_relations comes into play, helping you resolve the relations based upon these _uids. It will allow us the get all the content for these blogs. If you are seeing the JSON from the URL you get after clicking the dropdown button next to the publish button, try appending &resolve_relations=popular-articles.articles to the URL.
The complete URL should look something like this:
https://api.storyblok.com/v2/cdn/stories/home?version=draft&token=UatY9FBAFasWsdHl7UZJgwtt&cv=1655906161&resolve_relations=popular-articles.articles
Now, you will see a key rels in the JSON which gives you the content for all the blogs you selected.
We need this functionality in our frontend. To do that, let's go the +page.js file and add resolve relations to the Storyblok parameters which we are using while fetching the data with the storyblokApi. Update the params as follows:
 const resolveRelations = ['popular-articles.articles']
  const dataStory = await storyblokApi.get(path, {
    version: 'draft',
    resolve_relations: resolveRelations,
  });
This will automatically resolve the relations when it sees the array of articles inside the popular_articles. Let's now add the PopularArticle component to our SvelteKit project. Create a file named PopularArticle.svelte and the following code to it:
<script>
    import ArticleCard from './ArticleCard.svelte';
    export let blok;
</script>
<div class="py-24">
    <h2 class="text-6xl text-[#50b0ae] font-bold text-center mb-12">{blok.headline}</h2>
    <div class="container mx-auto grid md:grid-cols-3 gap-12 my-12 place-items-start">
        {#each blok.articles as article}
            <ArticleCard article={article.content} slug={article.full_slug} />
        {/each}
    </div>
</div>
After hitting save, our website should now have the Teaser cards for the popular articles as well and should look like this:

Home Story
However, you will see that if you now try to select or deselect any article from the list of popular articles, you will get an error and it won't work correctly. You won't be able to see the live changes unless you hit save. This is because we still need to resolve the relations for the Storyblok Bridge, which is the last thing we need to do.
In the +page.svelte file, let's pass another argument to the onMount function for resolving relations. The code should now be:
<script>
	import { onMount } from 'svelte';
	import { useStoryblokBridge, StoryblokComponent } from '@storyblok/svelte';
	export let data;
	onMount(() => {
		if (data.story) {
			const resolveRelations = ['popular-articles.articles'];
			useStoryblokBridge(data.story.id, (newStory) => (data.story = newStory), {
				resolveRelations: resolveRelations
			});
		}
	});
</script>

<svelte:head>
	<title>{data.story.name}</title>
</svelte:head>
{#key data}
	<div>
		{#if data.story}
			<StoryblokComponent blok={data.story.content} />
		{/if}
	</div>
{/key}
And that's it! Now you can play with article teasers here as well and it will show you the live edits in real-time.
Wrapping Up
In this tutorial, you saw how to create and render blog articles with Storyblok and SvelteKit. You also saw how to resolve relations when referencing stories in other stories.
In the next part of this series, we will see how to manage multilingual content in Storyblok and SvelteKit. We are still working on it, it will be online shortly.
| Resource | Link |
|---|---|
| Storyblok SvelteKit Ultimate Tutorial | https://www.storyblok.com/tp/the-storyblok-sveltekit-ultimate-tutorial |
| GitHub Repository Part 5 | https://github.com/storyblok/sveltekit-ultimate-tutorial/tree/part-5-sveltekit-ut |
| Create custom components in Storyblok and SvelteKit | https://www.storyblok.com/tp/create-custom-components-in-storyblok-and-sveltekit |
| Storyblok Technologies Hub | https://www.storyblok.com/technologies |
