How to Create a Recipe Book with Storyblok’s React SDK, Next.js, and Vercel
Storyblok is the first headless CMS that works for developers & marketers alike.
In this tutorial, we will go through the basics of how to use Storyblok’s React SDK (opens in a new window) by creating a recipe book!
You can find all the code for this example in Stackblitz.
Environment Setup
Requirements
To follow this tutorial, you will need:
- Basic understanding of Next.js (opens in a new window) and React (opens in a new window)
- Node, npm and npx installed
- An account on Storyblok (opens in a new window) to manage content
- A new Storyblok space
Setup Environment
Let’s start by creating the Next.js environment:
npx create-next-app recipe-bookNext, we’ll change our directory into the project and install our React SDK (opens in a new window) as well as our rich-text renderer (opens in a new window):
cd recipe-book
npm i @storyblok/react storyblok-rich-text-react-renderer axios
Then, we can start our development server where we can see the Next.js boilerplate homepage:
npm run devConnecting to Storyblok
Now it’s time to connect our app to Storyblok! Head over to the pages/_app.js file. From there, we will import the following at the top of the file:
import { storyblokInit, apiPlugin } from "@storyblok/react";
import Page from "../components/Page";
import Recipe from "../components/Recipe";
import FeaturedRecipes from "../components/FeaturedRecipes";| Import | Reason |
|---|---|
| storyblokInit | initializes our Storyblok application |
| apiPlugin | brings the Storyblok API into play |
| Page | our Page component which we will be using as a base for all our pages in Storyblok |
| Recipe | the individual page that contains the recipe, ingredients, and instructions |
| FeaturedRecipes | A list of recipes the admin/author has chosen to feature on the landing page. This is derived from the list of recipe stories we will create in Storyblok. |
We will learn more about these components and configure them later on in this tutorial!
Next, we will create an object that lists all your Storyblok components that you will be utilizing in the app: Page, Recipe, and FeaturedRecipes.
const components = {
 page: Page,
 recipe: Recipe,
 "featured-recipes": FeaturedRecipes,
};
Then, we will initialize Storyblok and your components with the following block of code, just above the MyApp function:
storyblokInit({
 accessToken: “YOUR ACCESS TOKEN HERE”,
 components,
 use: [apiPlugin],
});
Remember to replace the “accessToken'' value with your own {3} preview token under {2} “Access Tokens” in the {1} Settings page from the Storyblok dashboard.
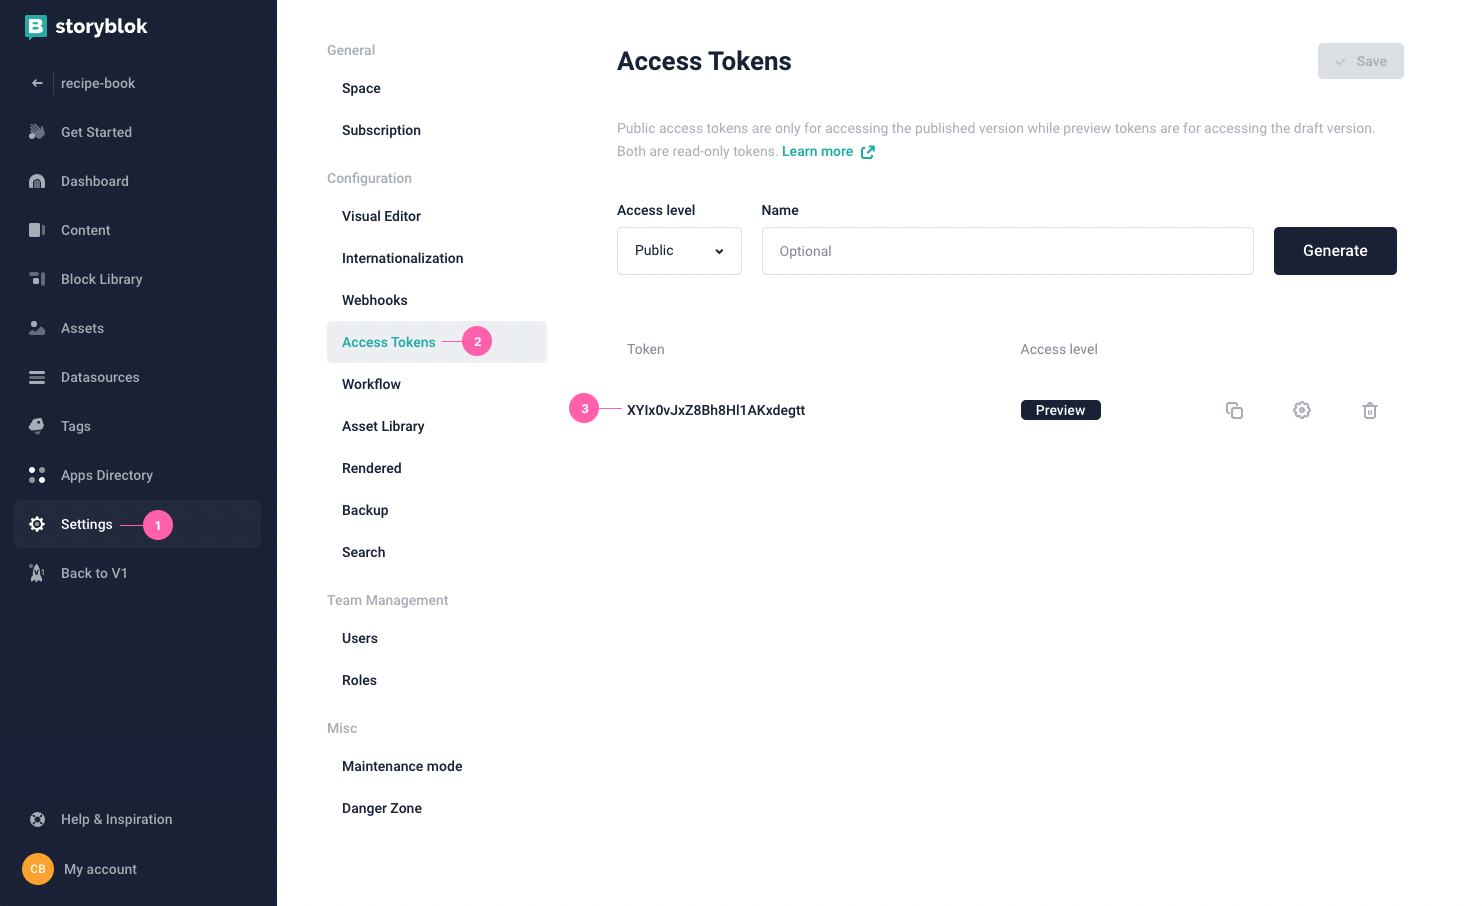
Please hide the access token inside a .env.local file and call it through process.env!
Fetching Data
Landing Page
Let’s set up our landing page! In pages/index.js, we will first import the following from our React SDK:
import { StoryblokComponent, useStoryblokState, getStoryblokApi } from "@storyblok/react";What do they do exactly?
| Import | Reason |
|---|---|
| StoryblokComponent | Sets up page for our Storyblok components |
| useStoryblokState | A custom hook that connects the current story/page to the Storyblok Real Time Visual Editor |
| getStoryblokApi | This works with our API endpoint; fetches the data from Storyblok |
Next, we will use Next.js' (opens in a new window) getStaticProps function. Copy/paste the following code, replacing all the content that’s currently in pages/index.js:
export default function Home({ story }) {
 story = useStoryblokState(story, {
   resolveRelations: ["featured-recipes.recipes"],
 });
 return (
   <div>
     <Head>
       <title>Create Next App</title>
       <link rel="icon" href="/favicon.ico" />
     </Head>
     <StoryblokComponent blok={story.content} />
   </div>
 );
}
export async function getStaticProps() {
 let slug = "home";
 // load the published content outside of the preview mode
 let sbParams = {
   version: "draft",
   resolve_relations: ["featured-recipes.recipes"], // or 'draft'
 };
 const storyblokApi = getStoryblokApi()
 let { data } = await storyblokApi.get(`cdn/stories/${slug}`, sbParams)
 return {
   props: {
     story: data ? data.story : false,
     key: data ? data.story.id : false,
   },
   revalidate: 3600, // revalidate every hour
 };
}
Resolve Relations
You may have noticed a param inside the useStoryblokState that contains an object called resolveRelations. What this is doing is bringing all the details related to the featured-recipes.recipes block (which we will configure later on in the code and on Storyblok) and making them available to view and edit on our Real Time Visual Editor.
You can read more details about how resolveRelations works in our API documentation (opens in a new window)!
Dynamic Route Page
Next, we’ll set up the page that will capture all the individual recipes by using the catch-all route [...slug].js and within it the getStaticPaths function.
In the pages folder, create a [...slug].js file. In that file, copy/paste the following code:
import React from "react";
import Head from "next/head";
import { StoryblokComponent, useStoryblokState, getStoryblokApi } from "@storyblok/react";

export default function Page({ story }) {
  story = useStoryblokState(story, {
   resolveRelations: ["featured-recipes.recipes"],
 });

 return (
   <div>
     <Head>
       <title>{story ? story.name : "My Site"}</title>
       <link rel="icon" href="/favicon.ico" />
     </Head>
     <header>
       <h1 className="text-4xl">{story ? story.name : "My Site"}</h1>
     </header>
     <StoryblokComponent blok={story.content} />
   </div>
 );
}
export async function getStaticProps({ params }) {
 // join the slug array used in Next.js catch-all routes
 let slug = params.slug ? params.slug.join("/") : "home";
 let sbParams = {
   // change to `published` to load the published version
   version: "draft", // or published
   resolve_relations: ["featured-recipes.recipes"],
 };
  const storyblokApi = getStoryblokApi()
 let { data } = await storyblokApi.get(`cdn/stories/${slug}`, sbParams)
 return {
   props: {
     story: data ? data.story : false,
     key: data ? data.story.id : false,
   },
   revalidate: 3600, // revalidate every hour
 };
}
export async function getStaticPaths() {
 // get all links from Storyblok

 const storyblokApi = getStoryblokApi()
 let { data } = await storyblokApi.get(`cdn/links/`)

 let paths = [];
 // create a routes for every link
 Object.keys(data.links).forEach((linkKey) => {
   // do not create a route for folders or the home (index) page
   if (data.links[linkKey].is_folder || data.links[linkKey].slug === "home") {
     return;
   }
   // get array for slug because of catch all
   const slug = data.links[linkKey].slug;
   let splittedSlug = slug.split("/");
   // cretes all the routes
   paths.push({ params: { slug: splittedSlug } });
 });
 return {
   paths: paths,
   fallback: false,
 };
}
It’s almost the exact same as index.js, except we have the getStaticPaths function to generate all of our dynamic pages with.
Blocks
Now, we will set up our blocks that we will use as block elements in our Storyblok story!
First, let’s create them in Storyblok. Page has already been created for us, so we’ll make the Recipe and Featured Recipe components.
Recipe Component
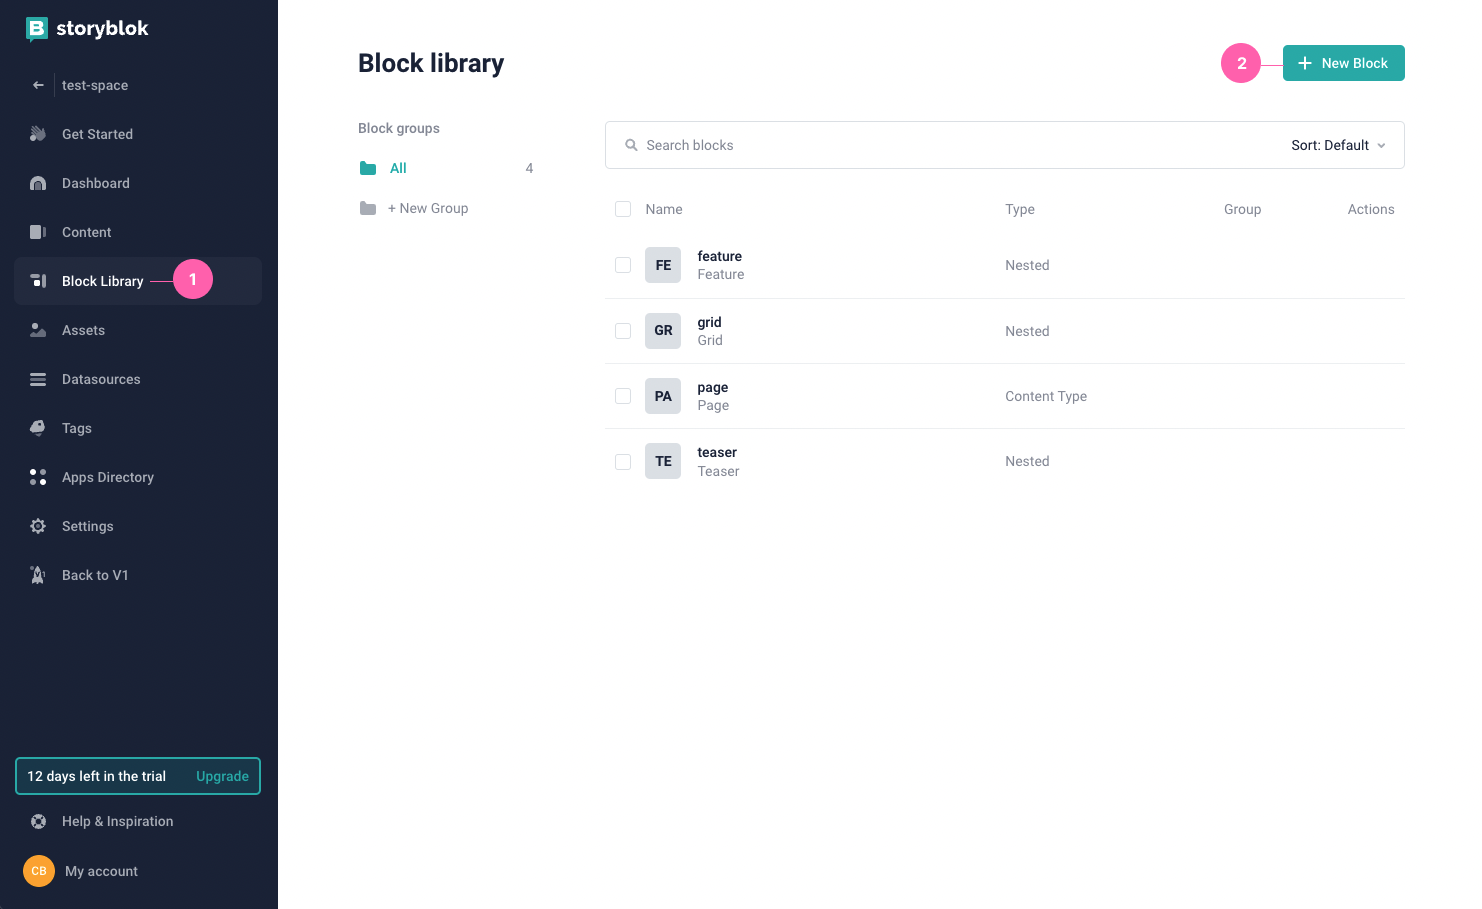
Head to {1} Block Library and click {2} New Block.
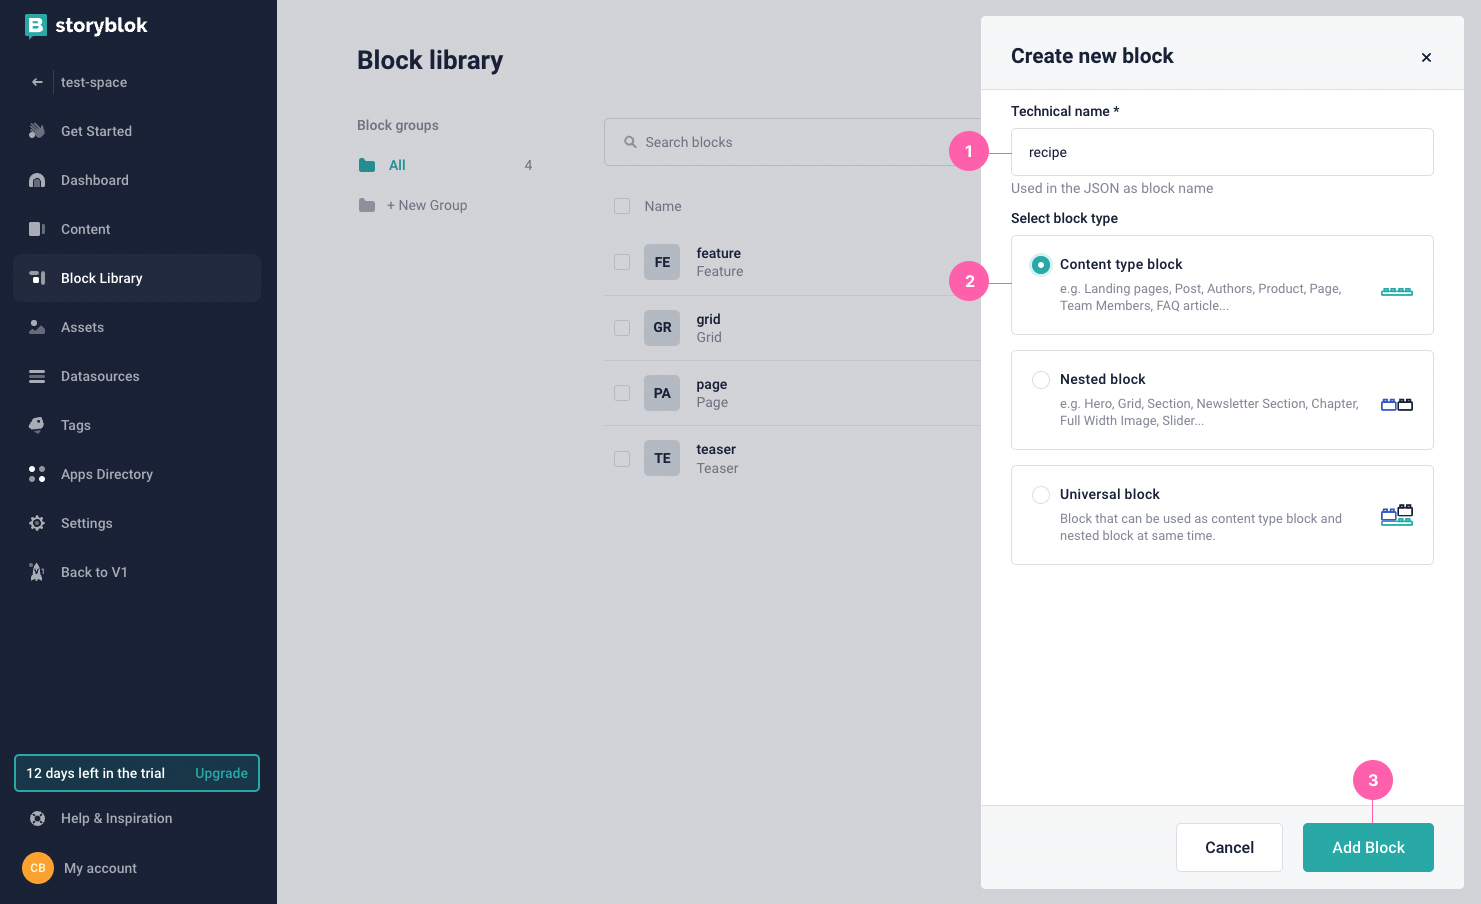
{1} Name this block recipe.
{2} Select Content type block
{3} Then, click Add Block
Add the following blocks:
| Block Name | Type |
|---|---|
| title | Text |
| image | Asset |
| ingredients | Richtext |
| instructions | Richtext |
We’re done setting up our own page block! Now to set up our Featured Recipe block.
Featured Recipes Block
The Featured Recipes block is a special block we will use on our landing page.
While still in the Block Library, click New.
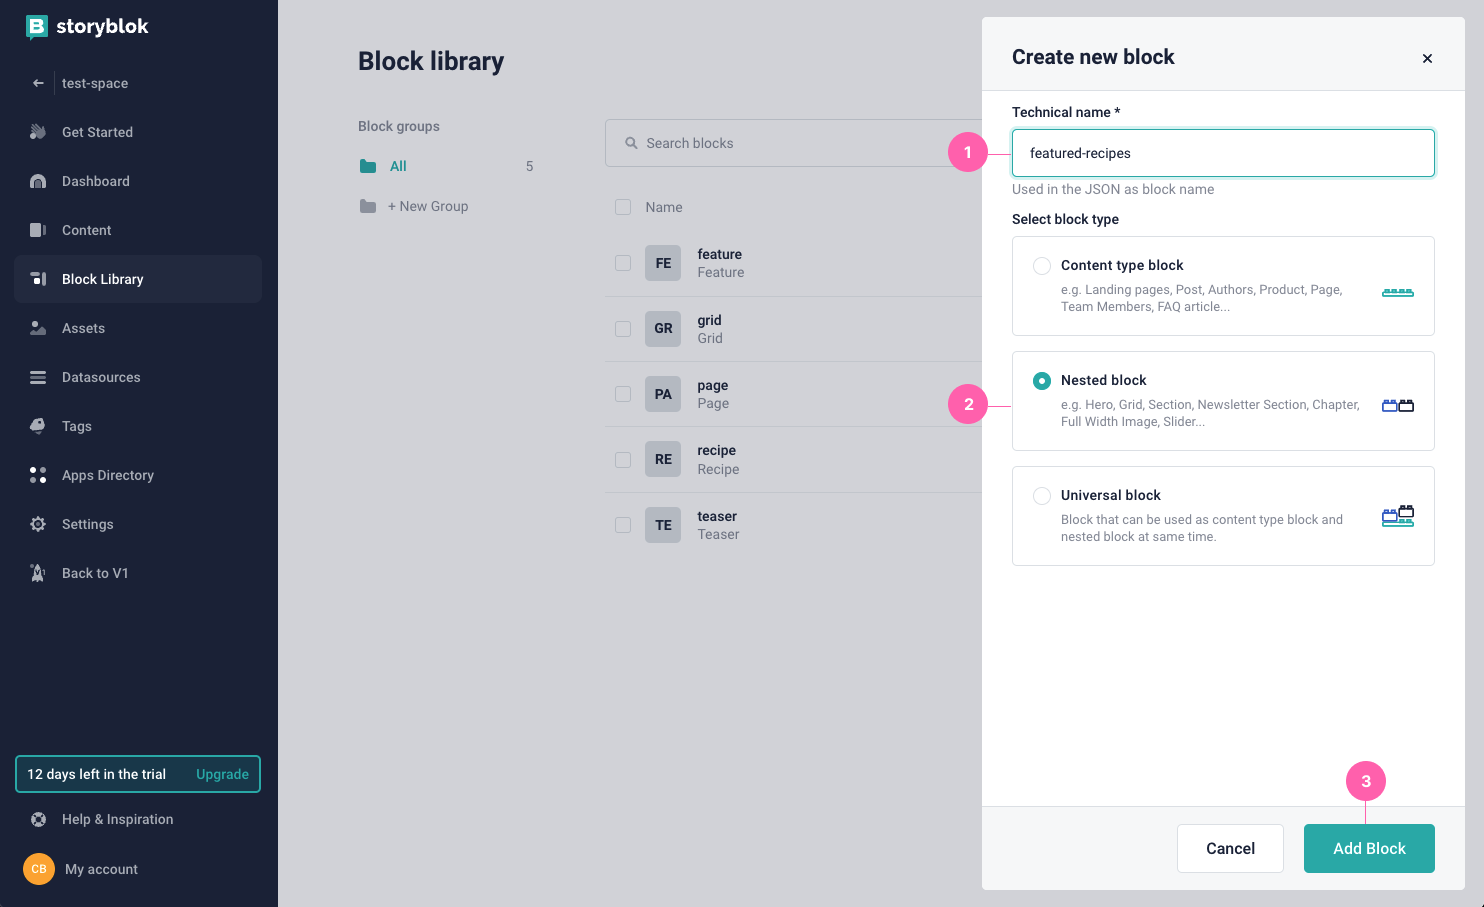
{1} Name this block featured-recipes.
{2} Select Nested block as the block type
{3} Then, click Add Block
Then, click, “Next”.
Add the following blocks:
| Block Name | Type |
|---|---|
| title | Text |
| recipes | Multi-options |
And that’s it for our featured-recipe component!
Next, we’ll jump into the code and create them.
Coding Our Components
First, we will code our Recipe page. In the root folder, create a components folder. There, create these three files:
Page.jsRecipe.jsFeaturedRecipes.js
In Page.js, copy/paste the following code:
import React from "react";
import {StoryblokComponent, storyblokEditable} from "@storyblok/react";

const Page = ({ blok }) => (
 <main {...storyblokEditable(blok)}>
   {blok.body
     ? blok.body.map((blok) => (
         <StoryblokComponent blok={blok} key={blok._uid} />
       ))
     : null}
 </main>
);
export default Page;
In Recipe.js, copy/paste the following code:
import React from "react";
import {storyblokEditable} from "@storyblok/react";
import { render } from "storyblok-rich-text-react-renderer";

const Recipe = ({ blok }) => {
   return (
     <div {...storyblokEditable(blok)} key={blok._uid}>
       <div className="w-full">
         <div className="max-w-3xl pt-20 flex flex-col items-center">
           <img className="w-1/2 my-16" src={blok.image.filename} alt={blok.image.alt} />
         </div>
       </div>
       <div>
         {render(blok.ingredients)}
       </div>
       <div className="max-w-3xl pt-20 flex flex-col items-center">
         <div className="leading-relaxed text-xl text-left">
           {render(blok.instructions)}
         </div>
       </div>
     </div>
   );
 };
  export default Recipe;
And finally, in FeaturedRecipes.js, copy/paste the following code:
import React from "react";
import { storyblokEditable } from "@storyblok/react";
import Link from "next/link";

const FeaturedRecipes = ({ blok }) => {
 return (
   <div
     {...storyblokEditable(blok)}
     key={blok._uid}
     className="py-8 mb-6 container mx-auto text-left"
   >
     <div className="relative">
       <h2 className="relative font-serif text-4xl z-10 text-primary">
         {blok.title}
       </h2>
       <ul className="flex">

         {blok.recipes.map((recipe) => {
           return (
             <li key={recipe.slug} className="pr-8 w-1/3">
               <Link href={`recipes/${recipe.slug}`}>
                 <a className="py-16 block">
                   <img src={recipe.content.image.filename} className="pb-10 w-full" alt={recipe.content.image.alt} />
                   <h2 className="pb-6 text-lg font-bold">
                     {recipe.content.title}
                   </h2>
                 </a>
               </Link>
             </li>
           );
         })}
       </ul>
     </div>
   </div>
 );
};

export default FeaturedRecipes;
You may have noticed that we are using the storyblokEditable function. That helps us declare that this specific block is editable in our Real-Time Visual Editor tool.
You may have also noticed the blok parameter: this helps us retrieve the specific information declared in the components (title, image, etc.).
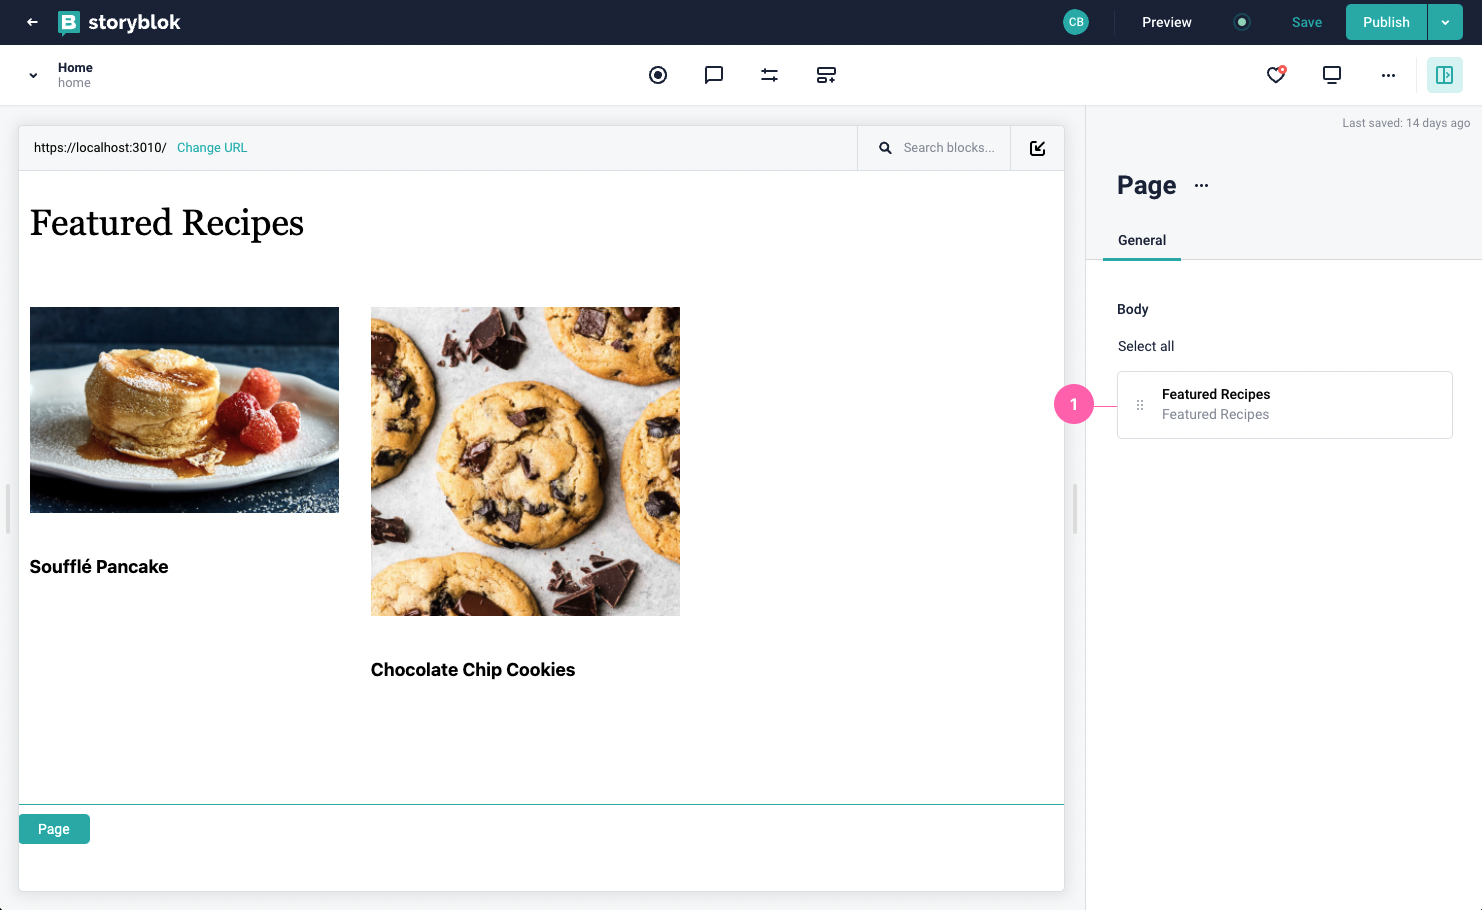
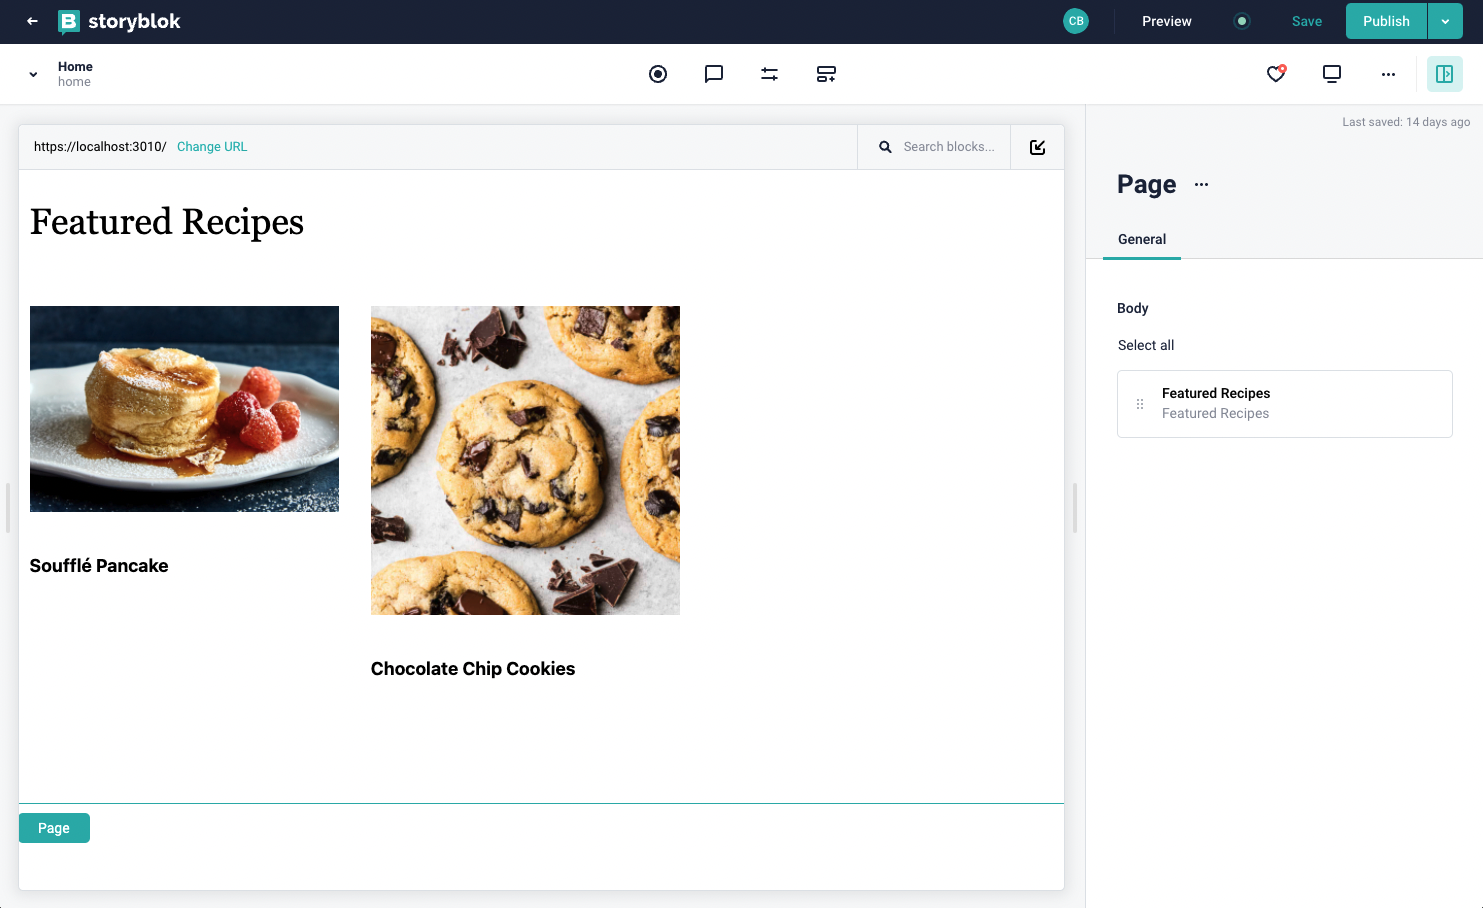
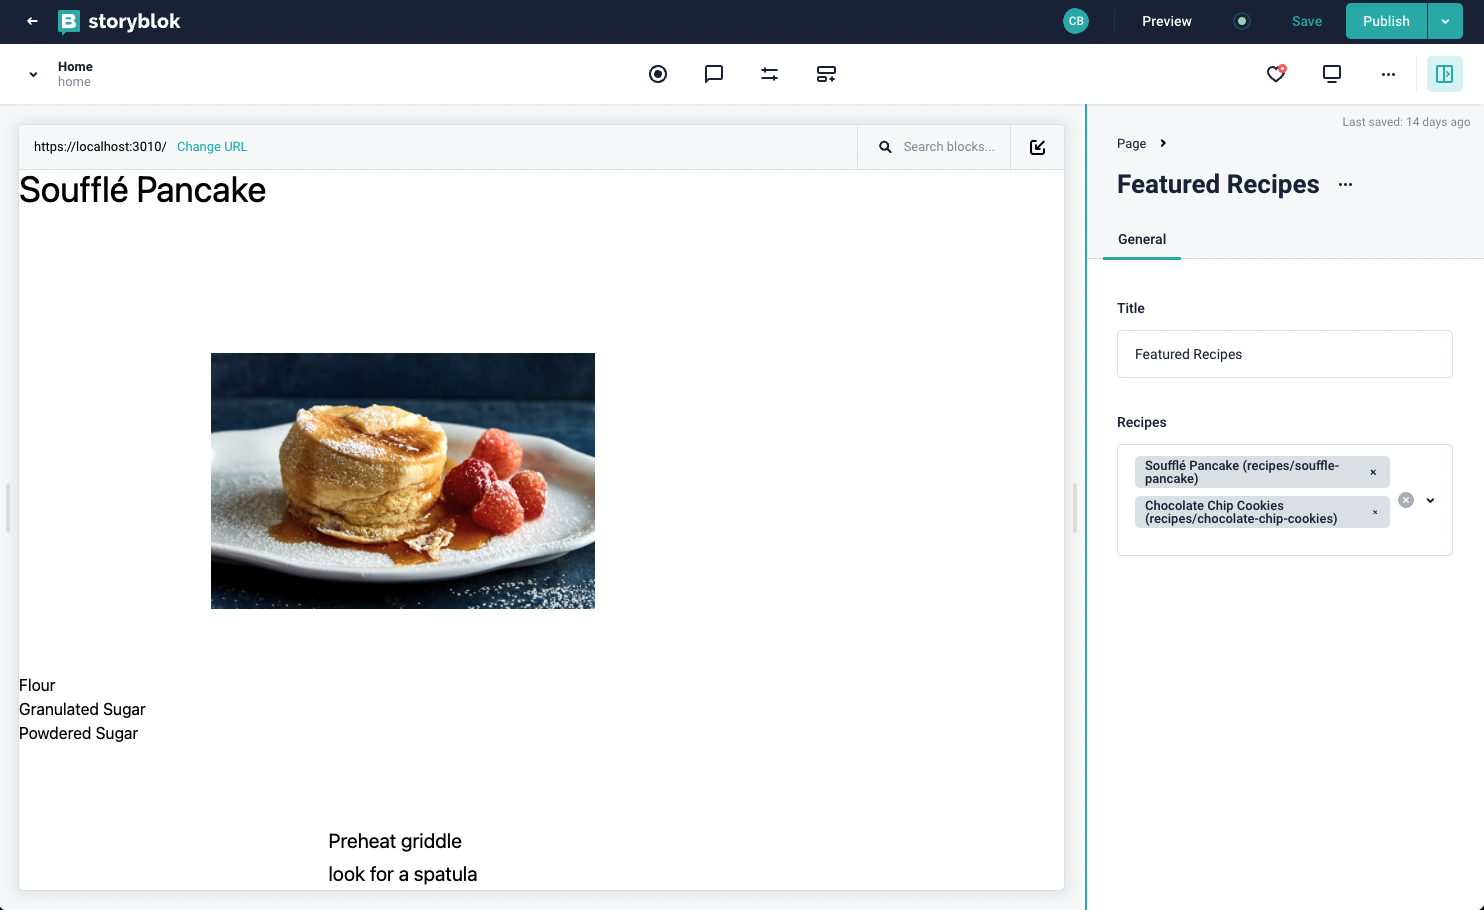
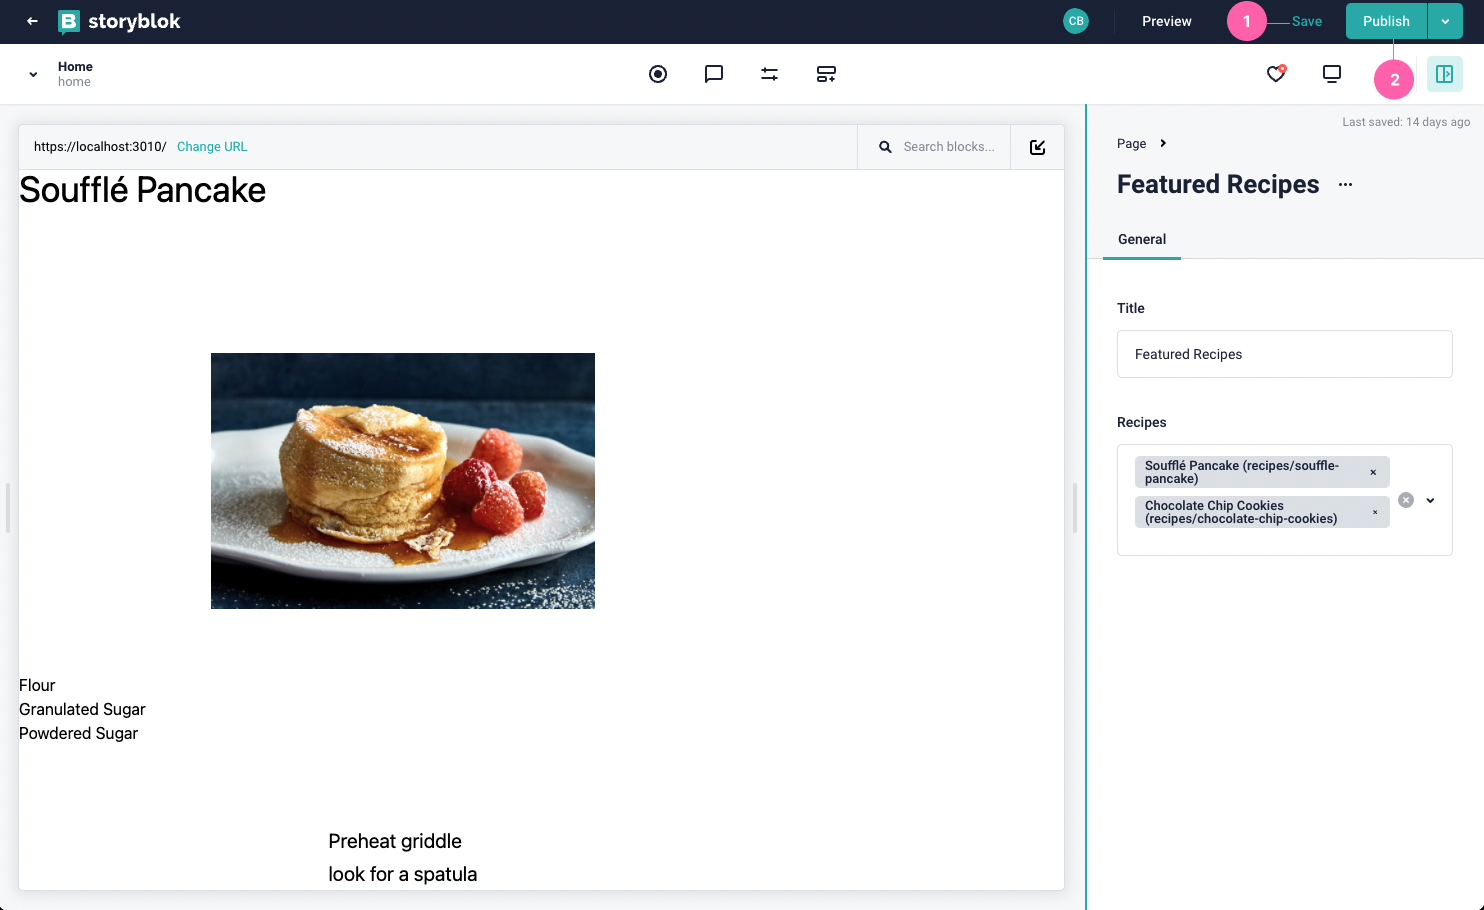
As for the FeaturedRecipes block, this {1} is being used in the home/landing page as a block within it. Please view the following screenshot for clarification:
Adding Recipes
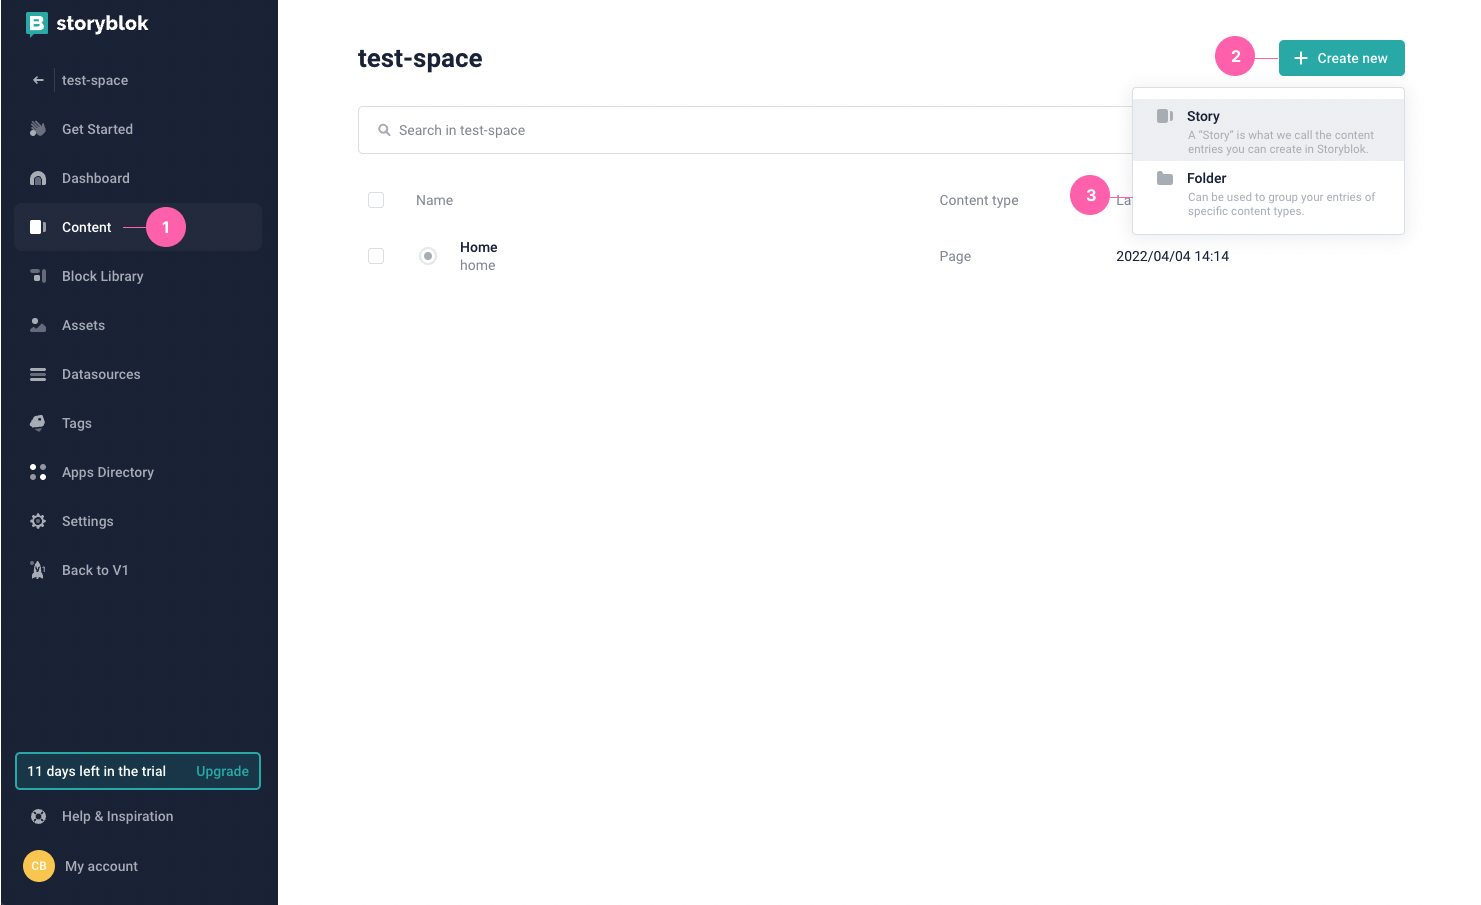
We will now go back to the {1} Content tab in the Storyblok website. Click on {2} + Create new, {3} Select Folder.
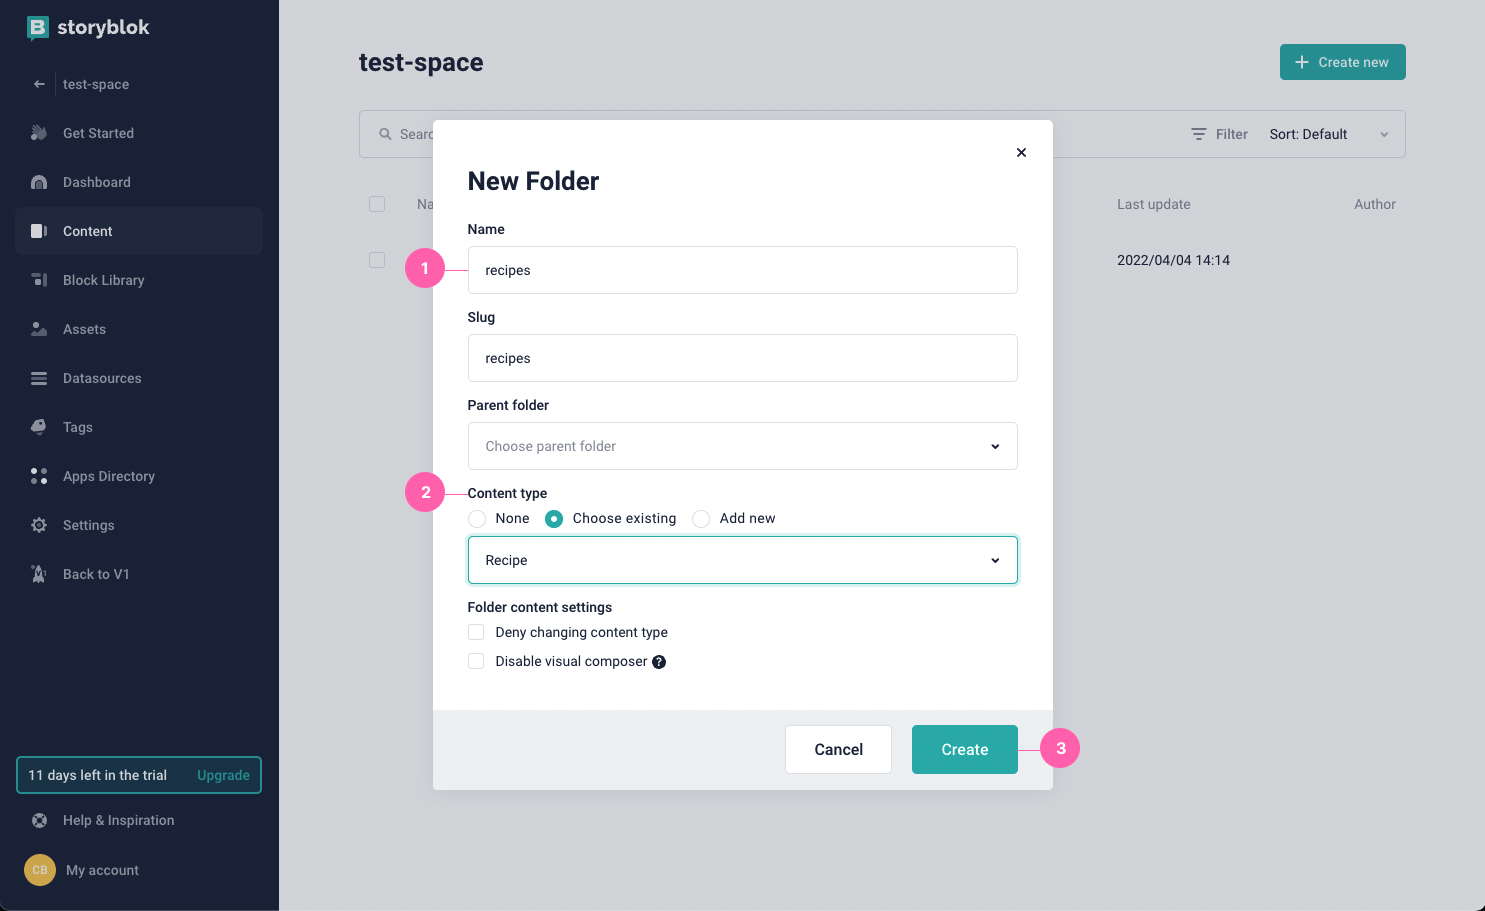
Name this new folder {1} recipes. For {2} content type, choose existing and select Recipe. Then, click {3} Create.
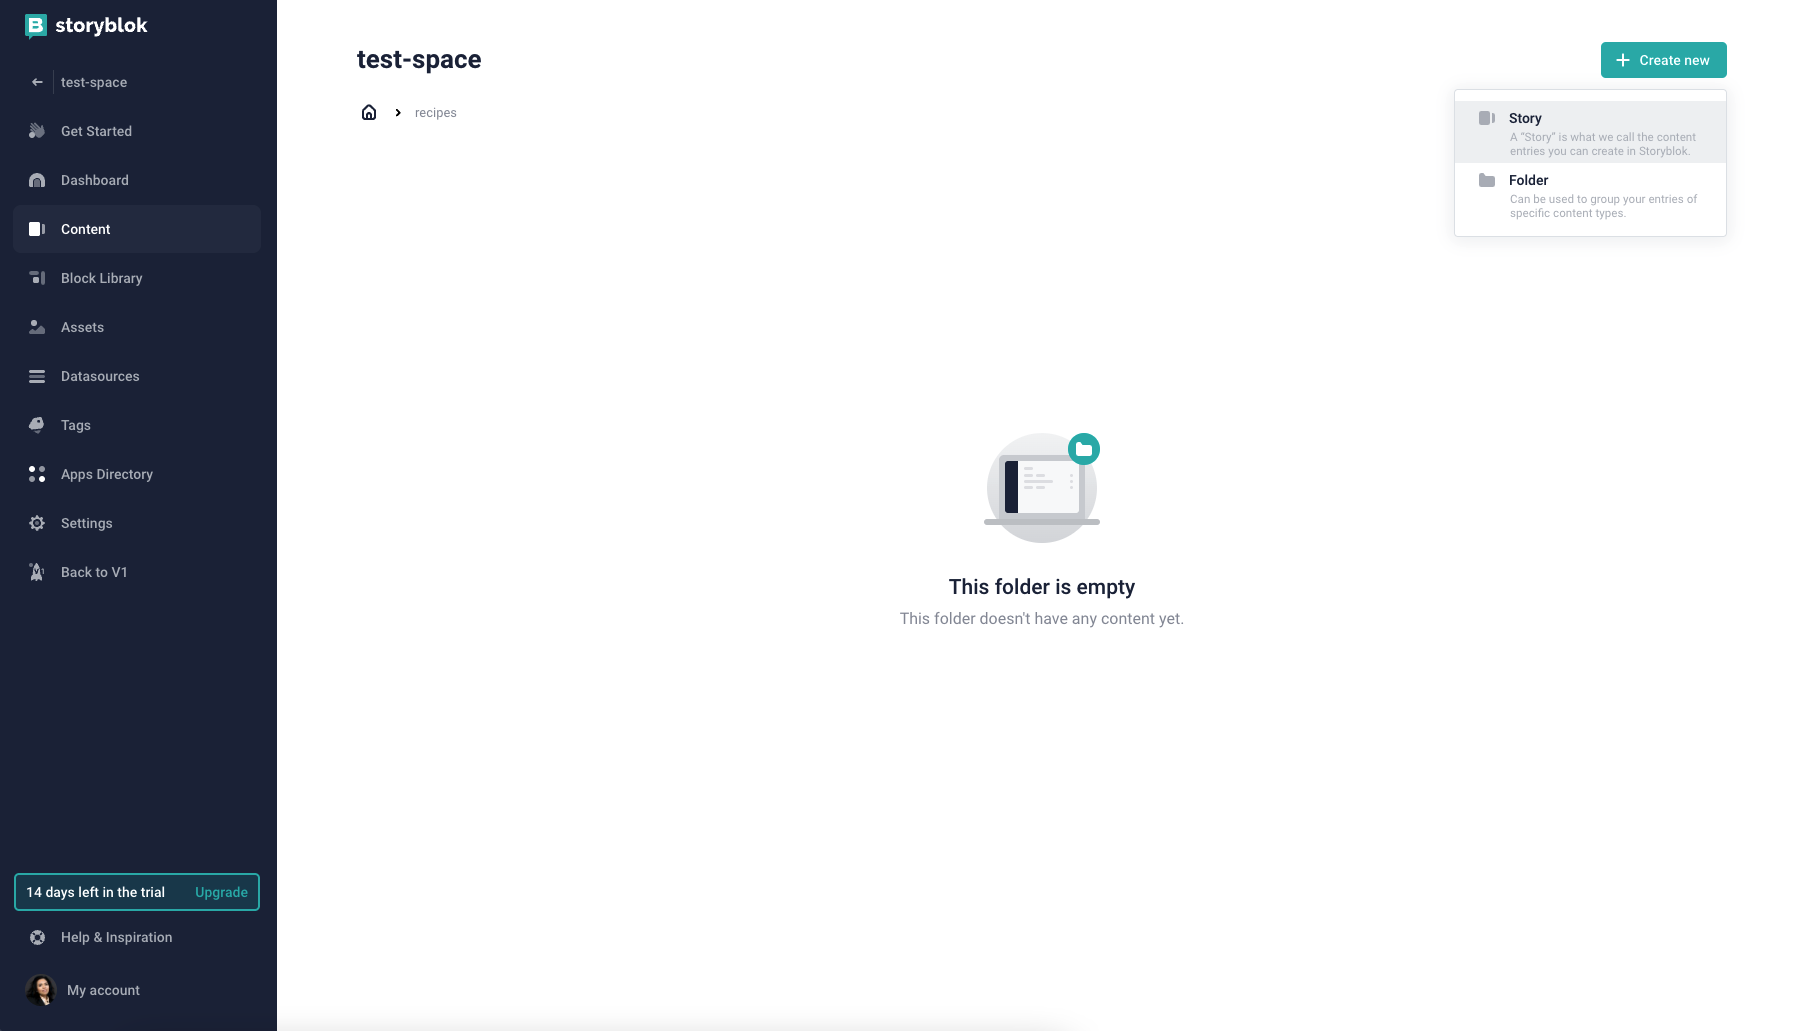
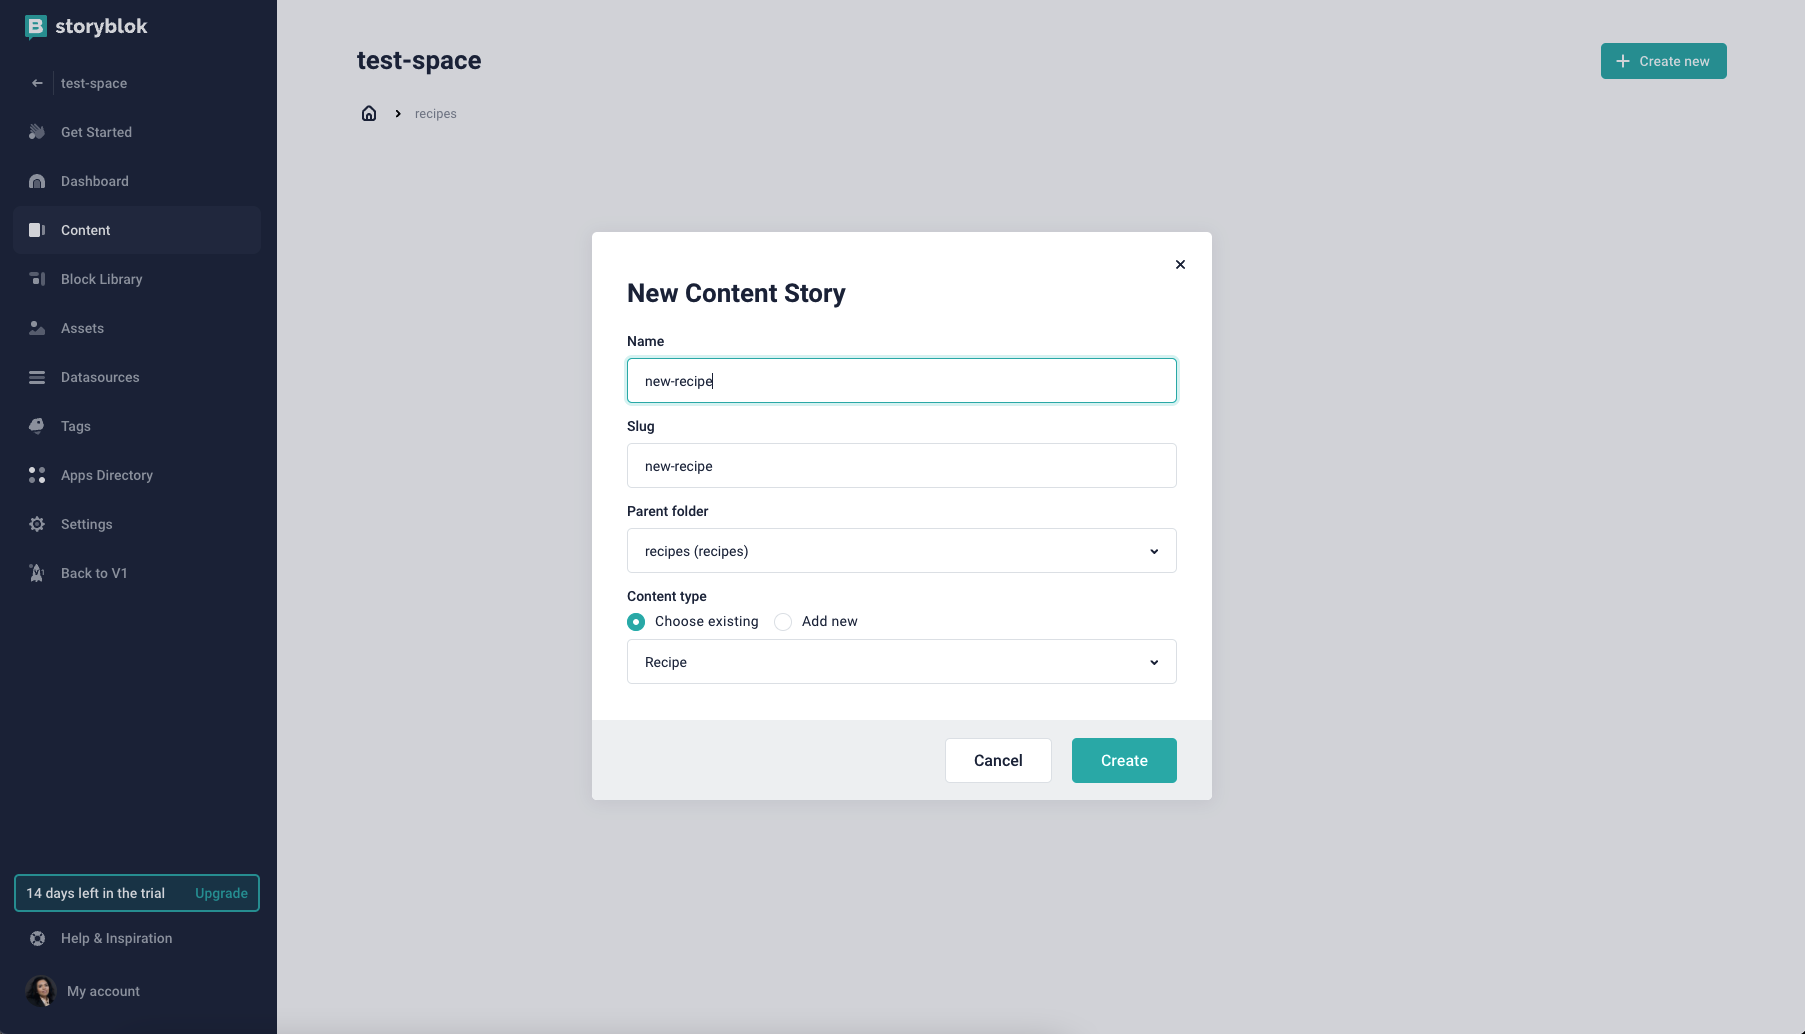
Here, we will create the individual recipe pages by clicking {1} + Create new, and selecting {2} Story.
Then, we will fill in the information needed {1} (name of recipe) and {2}choosing the content type, which is Recipe. When you're finished, click {3} Create.
Configuring Settings
It’s almost time to deploy our recipe book! Just a few more things to do before we do.
Local Environment
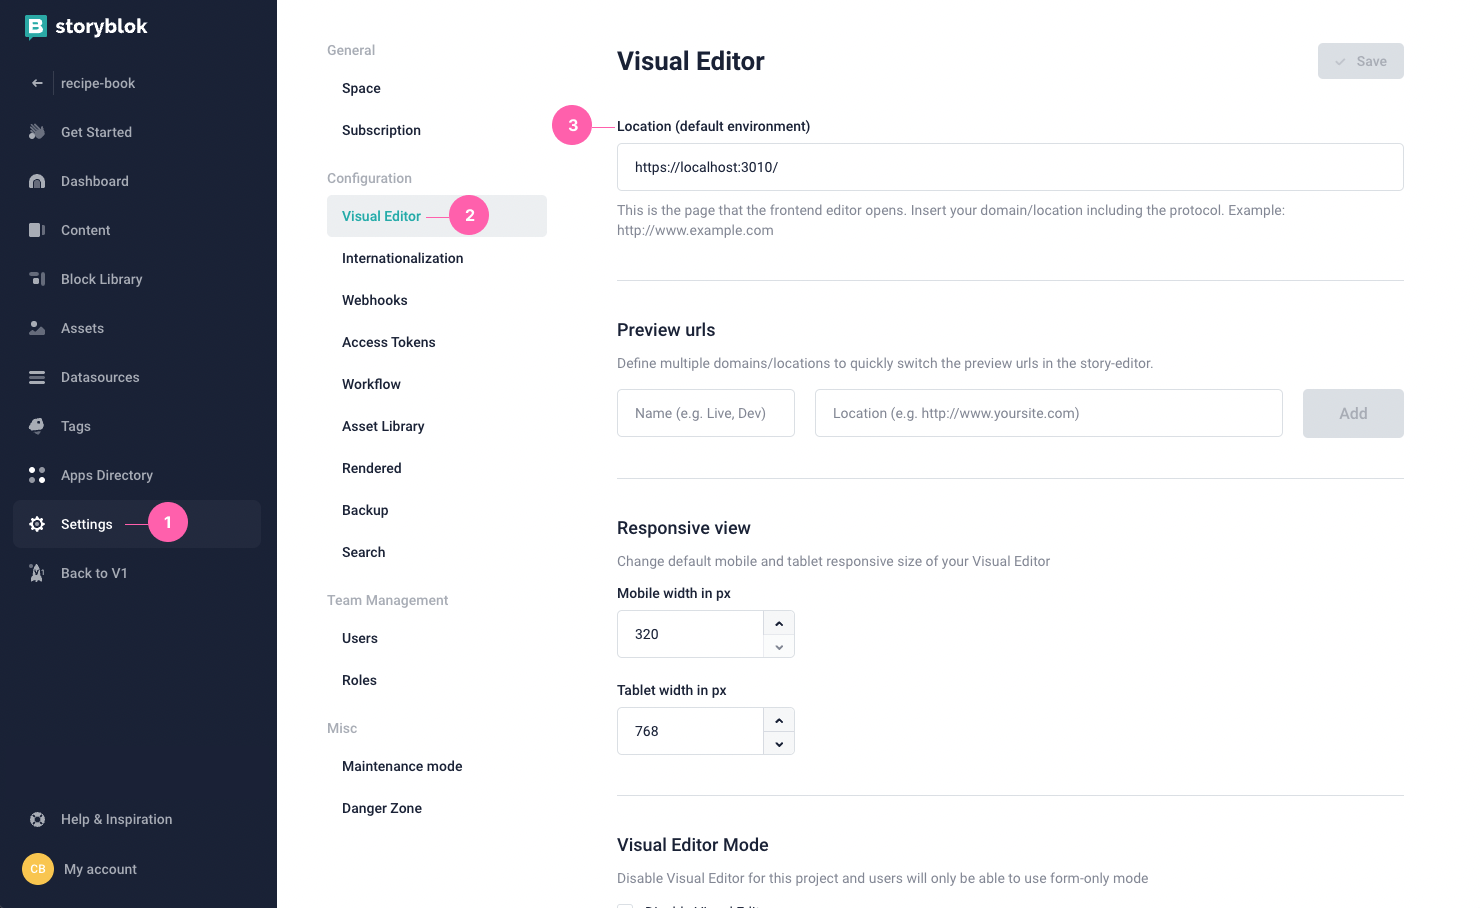
In {1} Settings under the {2} Visual Editor tab, set the {3} Location (default environment) to https://localhost:3010/ (opens in a new window)
Now, you should be able to see your project come to life!
Remember to click {1} Save and {2} Publish on the top-right corner of the page.
Deployment
Make sure to push this project to its GitHub repo!
Go to Vercel (opens in a new window), import your repo, watch it build, and deploy!
Congratulations! We have successfully built a recipe book using Storyblok, Next.js, and Vercel!
Let us know if you have any questions or comments, or even share your own results in the comments. Thanks for reading!
Sources
| Title | URL |
|---|---|
| Stackblitz | https://stackblitz.com/edit/github-ixr5se |
| Next.js Documentation | https://nextjs.org/docs |
| Storyblok Content Delivery API Documentation | https://www.storyblok.com/docs/api/content-delivery |
| Vercel | https://vercel.com |
