Create and Render Blog Articles in Storyblok and Gatsby.js
Storyblok is the first headless CMS that works for developers & marketers alike.
If you'd like to build a multilanguage website with Gatsby, please follow this tutorial instead. If you'd like to build a website without internationalization logic, please keep following the rest of this article and the Ultimate Tutorial articles.
In this tutorial, we will see how to add and render blog articles to our website. We will also add an Article Teaser component to show all the articles on the blog article overview page along with popular articles in the home story. While building this, we will also take a look at what the resolve_relations parameter of the Content Delivery API is, and how we can resolve relations in Storyblok.
If you’re in a hurry, have a look at our Ultimate Tutorial GitHub repo part 5 branch!
Requirements
This is a part of the Ultimate Tutorial Guide for Gatsby.js. (opens in a new window) You can find the previous part of the series here (opens in a new window), which shows how to create custom components in Storyblok and Gatsby.js. We recommend you that tutorial before starting this one.
We will be using the code from the previous tutorial here as a starting point. You can find it here.
Adding a Blog folder
Let's create a Blog folder, which will be used to store all the articles and an overview of all of them.
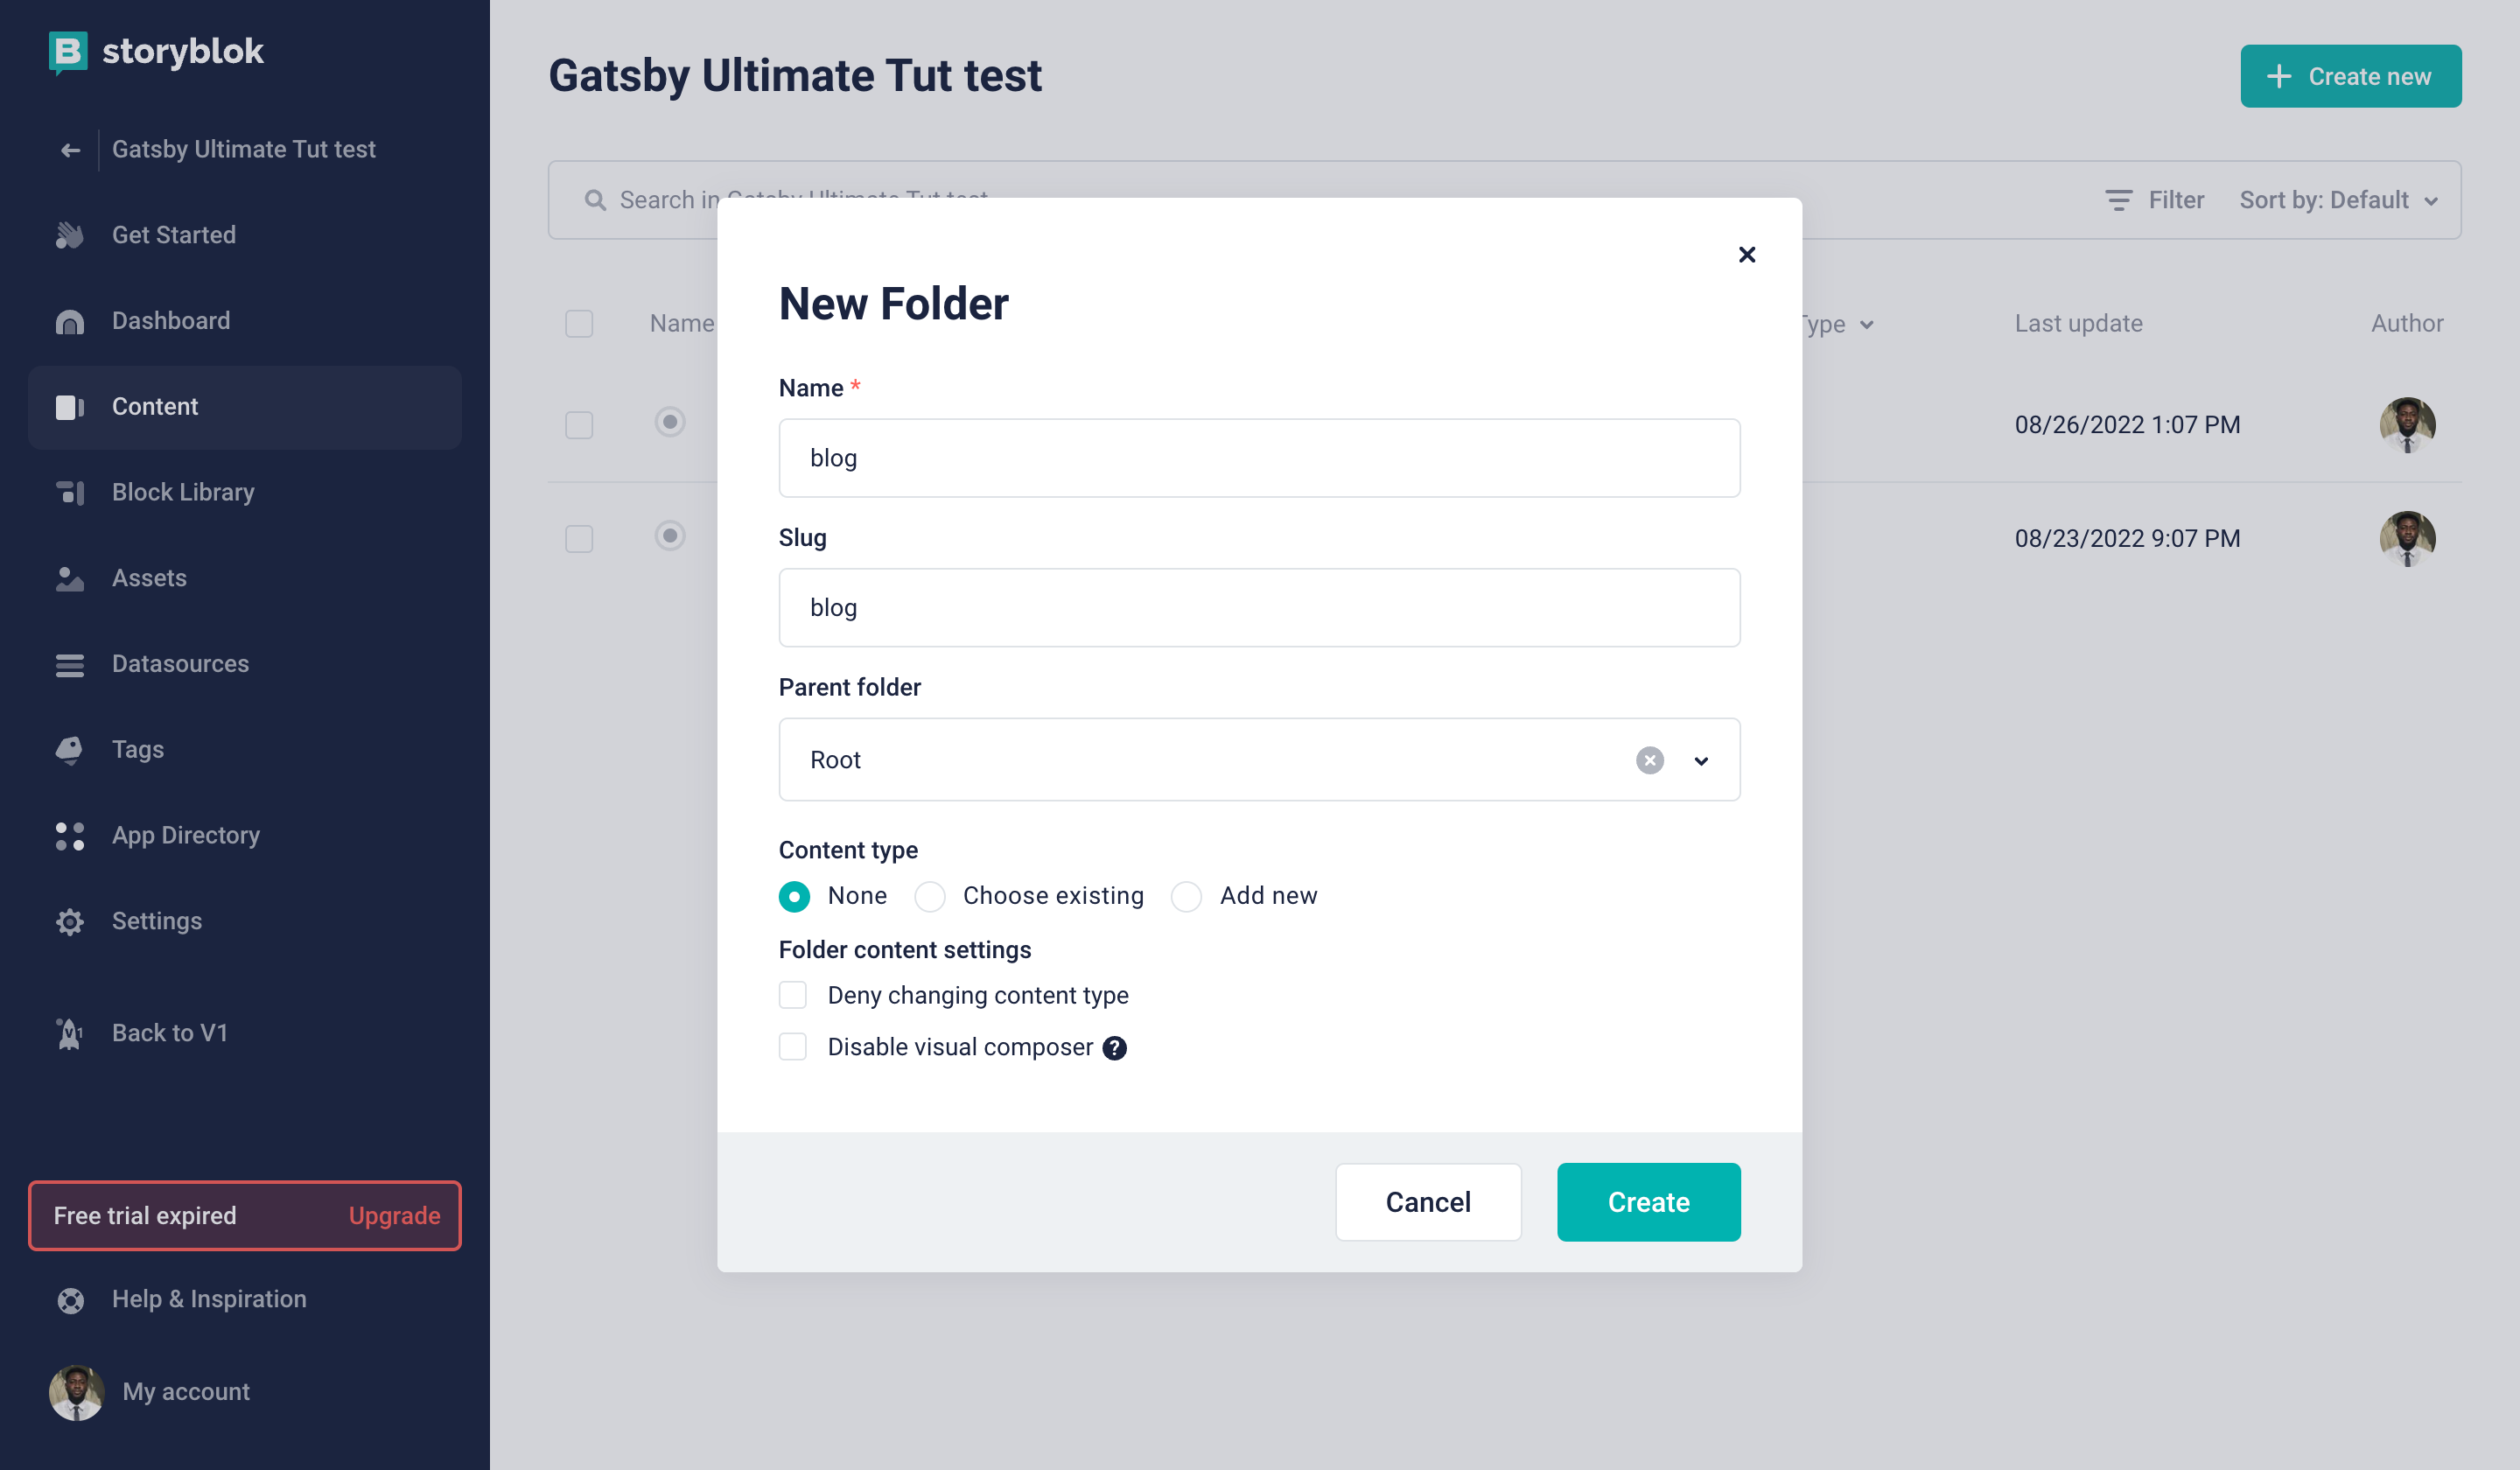
Adding Blog Folder
We already have a Blog page, let's move it inside the newly created folder and change the name to Home. This will be our overview page for blog articles, and we will display teaser cards for all the blog articles. Let's change the body and remove the Teaser component which is already there.
In the Content section, you will see a checkbox along with all the stories. You can click on the checkbox for Blog story and you will see the option to move it just below the search bar. Click on move, open the Blog Article folder and move it there.
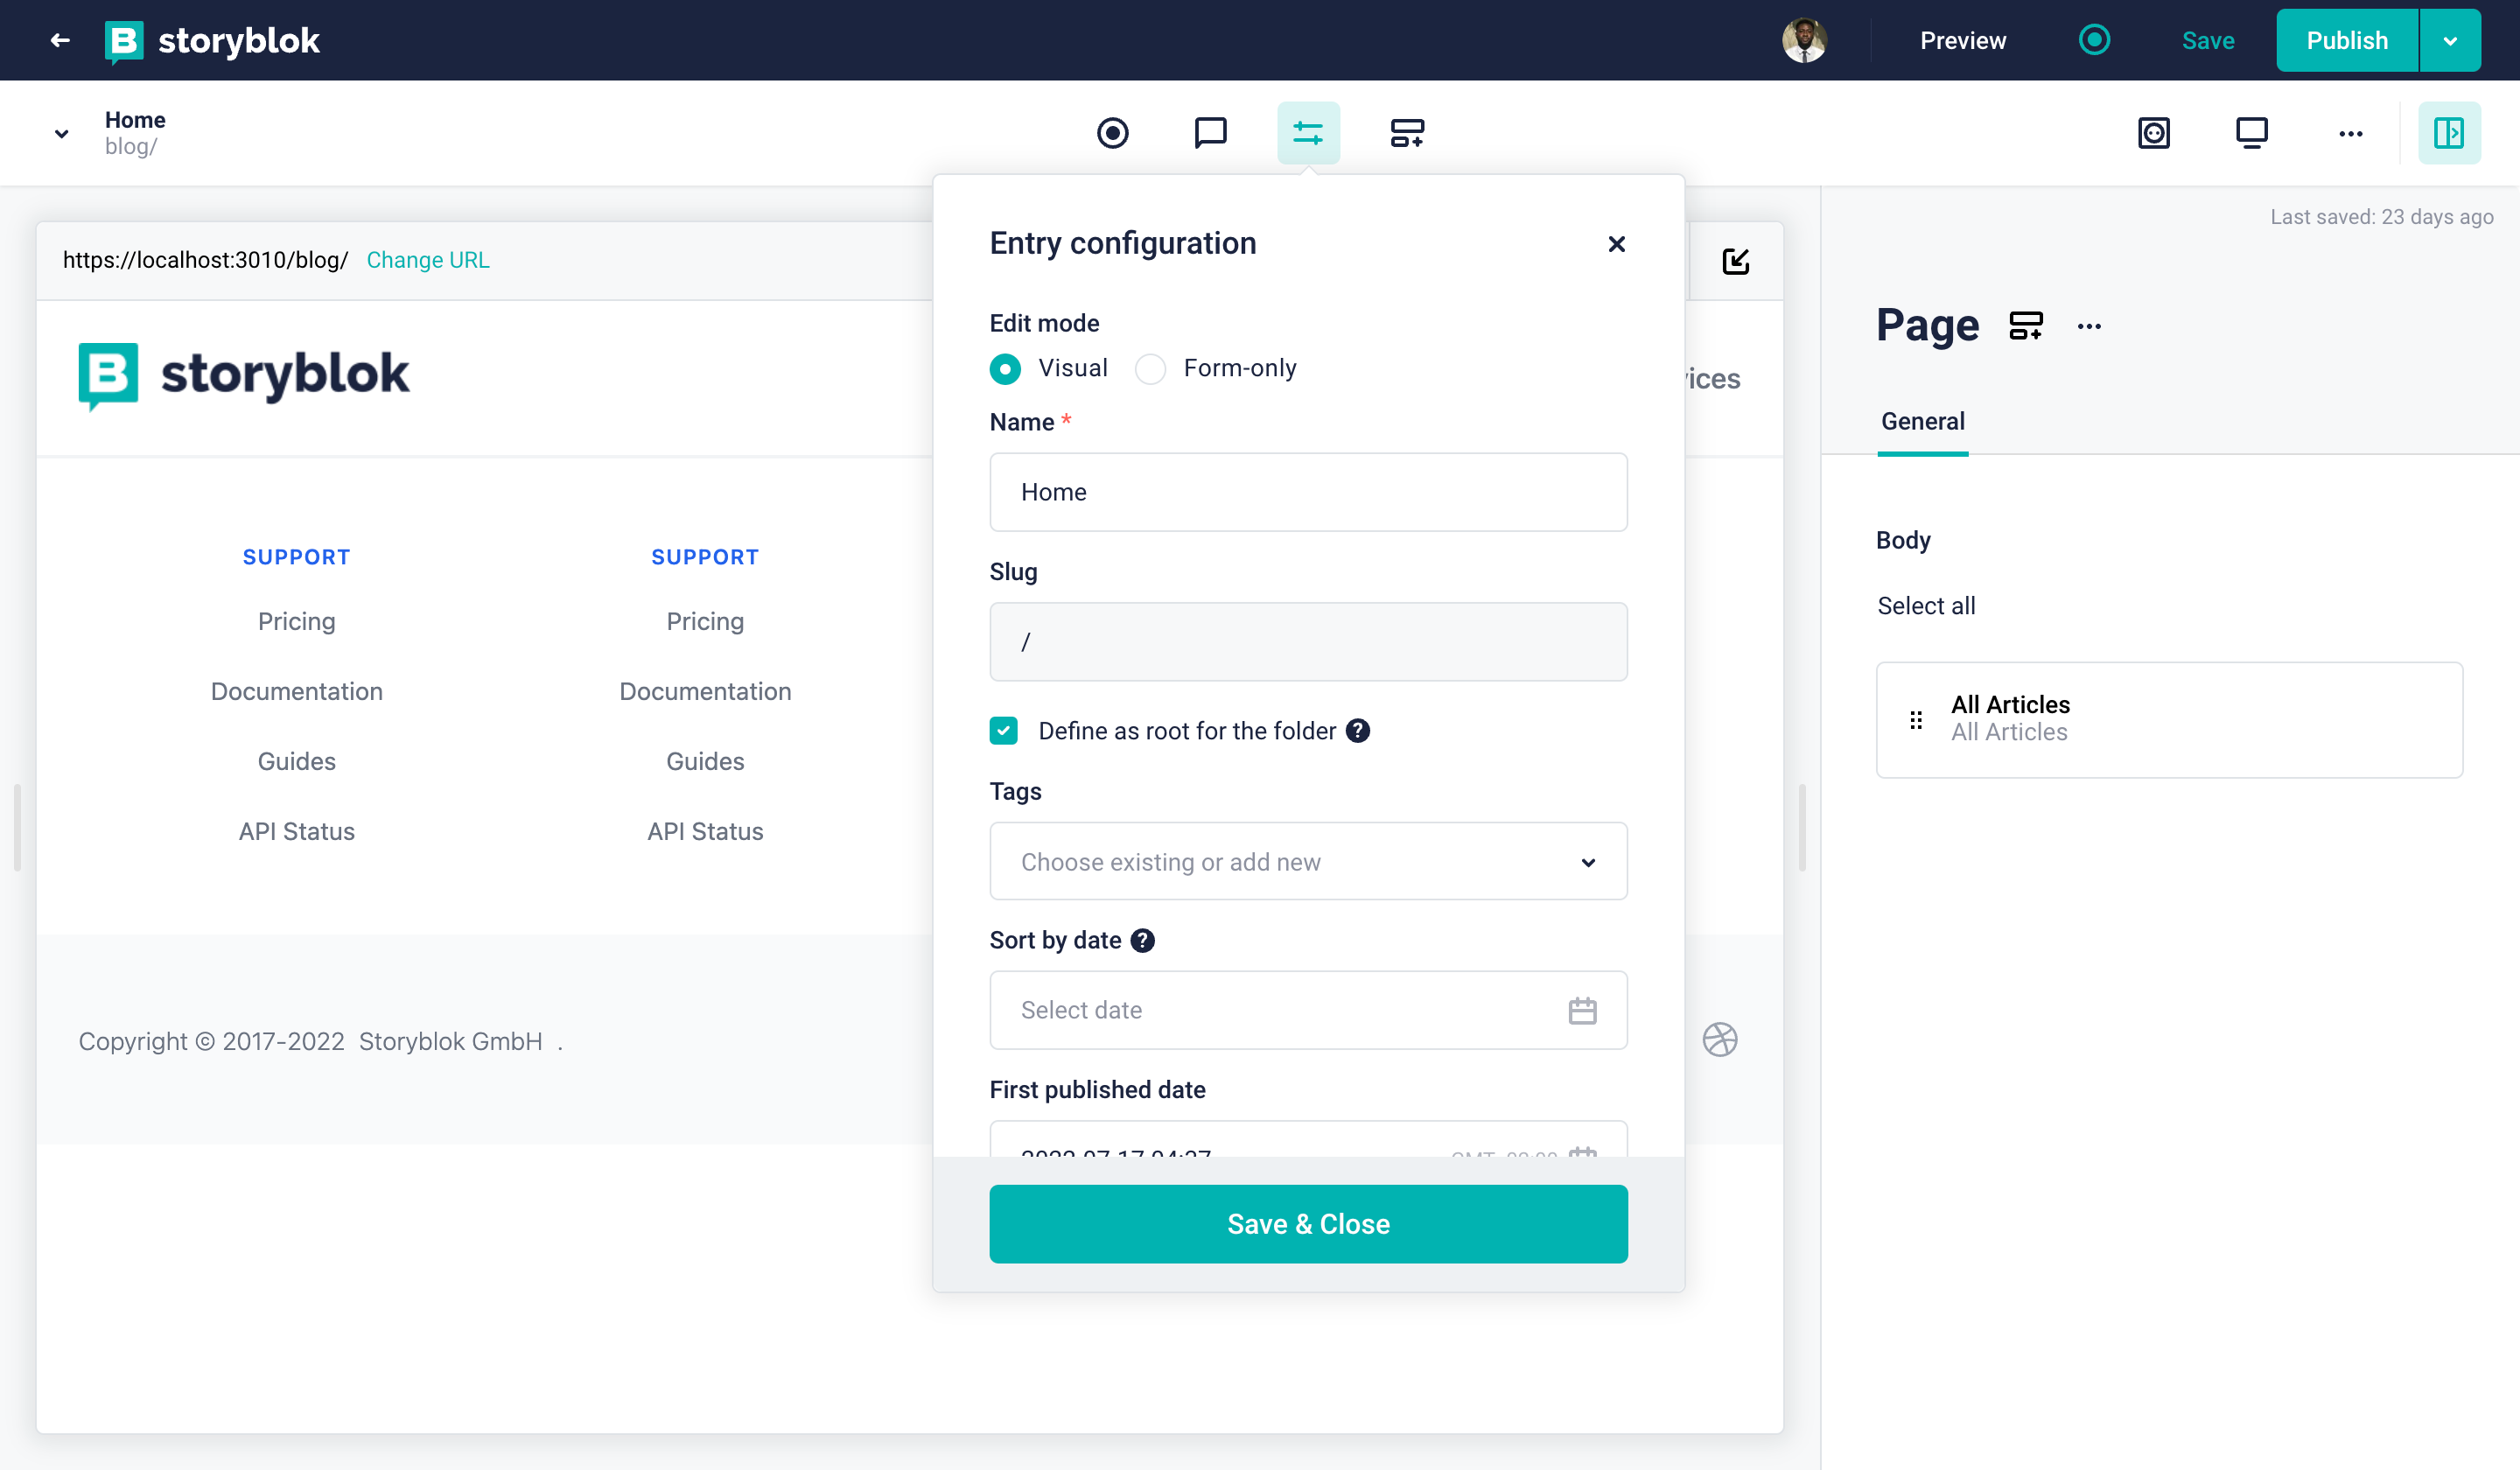
As this is the home story for the folder, let's go to the Entry configuration {1} and check the box that says Define as root for the folder. This will automatically change the slug to / and you will also see a home icon in the blog articles folder on the Home story.
Creating a new Content Type Block for the Blog Articles
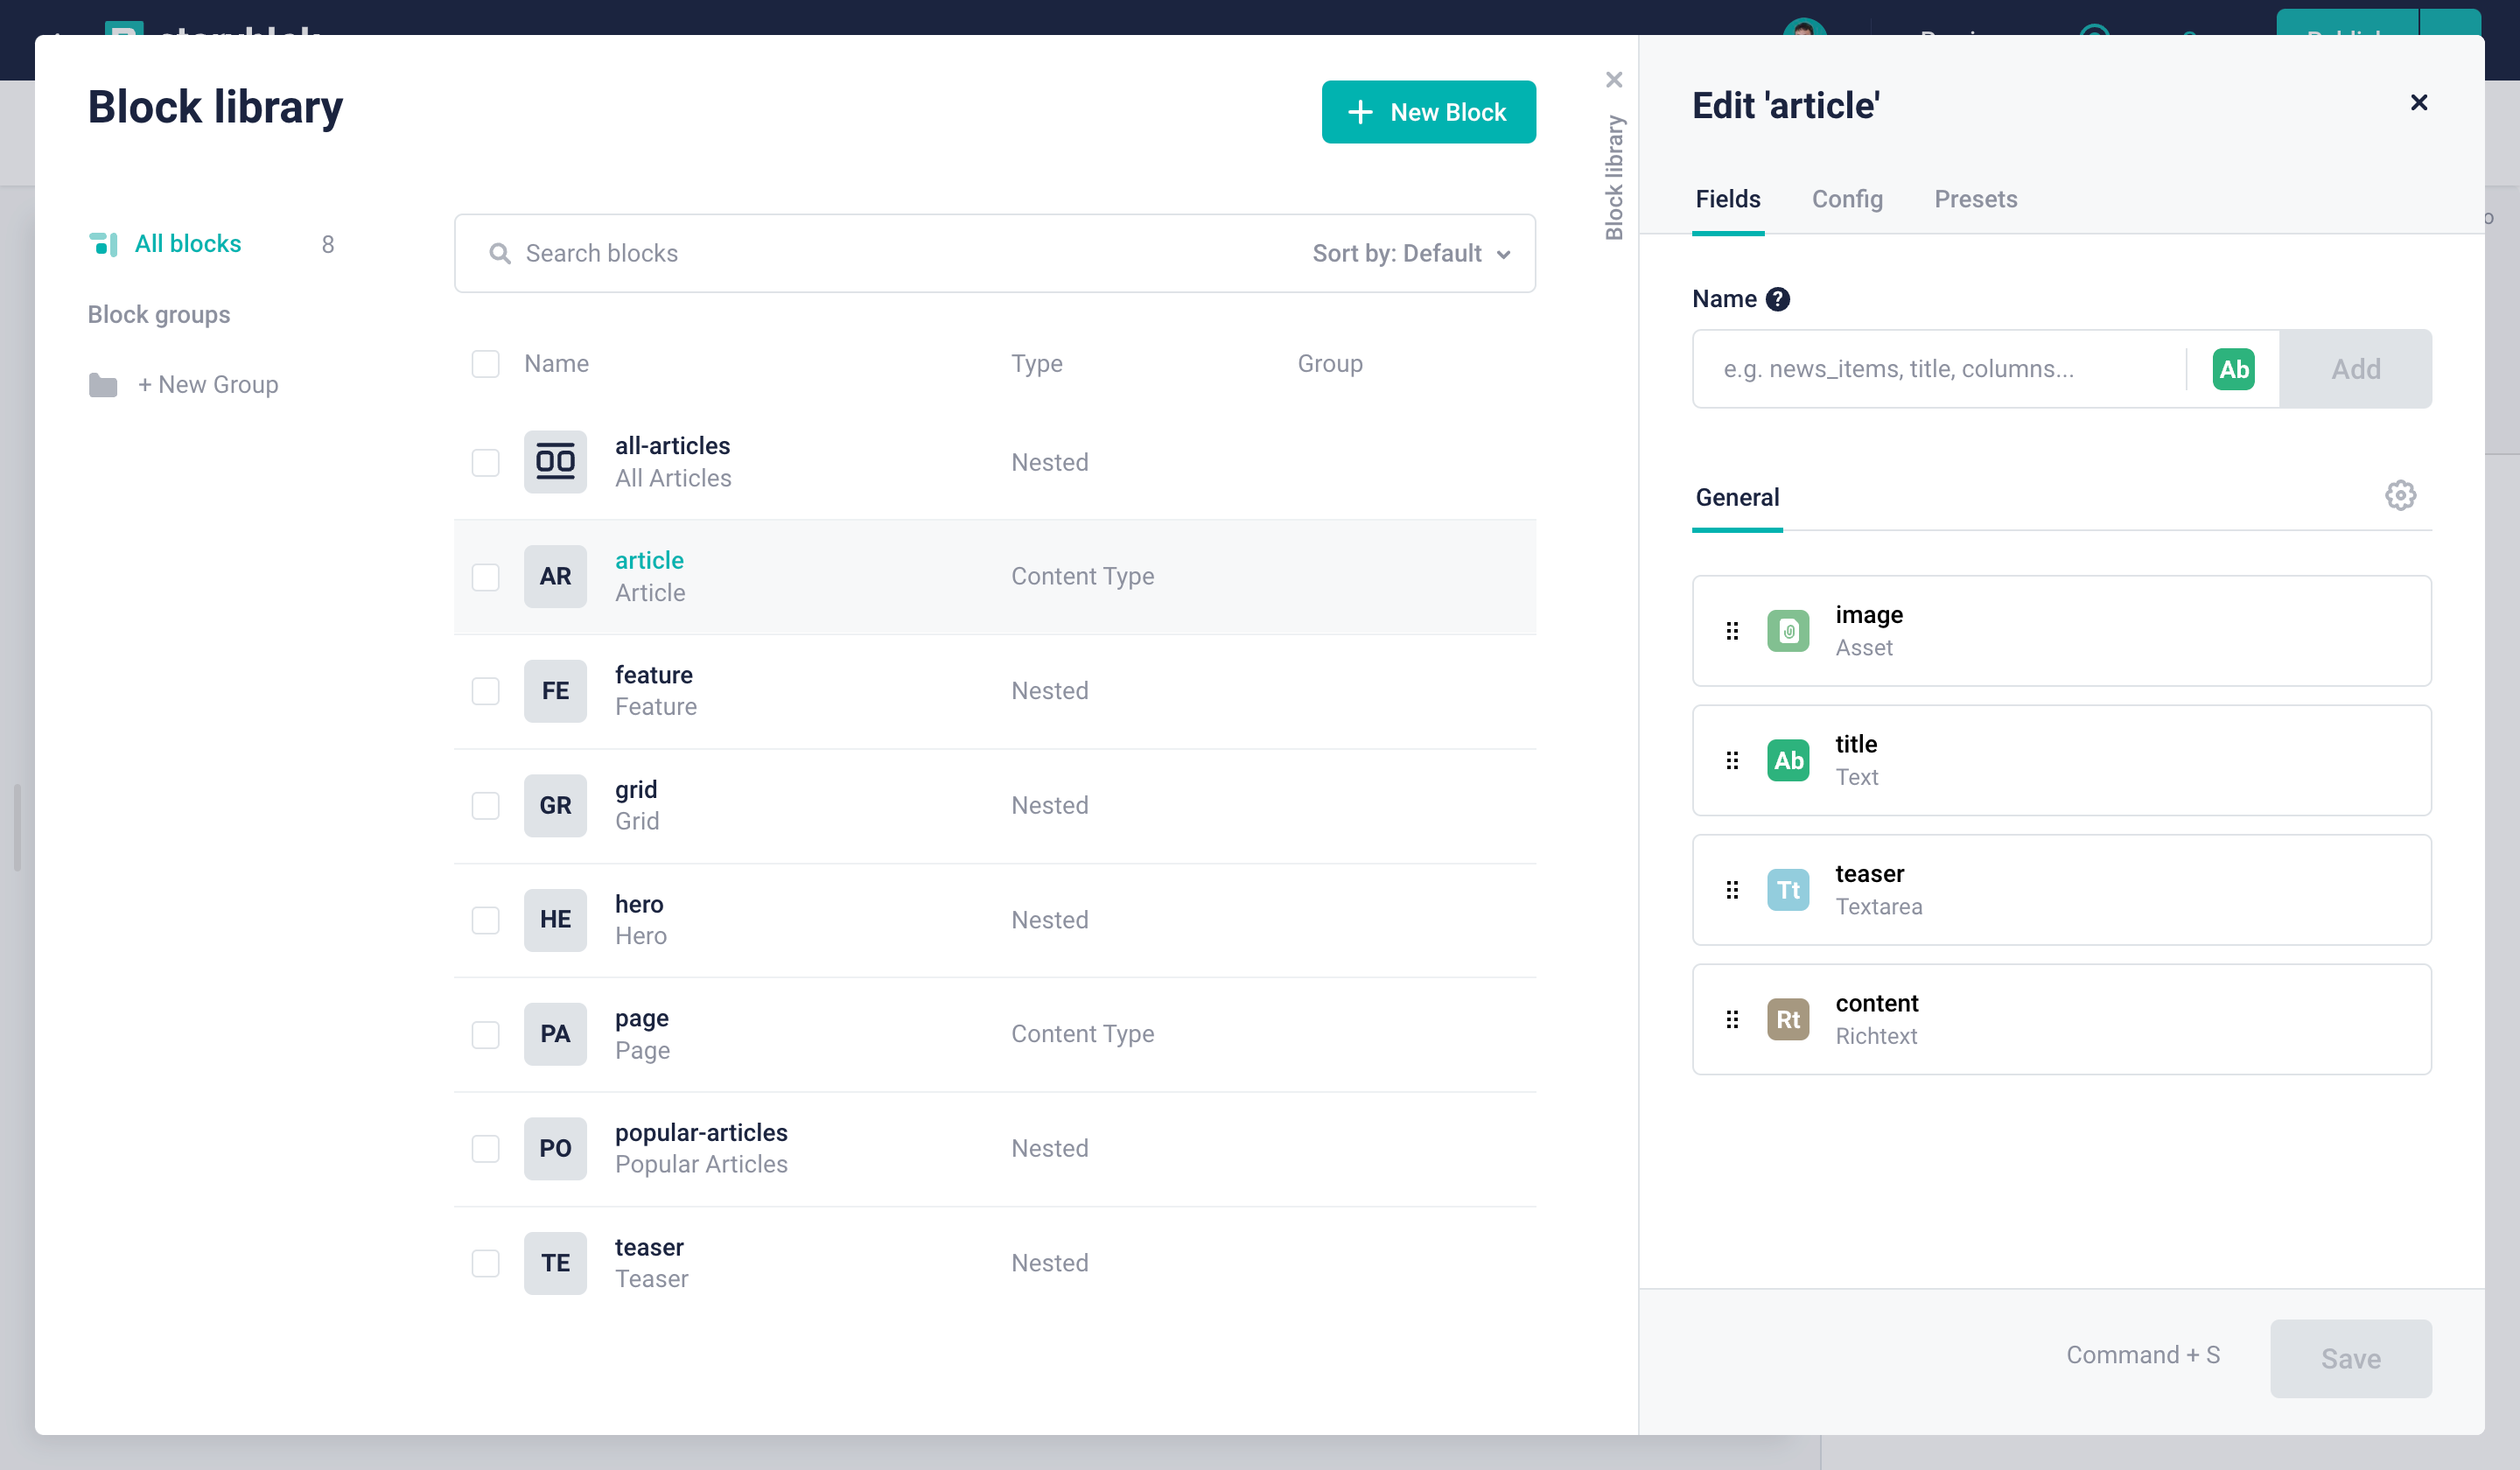
First of all, we need to consider how we would like to manage our blog articles. As of right now, we have just one content type block: the page block for all of our pages. This particular block allows for a lot of flexibility in arranging nested blocks exactly how a content creator might need them in a variety of different use cases. However, when it comes to blog articles, we most likely need less flexibility and more coherency instead. Therefore, we need to consider what a blog article would typically consist of and how that would translate to our selection of Storyblok fields. Let’s go for the following fields:
image: field type Asset {1}title: field type Text {2}teaser: field type Textarea {3}content: field type Richtext {4}
Alright, so let’s create our new content type block - let’s call it article:
Creating a new article content block type
We will come back to this story for adding all the blog teasers, let's add individual blogs first.
Adding Blog Articles
Let's now add a block named Article which will be a Content type block. We will use it for Blog Articles. It should have to following fields :
1. title of type text.
2. subtitle of type text.
3. content of type Richtext.
4. image of type asset (image) : similar to the way we added in the previous tutorial (opens in a new window).
We now need to add the same in our frontend as well. Create a new file named article.js in the components folder and add the following code to it.
import { renderRichText } from "gatsby-source-storyblok";


const Article = ({ blok }) => {
  return (
    <section className="text-gray-600 body-font">
      <div className="container mx-auto flex px-5 py-24 items-center justify-center flex-col">
        <img
          className="  md:h-96 w-full mb-10 object-cover object-center rounded"
          alt={blok.image.alt}
          src={blok.image.filename}
        />
        <div className="text-center lg:w-2/3 w-full">
          <h1 className="title-font sm:text-4xl text-3xl mb-4 font-medium text-gray-900">
            {blok.title}
          </h1>
          <h1 className="title-font sm:text-3xl text-2xl mb-4 font-medium text-gray-600">
            {blok.subtitle}
          </h1>
          <div className="mb-8 leading-relaxed text-justify">{renderRichText(blok.content)}</div>
        </div>
      </div>
    </section>
  );
};
export default Article;
You will also see that we use an API here named renderRichText. This is because we have a richtext field (content) in a blog article (Article Component). We use this API to render the rich text we are getting in the content field from Storyblok.
You will also need to import and add this component to the components list in layout.js
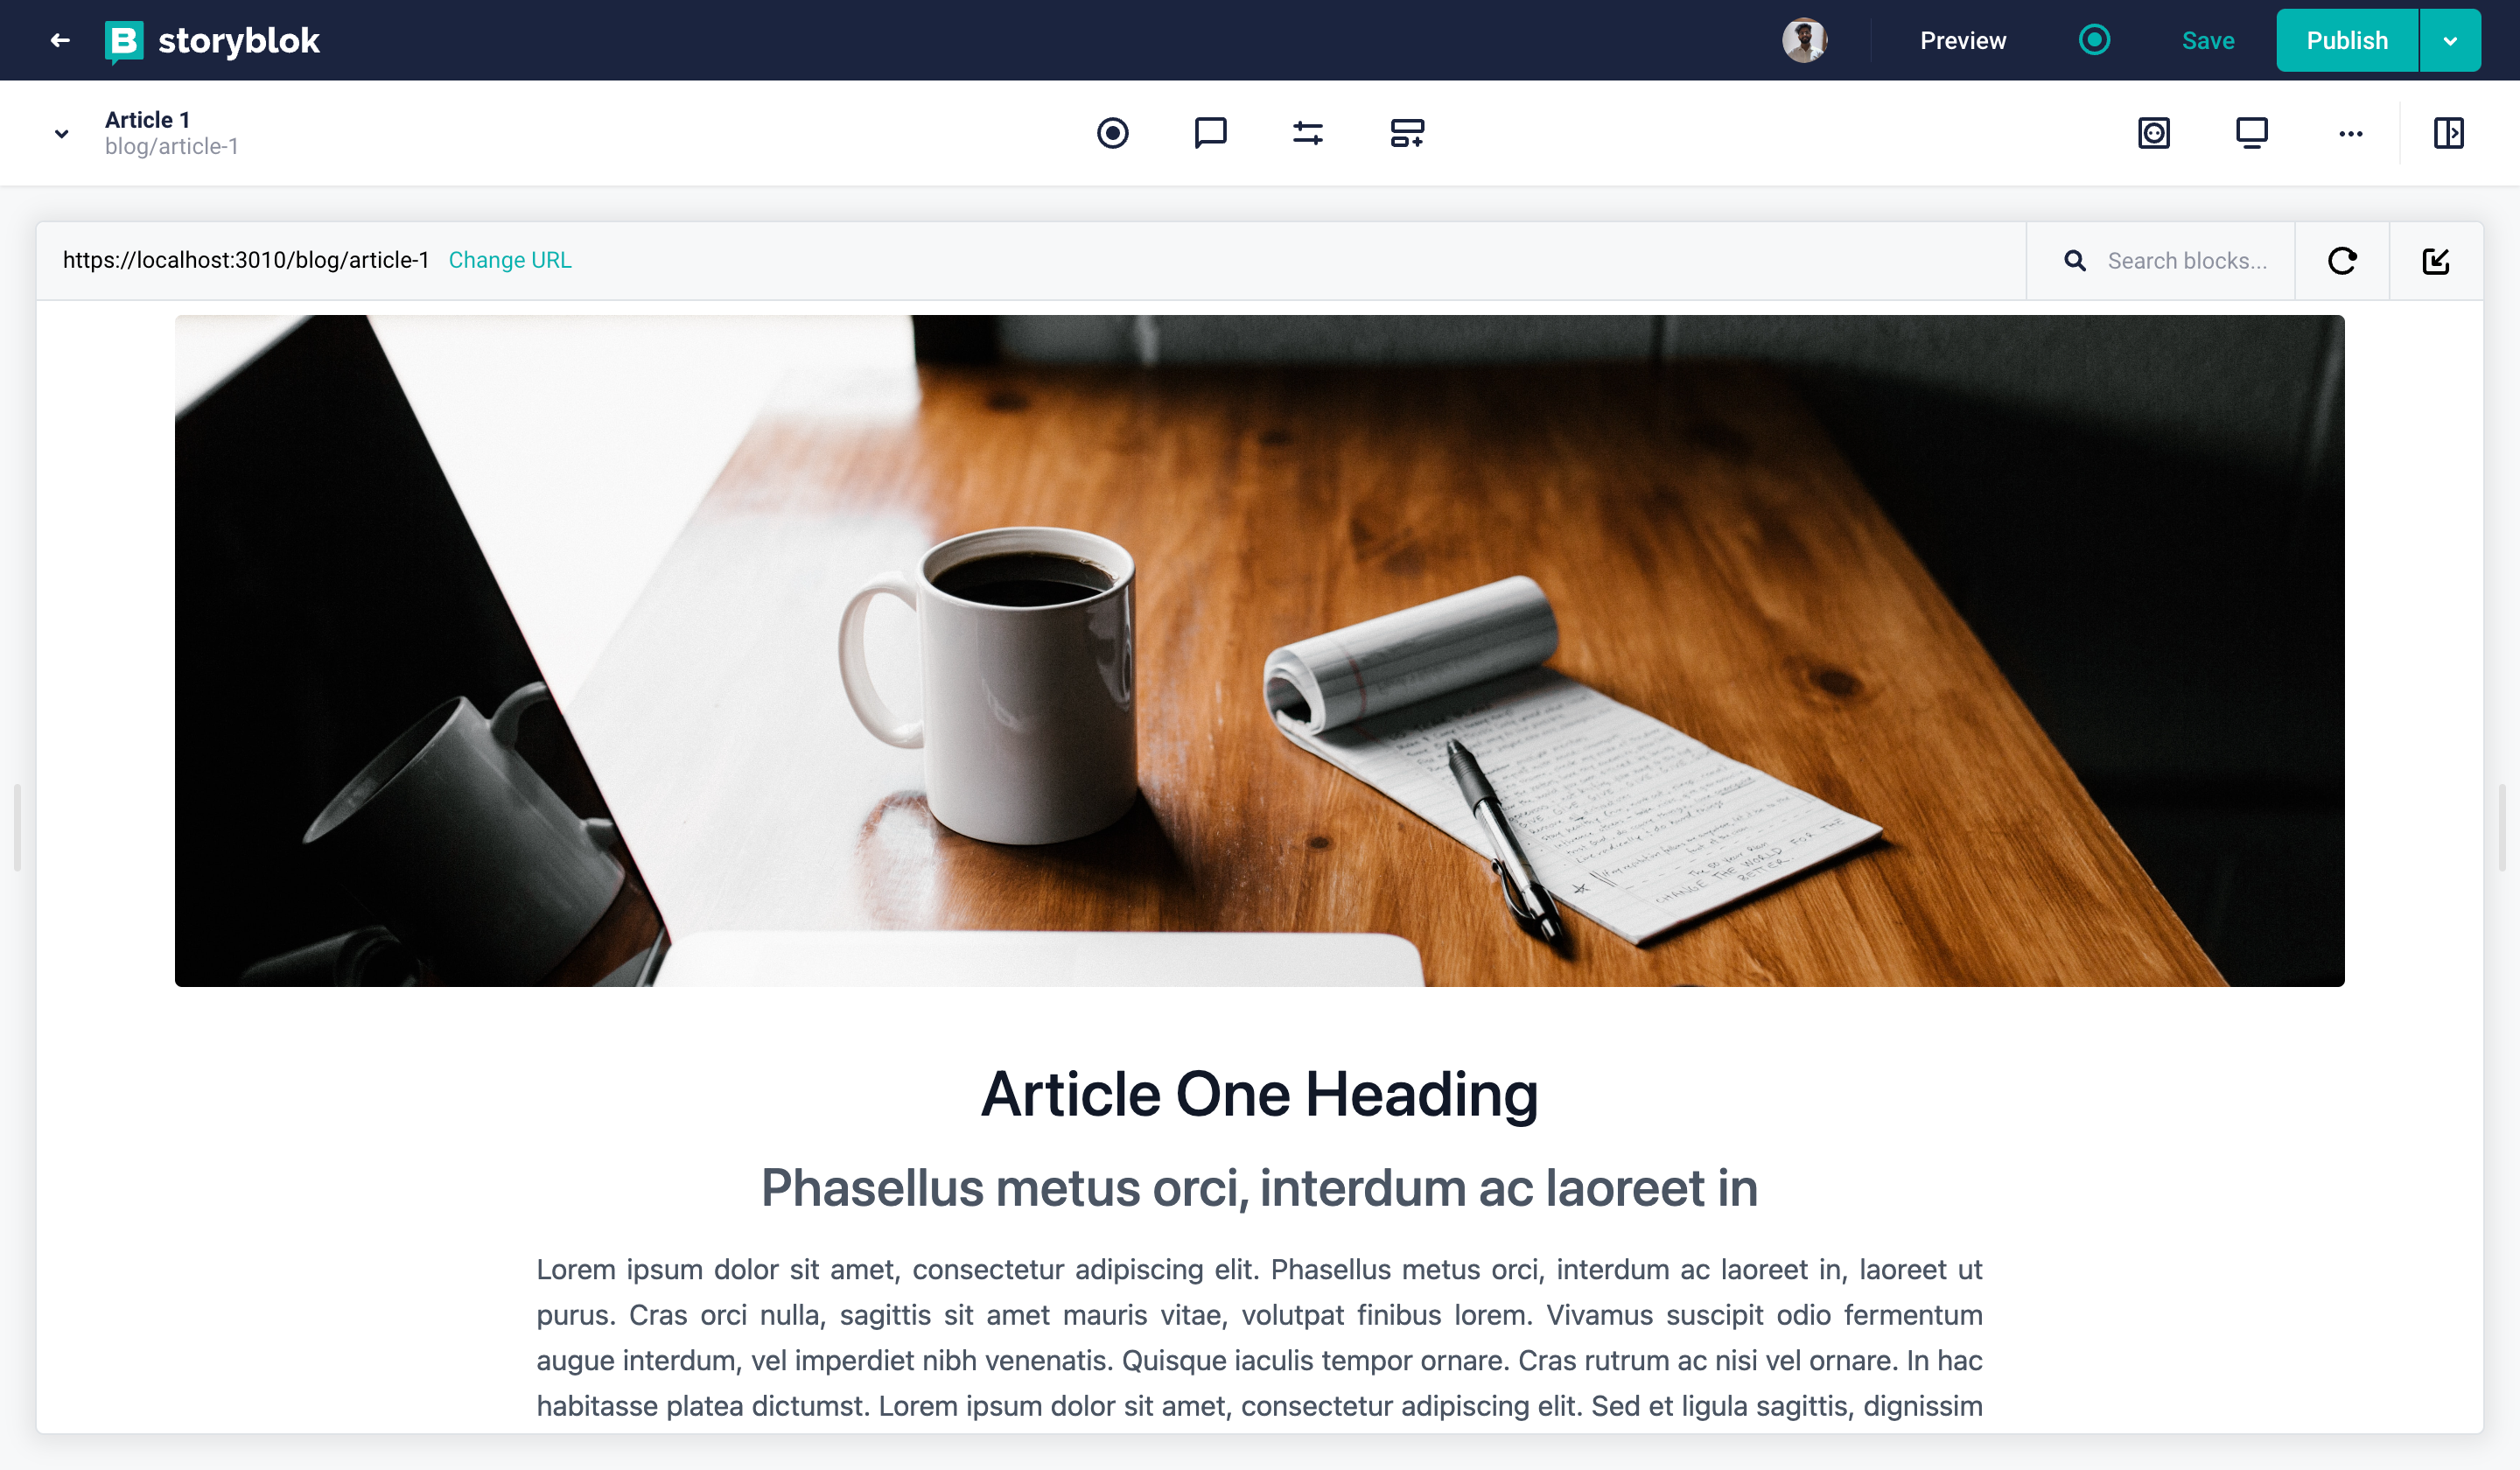
Now, let's create a few blog articles with this inside the blog folder. While creating a blog story, make sure to select the content type as Article {1}.
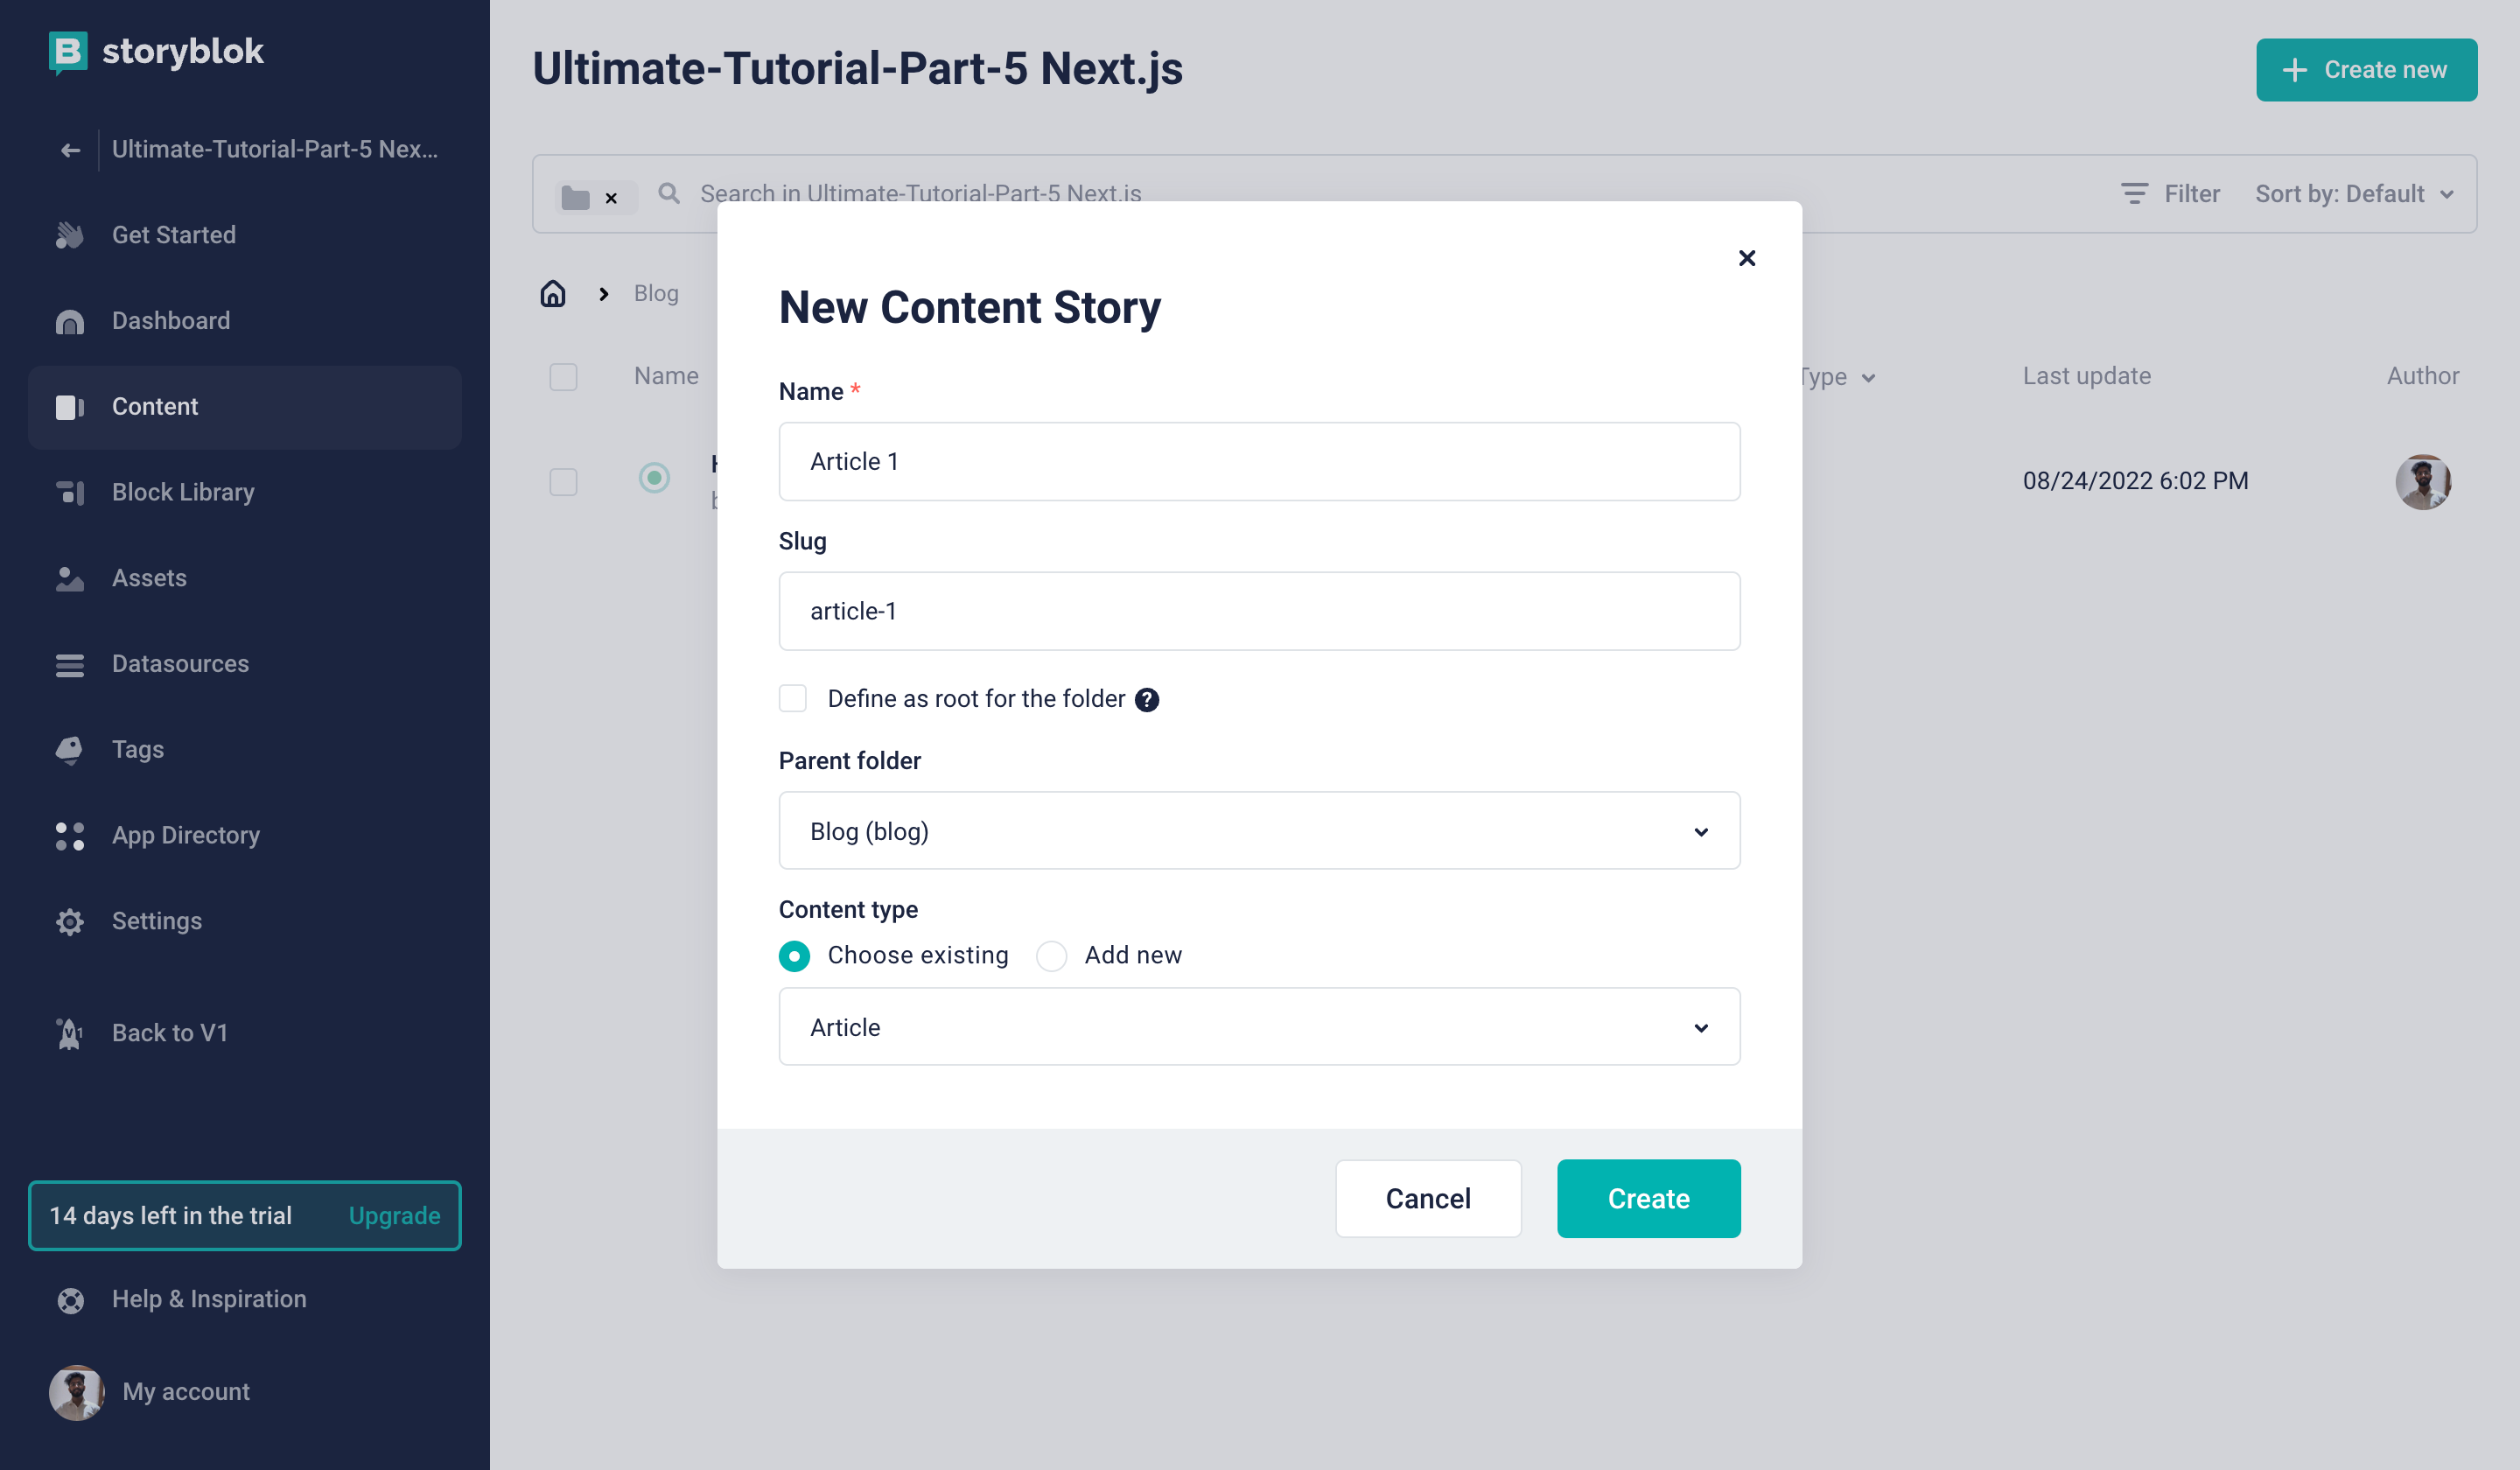
Create New Blog Article
You can add any data to the fields you'd like, the blog stories should look something like this.
Blog Article
As we will need to show the popular articles on the home story as well as all articles at the blog home, we recommend you create more than 4 blog articles.
Displaying Article Teasers
Now, let's take a look at how to show all the article teasers on the Blog Home story. Each blog teaser will be styled as a card to show the details about the blog article along with a link to it.
Create a new component in the components folder named ArticleTeaser. Add the following code to the articleTeaser.js file
const ArticleTeaser = ({ article, slug }) => {
  return (
    <div className="column feature">
      <div className="p-6">
        <img
          className="object-cover object-center w-full mb-8 lg:h-48 md:h-36 rounded-xl"
          src={article.image.filename}
          alt="blog"
        />
        <h1 className="mx-auto mb-8 text-2xl font-semibold leading-none tracking-tighter text-neutral-600 lg:text-3xl">
          {article.title}
        </h1>
        <div className="mx-auto text-base leading-relaxed text-gray-500 line-clamp-2">
          {article.subtitle}
        </div>
        <div className="mt-4">
          <a
            href={`/blog/${article.slug || slug}`}
            className="inline-flex items-center mt-4 font-semibold text-blue-600 lg:mb-0 hover:text-neutral-600"
            title="read more"
          >
            Read More »
          </a>
        </div>
      </div>
    </div >
  )
};
export default ArticleTeaser;We have used Tailwind's line clamp plugin to truncate the number of lines for blog descriptions. You can find more about the plugin here.
This teaser component will just be in our front-end, as we will pass the blog article data as props. Now, let's create an all-articles block (Nested block) in Storyblok with only one field named title of type text. We will now add this to the home story inside the blog folder. You can add any title you'd like for the block.
To make this work, let's now create a new component in our Gatsby.js project.
Add the following to the allArticles.js file :
import ArticleTeaser from "./articleTeaser";
import { storyblokEditable } from "gatsby-source-storyblok";
import { useStaticQuery, graphql } from "gatsby"
import { useState, useEffect } from "react";

const AllArticles = ({ blok }) => {
  const data = useStaticQuery(graphql`
    {
      posts: allStoryblokEntry(
        filter: {field_component: {eq: "article"}}
      ) {
        edges {
          node {
            id
            uuid
            name
            slug
            full_slug
            content
            created_at
          }
        }
      }
    }
  `)

  const [articles, setArticles] = useState([]);
  useEffect(() => {
    const getArticles = async () => {
      const filteredArticles = data.posts.edges.filter(edge => edge)
      setArticles(() => filteredArticles.map(article => article));
    };
    getArticles();
  }, []);

  return (
    <>
      <p className="text-3xl">{blok.title}</p>
      <div
        className="grid w-full grid-cols-1 gap-6 mx-auto lg:grid-cols-3 lg:px-24 md:px-16"
        {...storyblokEditable(blok)}
      >
        {articles[0] && articles.map(article => {
          return (
            <ArticleTeaser
              article={JSON.parse(article.node.content)}
              key={article.node.uuid}
              slug={article.node.slug}
            />
          )
        }
        )}
      </div>
    </>
  );
};
export default AllArticles;
Here, we are fetching all the stories from the Blog folder and excluding the Home story with the help of filter. We are getting this Home story as well because we are requesting all the data that is inside the folder. Furthermore, we are looping through all the blog articles and rendering the ArticleTeaser component.
Additionally, we are also adding the slug to the content of the blog to use it for the link in ArticleTeaser. Now in our Blog Home, we should see all the article teasers like this.
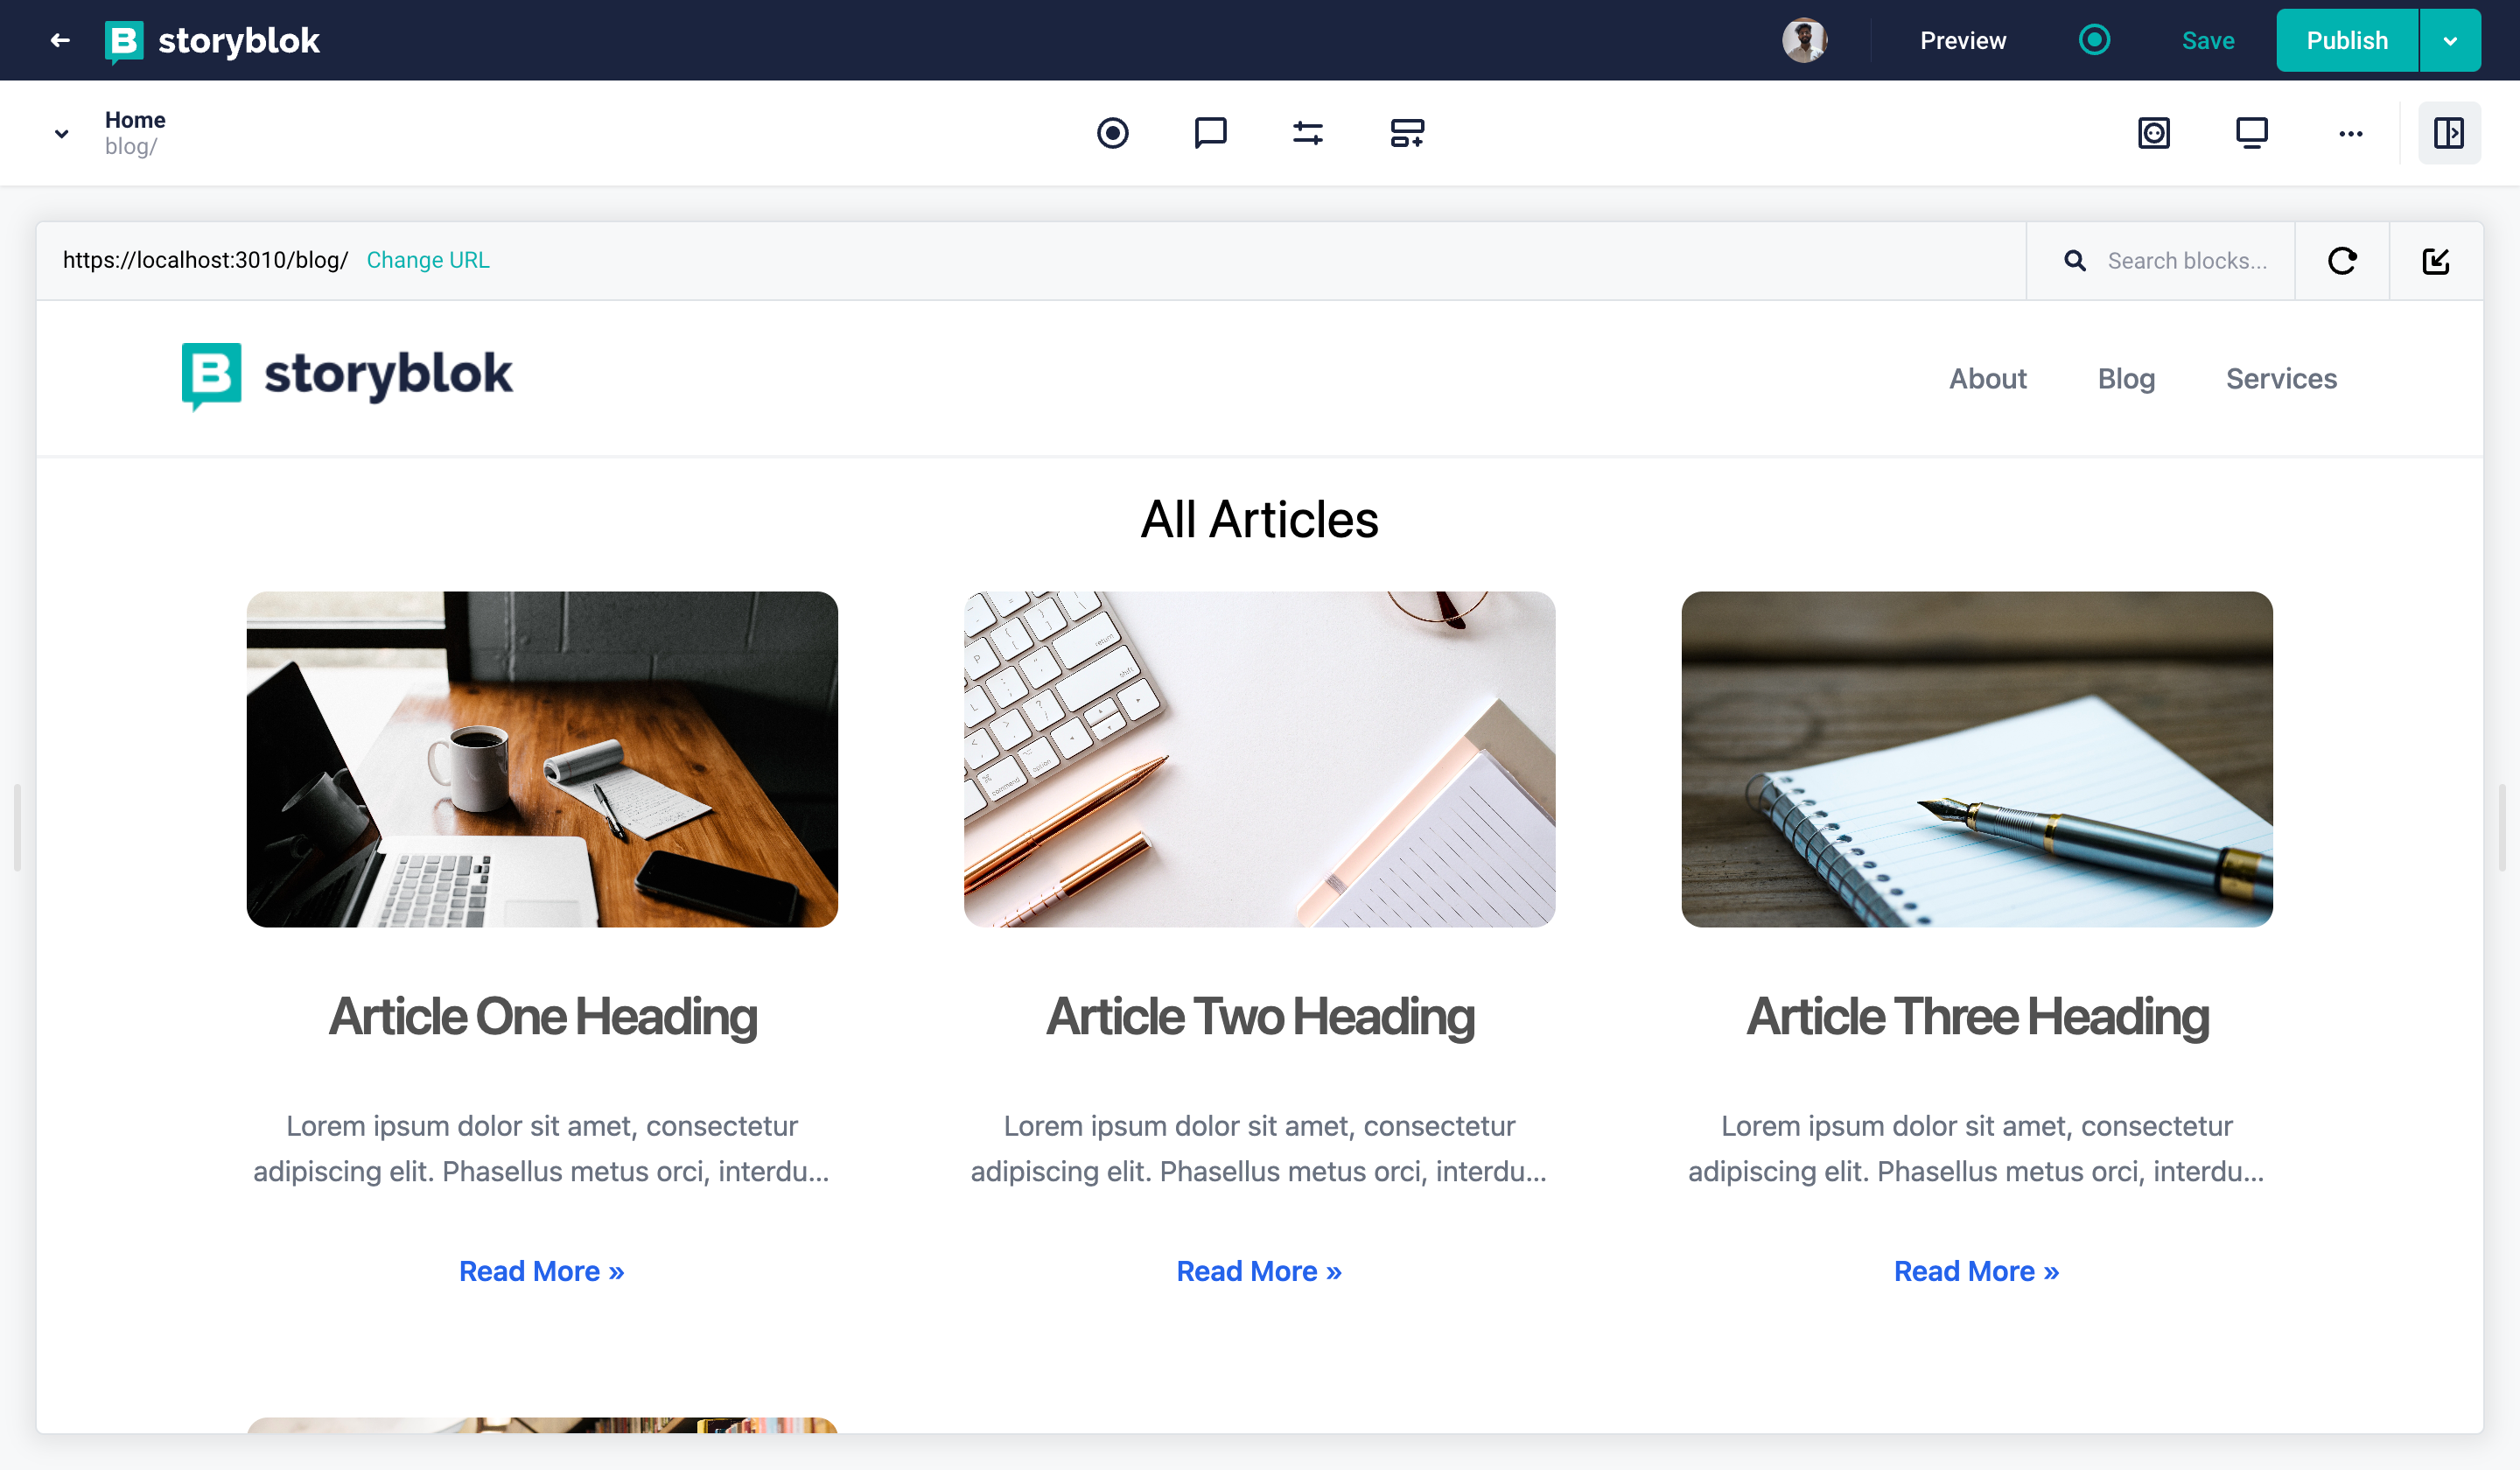
All Articles
Displaying Popular Articles
Let's now see how we can use all the existing blog articles and reference them in the Home story of our space (root folder). For this, we will need to create a new nested block named popular-articles. It will have just one field named articles. This field should be of the type Multi-Options {1}
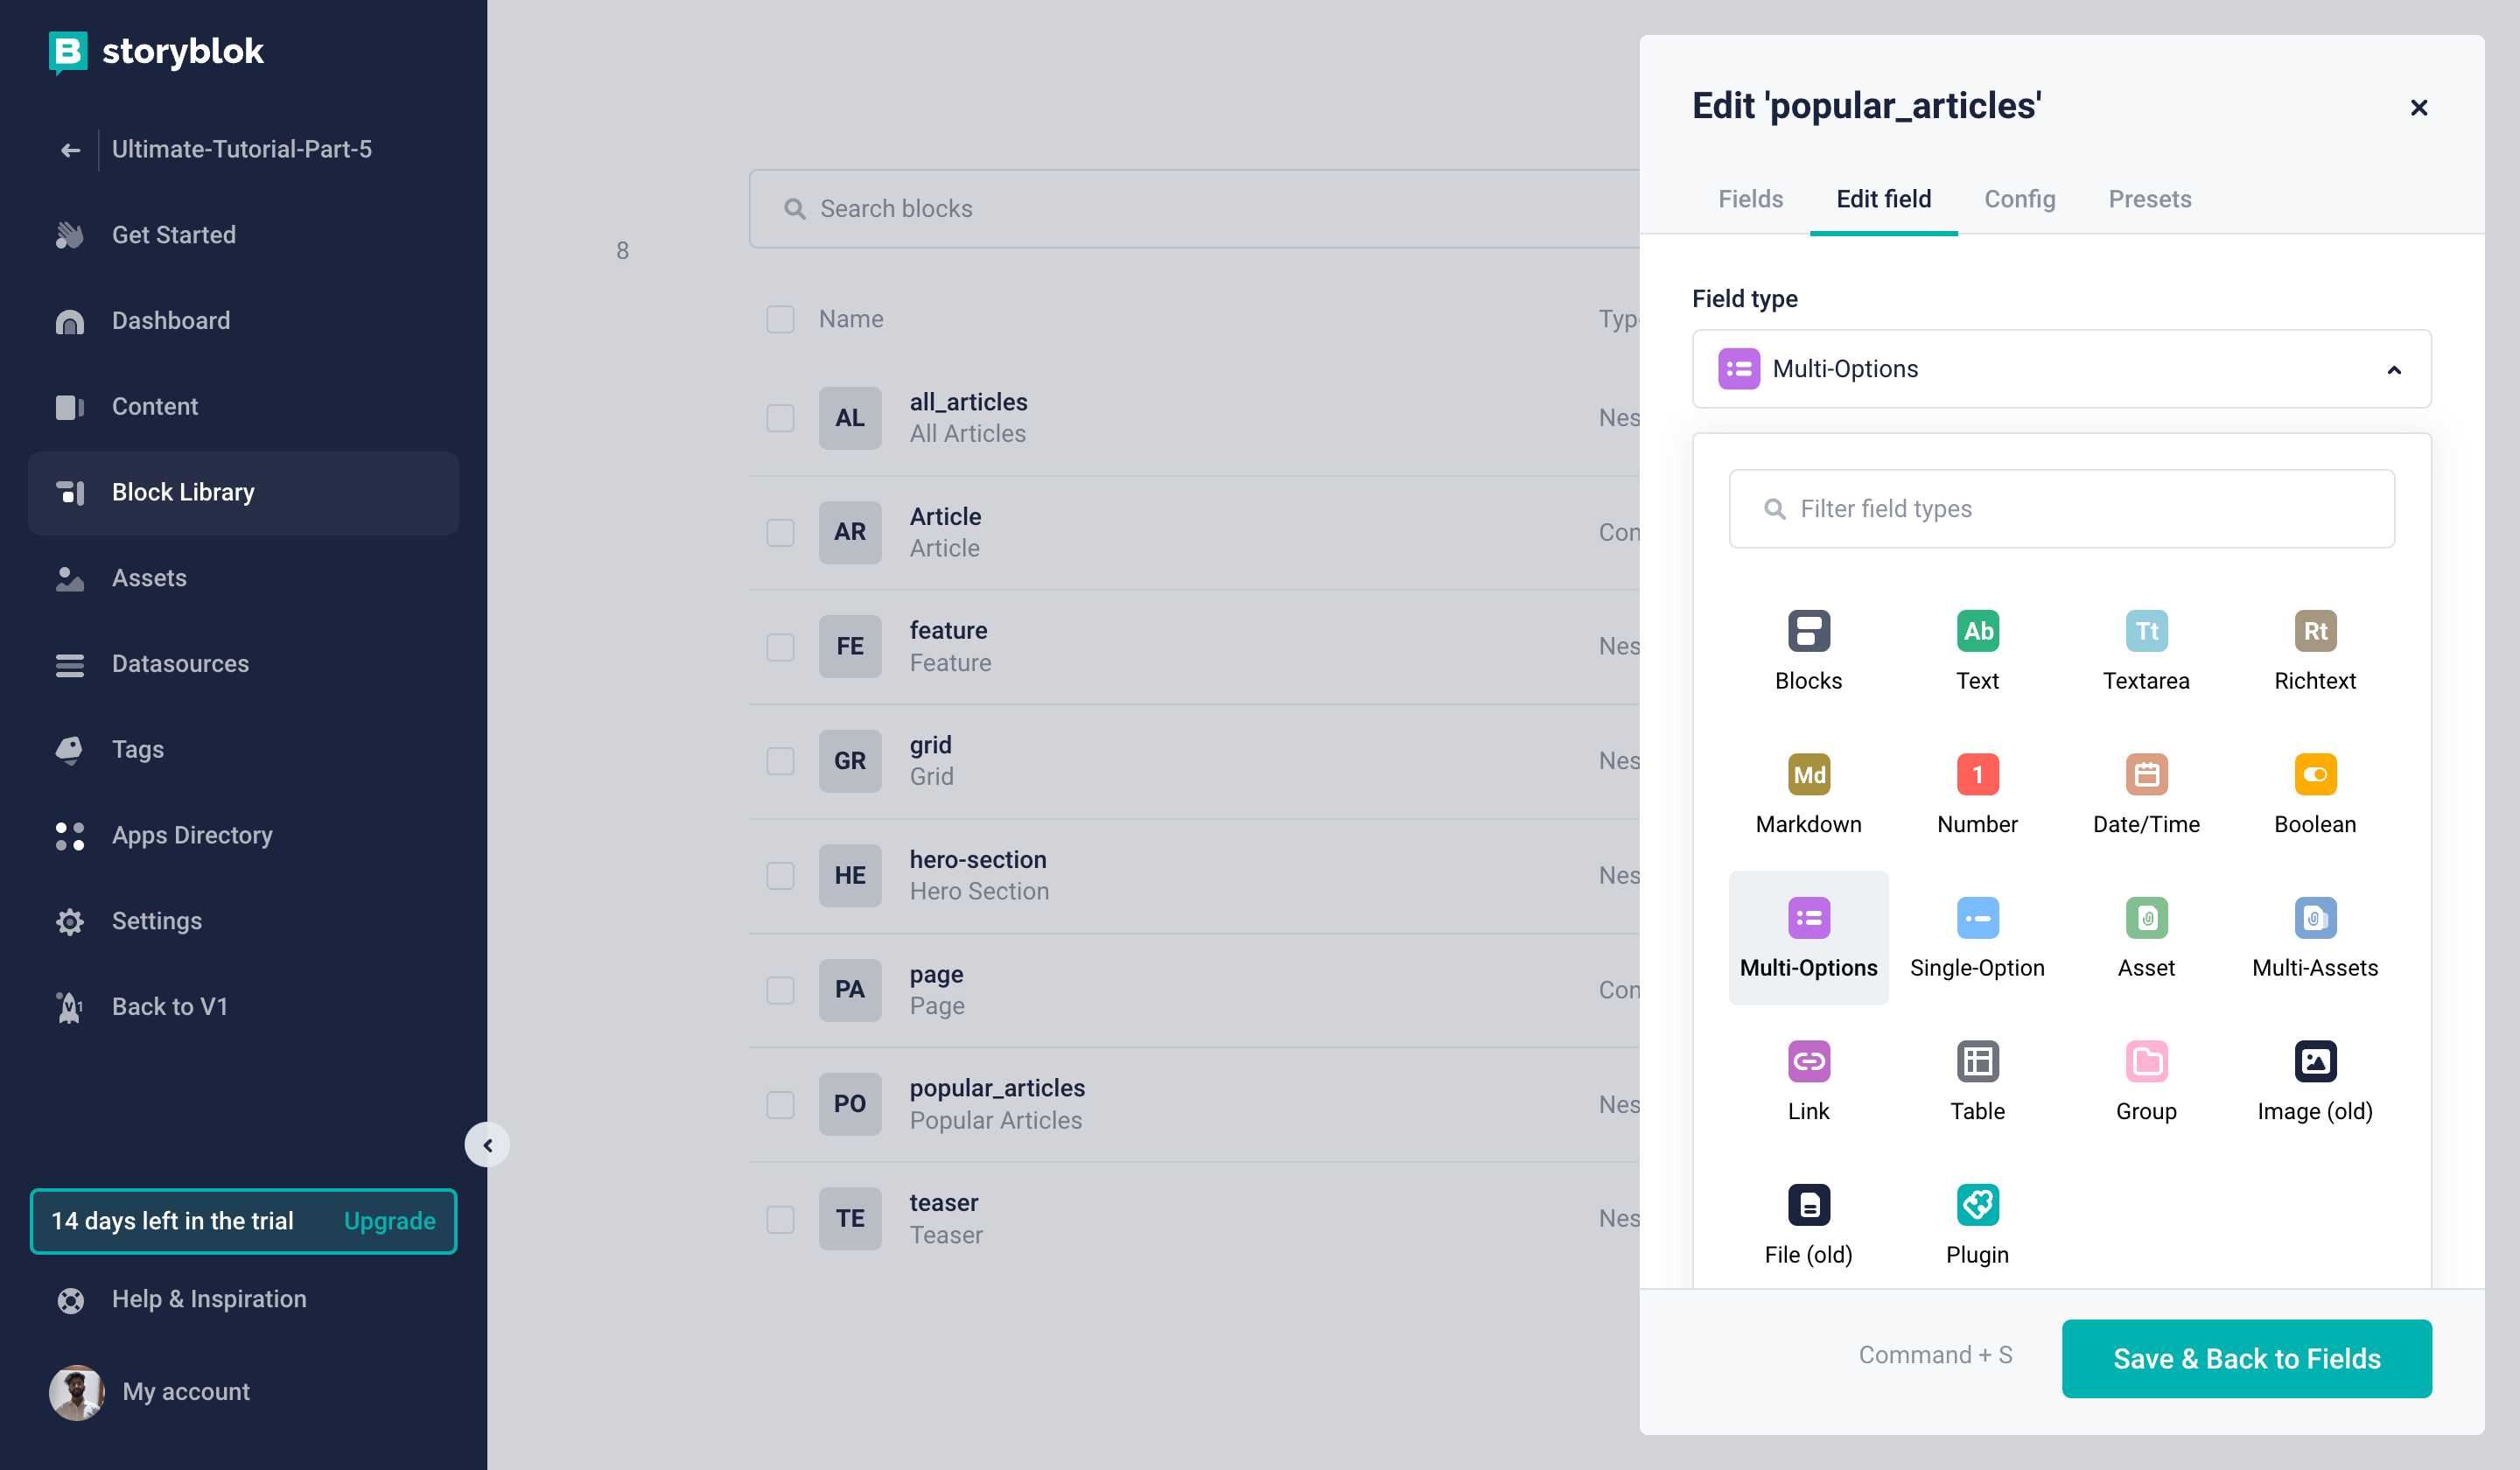
Popular Articles Field
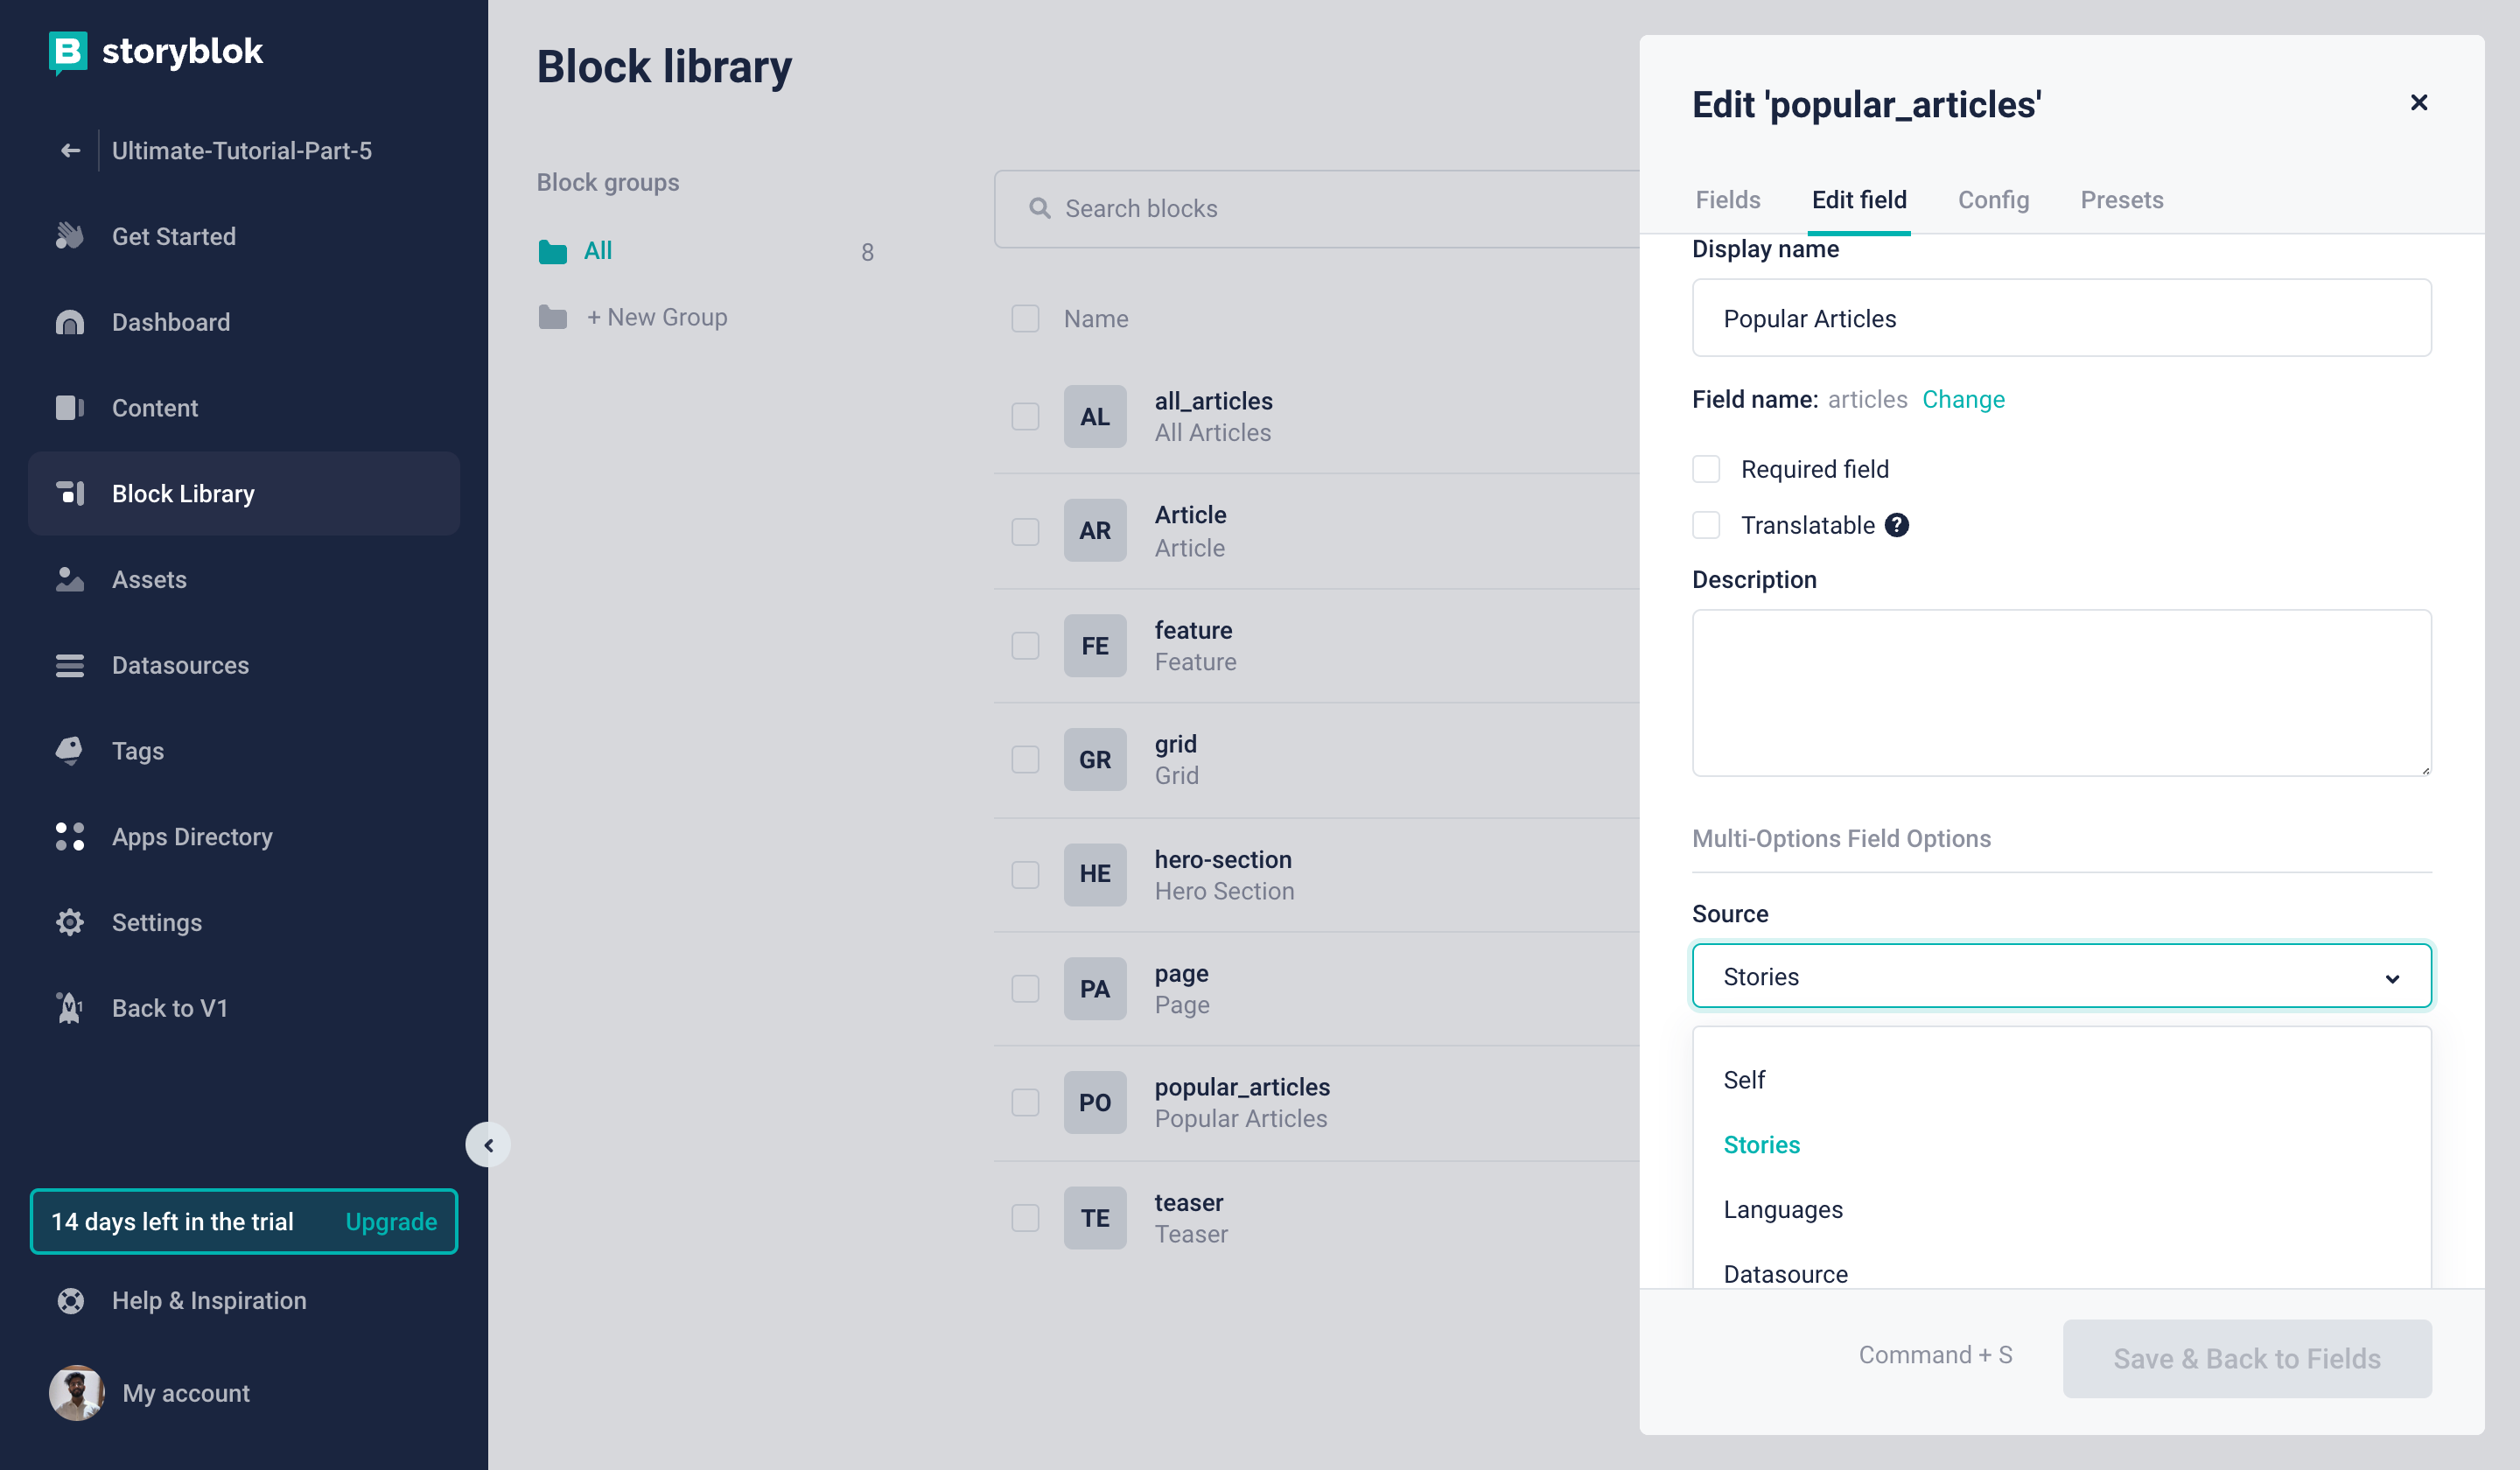
Let's change the Display name to Popular Articles {1} and change the Source to Stories {2}.
Field Settings
We will also need to set the path of the folder for stories, which will be blog/ {1}. And let's also restrict the content type here to article {2}. Lastly, let's set the maximum number to 3 {3}.
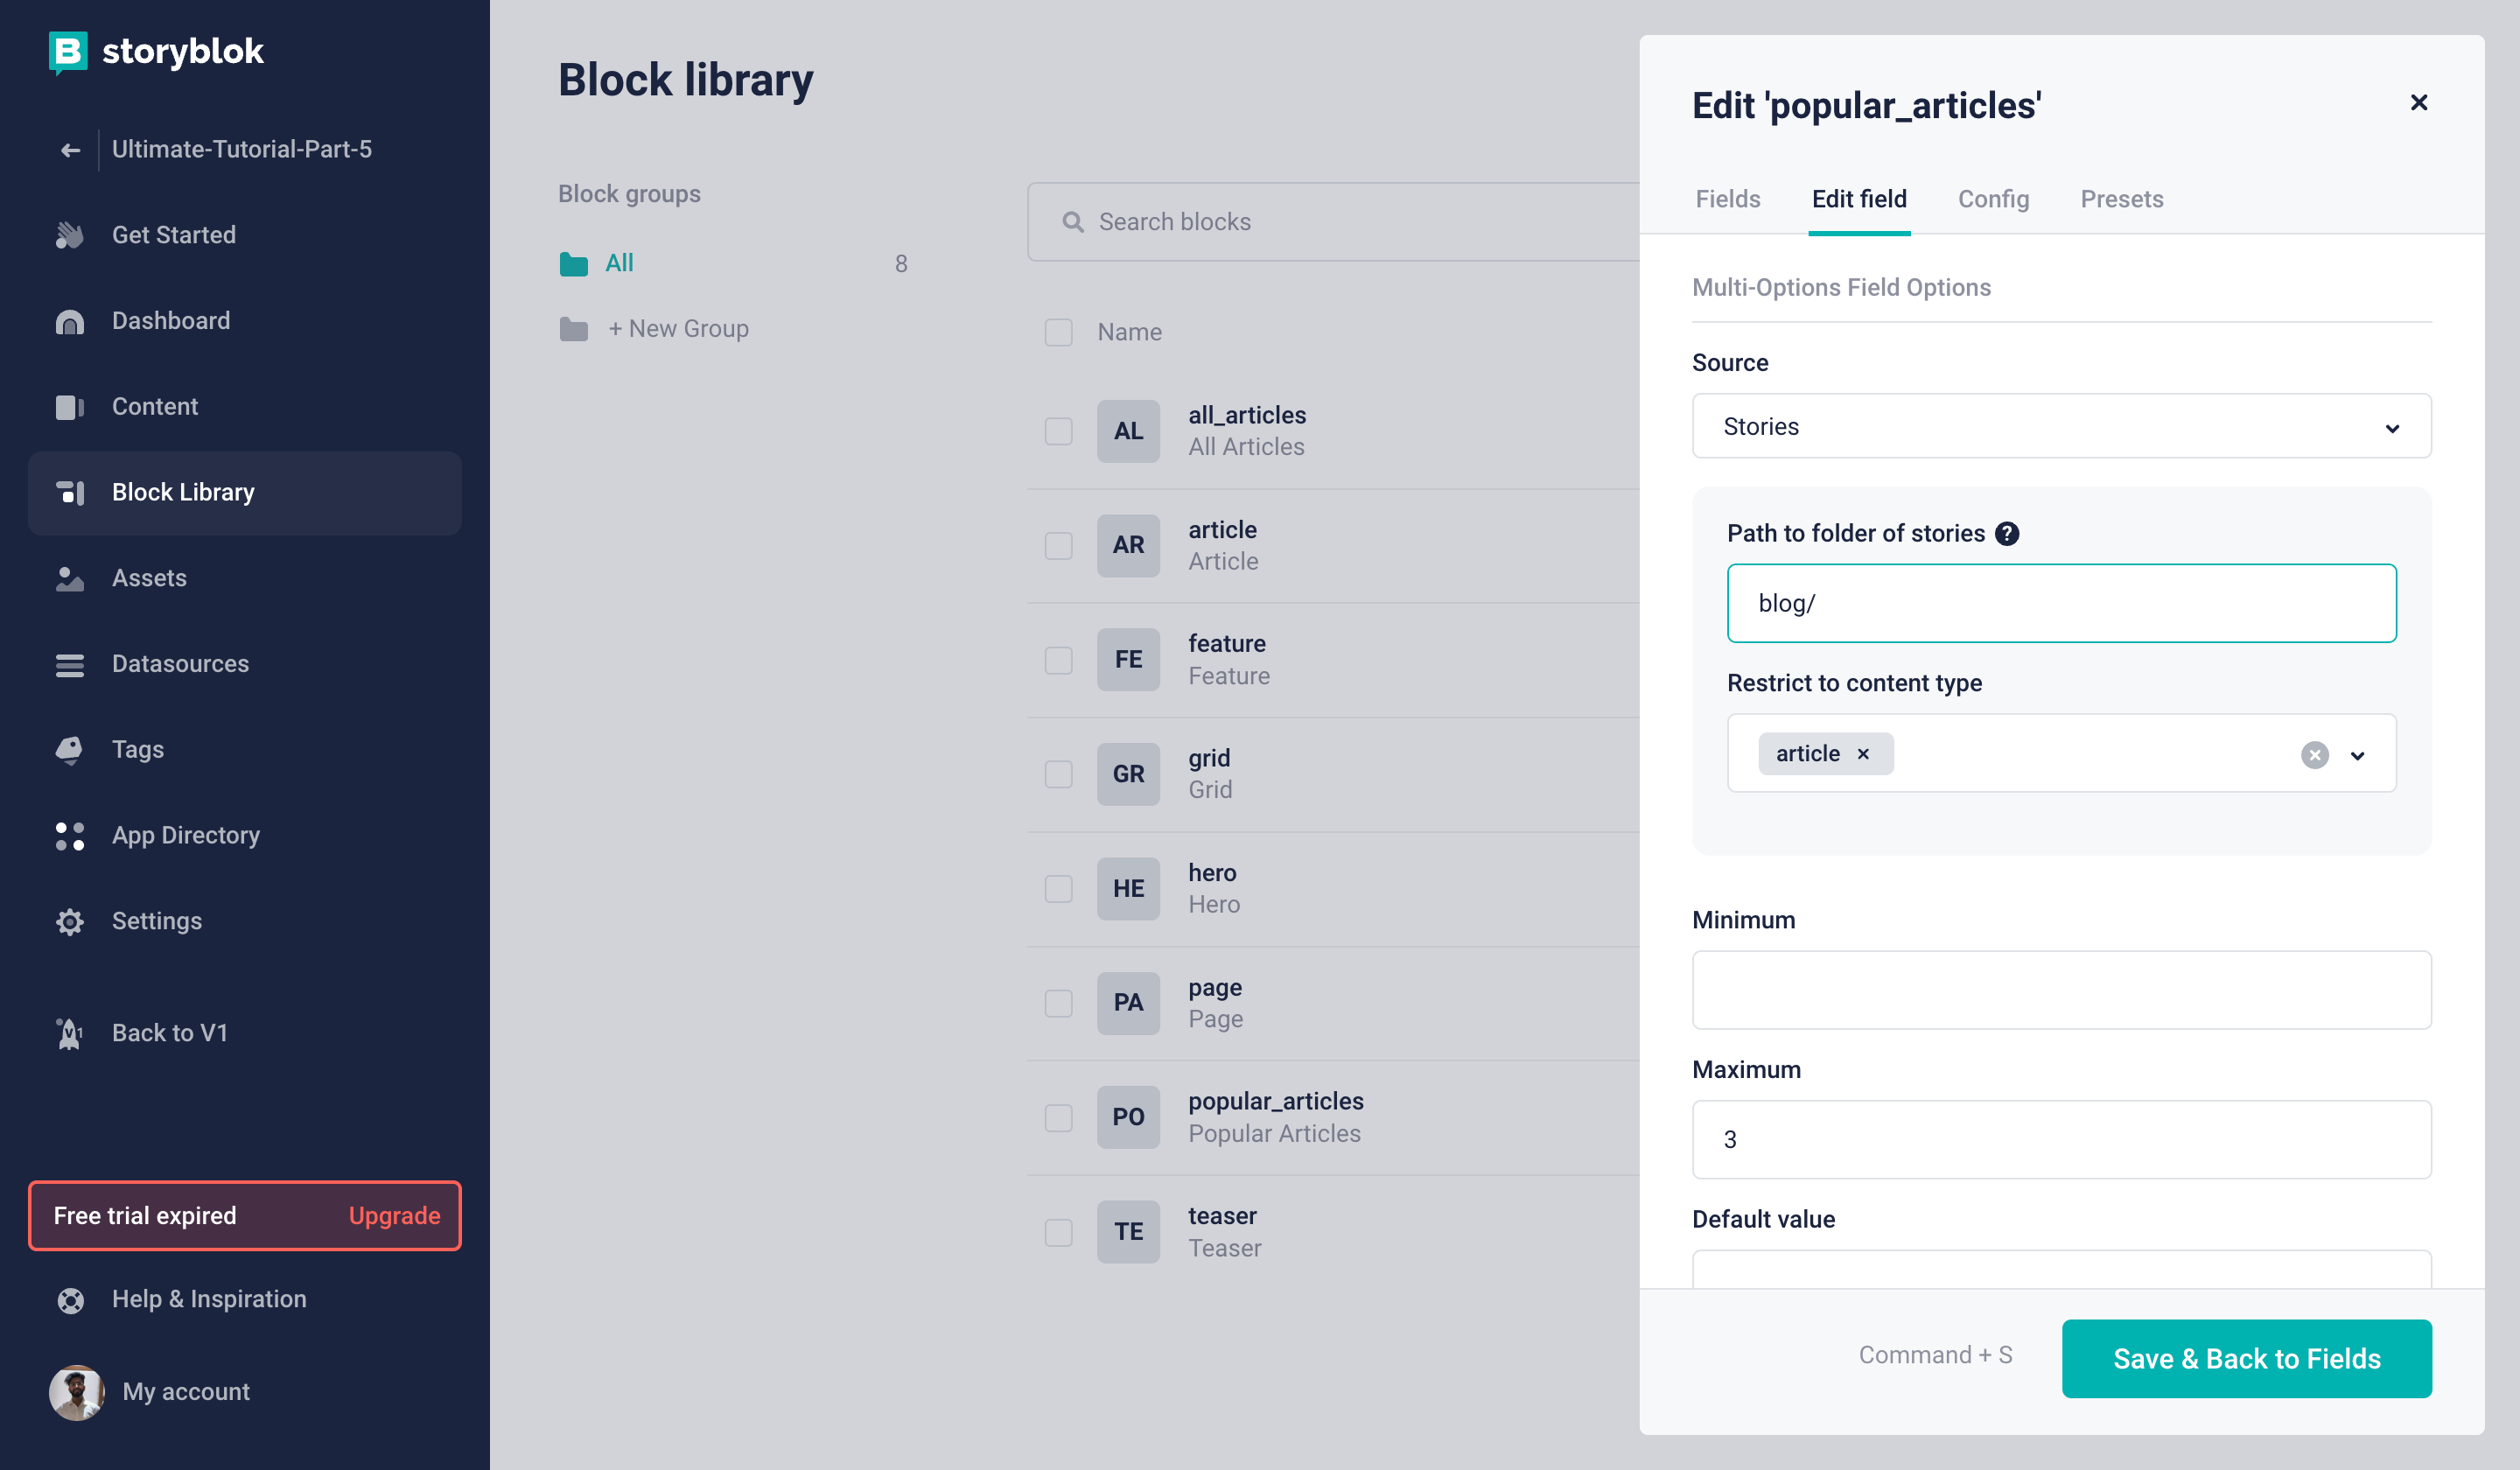
Field Settings
This will allow us to select 3 blog articles from the list of all the blog articles. Let's go ahead and add it to the Home story. You should see something like this:
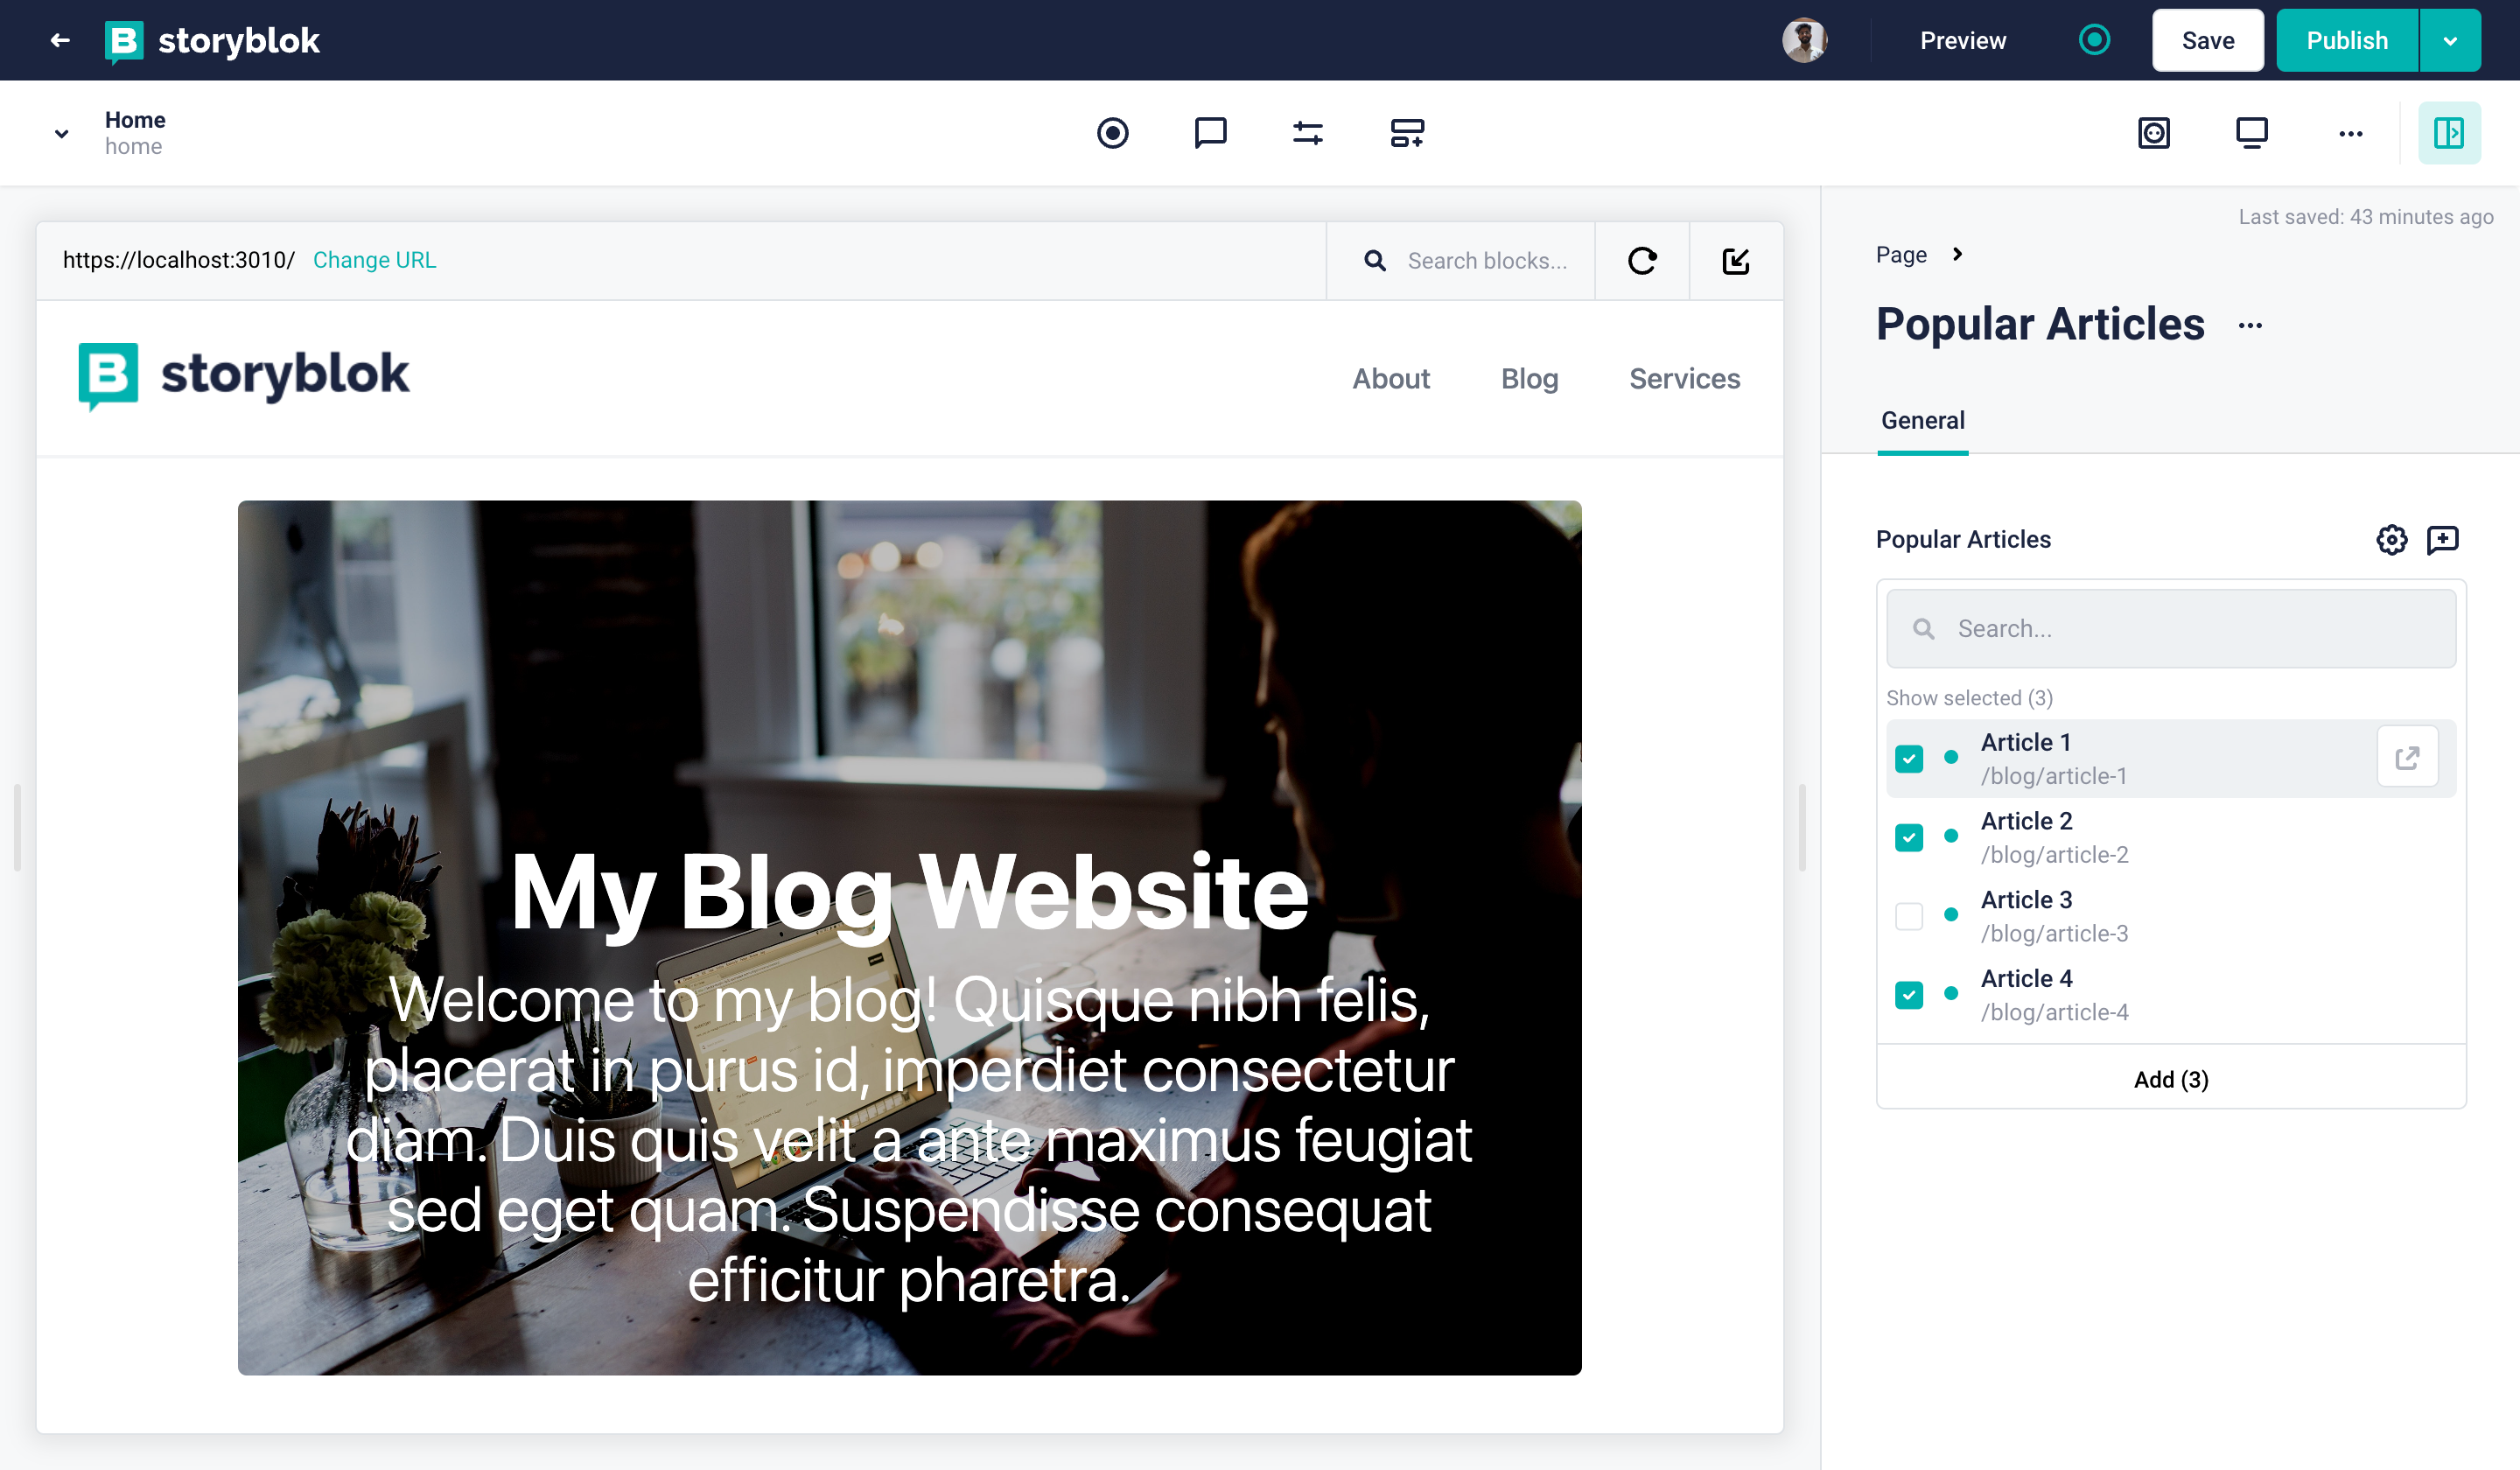
Popular Articles Selection
You can go ahead and select any three articles you'd like from the list of Articles. We won't be able to see anything yet, as we still need to add a component to our frontend. But before that, if you'd take a look at how our draft JSON looks after selecting the blogs, you will see something like this in the articles array.
"articles": [
    "8c9877f0-6ef5-4cd0-9f7d-abc88ceaab14",
    "aafc0ccb-0339-4545-b7dd-6a5879ffa059",
    "81c1f9f8-fdb8-4e3b-ab7e-56648adb51ac"
],You can see the draft or published JSON simply by clicking the dropdown button next to the publish button and selecting the option. You can even check the page history from there.
This is the array containing the _uids of the selected articles. HAt this point, the API parameter resolve_relations comes into play, helping you resolve the relations based upon these _uids. It will allow us the get all the content for these blogs. If you are seeing the JSON from the URL you get after clicking the dropdown button next to the publish button, try appending &resolve_relations=popular-articles.articles to the URL.
The complete URL should look something like this:
https://api.storyblok.com/v2/cdn/stories/home?version=draft&token=UatY9FBAFasWsdHl7UZJgwtt&cv=1655906161&resolve_relations=popular-articles.articles
Now, you will see a key rels in the JSON which gives you the content for all the blogs you selected.
We need this functionality in our frontend. To do that, let's go the gatsby-config.js and index.js files and add resolve relations to the Storyblok parameters which we are using while fetching the data. Update the params as follows:
    {
      resolve: 'gatsby-source-storyblok',
      options: {
        // ...
        resolveRelations: ["popular-articles.articles"],
        // ...
      }
},import { graphql } from "gatsby"
import { StoryblokComponent, storyblokEditable, useStoryblokState } from "gatsby-source-storyblok"
import Layout from "../components/layout"
export default function Home({ data }) {
let story = data.storyblokEntry
story = useStoryblokState(story, {
resolveRelations: ["popular-articles.articles"],
})
const components = story.content.body.map(blok => (<StoryblokComponent blok={blok} key={blok._uid} />))
return (
<Layout>
<div {...storyblokEditable(story.content)}>
{components}
</div>
</Layout>
)
}
export const query = graphql`
query HomeQuery {
storyblokEntry(full_slug: { eq: "home" }) {
content
name
full_slug
uuid
id
internalId
}
}
`This will automatically resolve the relations when it sees the array of articles inside the popular_articles. Let's now add the PopularArticle component to our Gatsby.js project. Create a file named PopularArticle.js and the following code to it:
import ArticleTeaser from "./articleTeaser";
import { storyblokEditable } from "gatsby-source-storyblok";

const PopularArtices = ({ blok }) => {
  return (
    <>
      <div
        className="grid w-full grid-cols-1 gap-6 mx-auto lg:grid-cols-3 lg:px-24 md:px-16"
        {...storyblokEditable(blok)}
      >
        {blok.articles.map((article) => {
          article.content.slug = article.slug
          return (
            <ArticleTeaser article={article.content} key={article.uuid} />
          )
        })}
      </div>
    </>
  );
};
export default PopularArtices;
After hitting save, our website should now have the Teaser cards for the popular articles as well and should look like this:
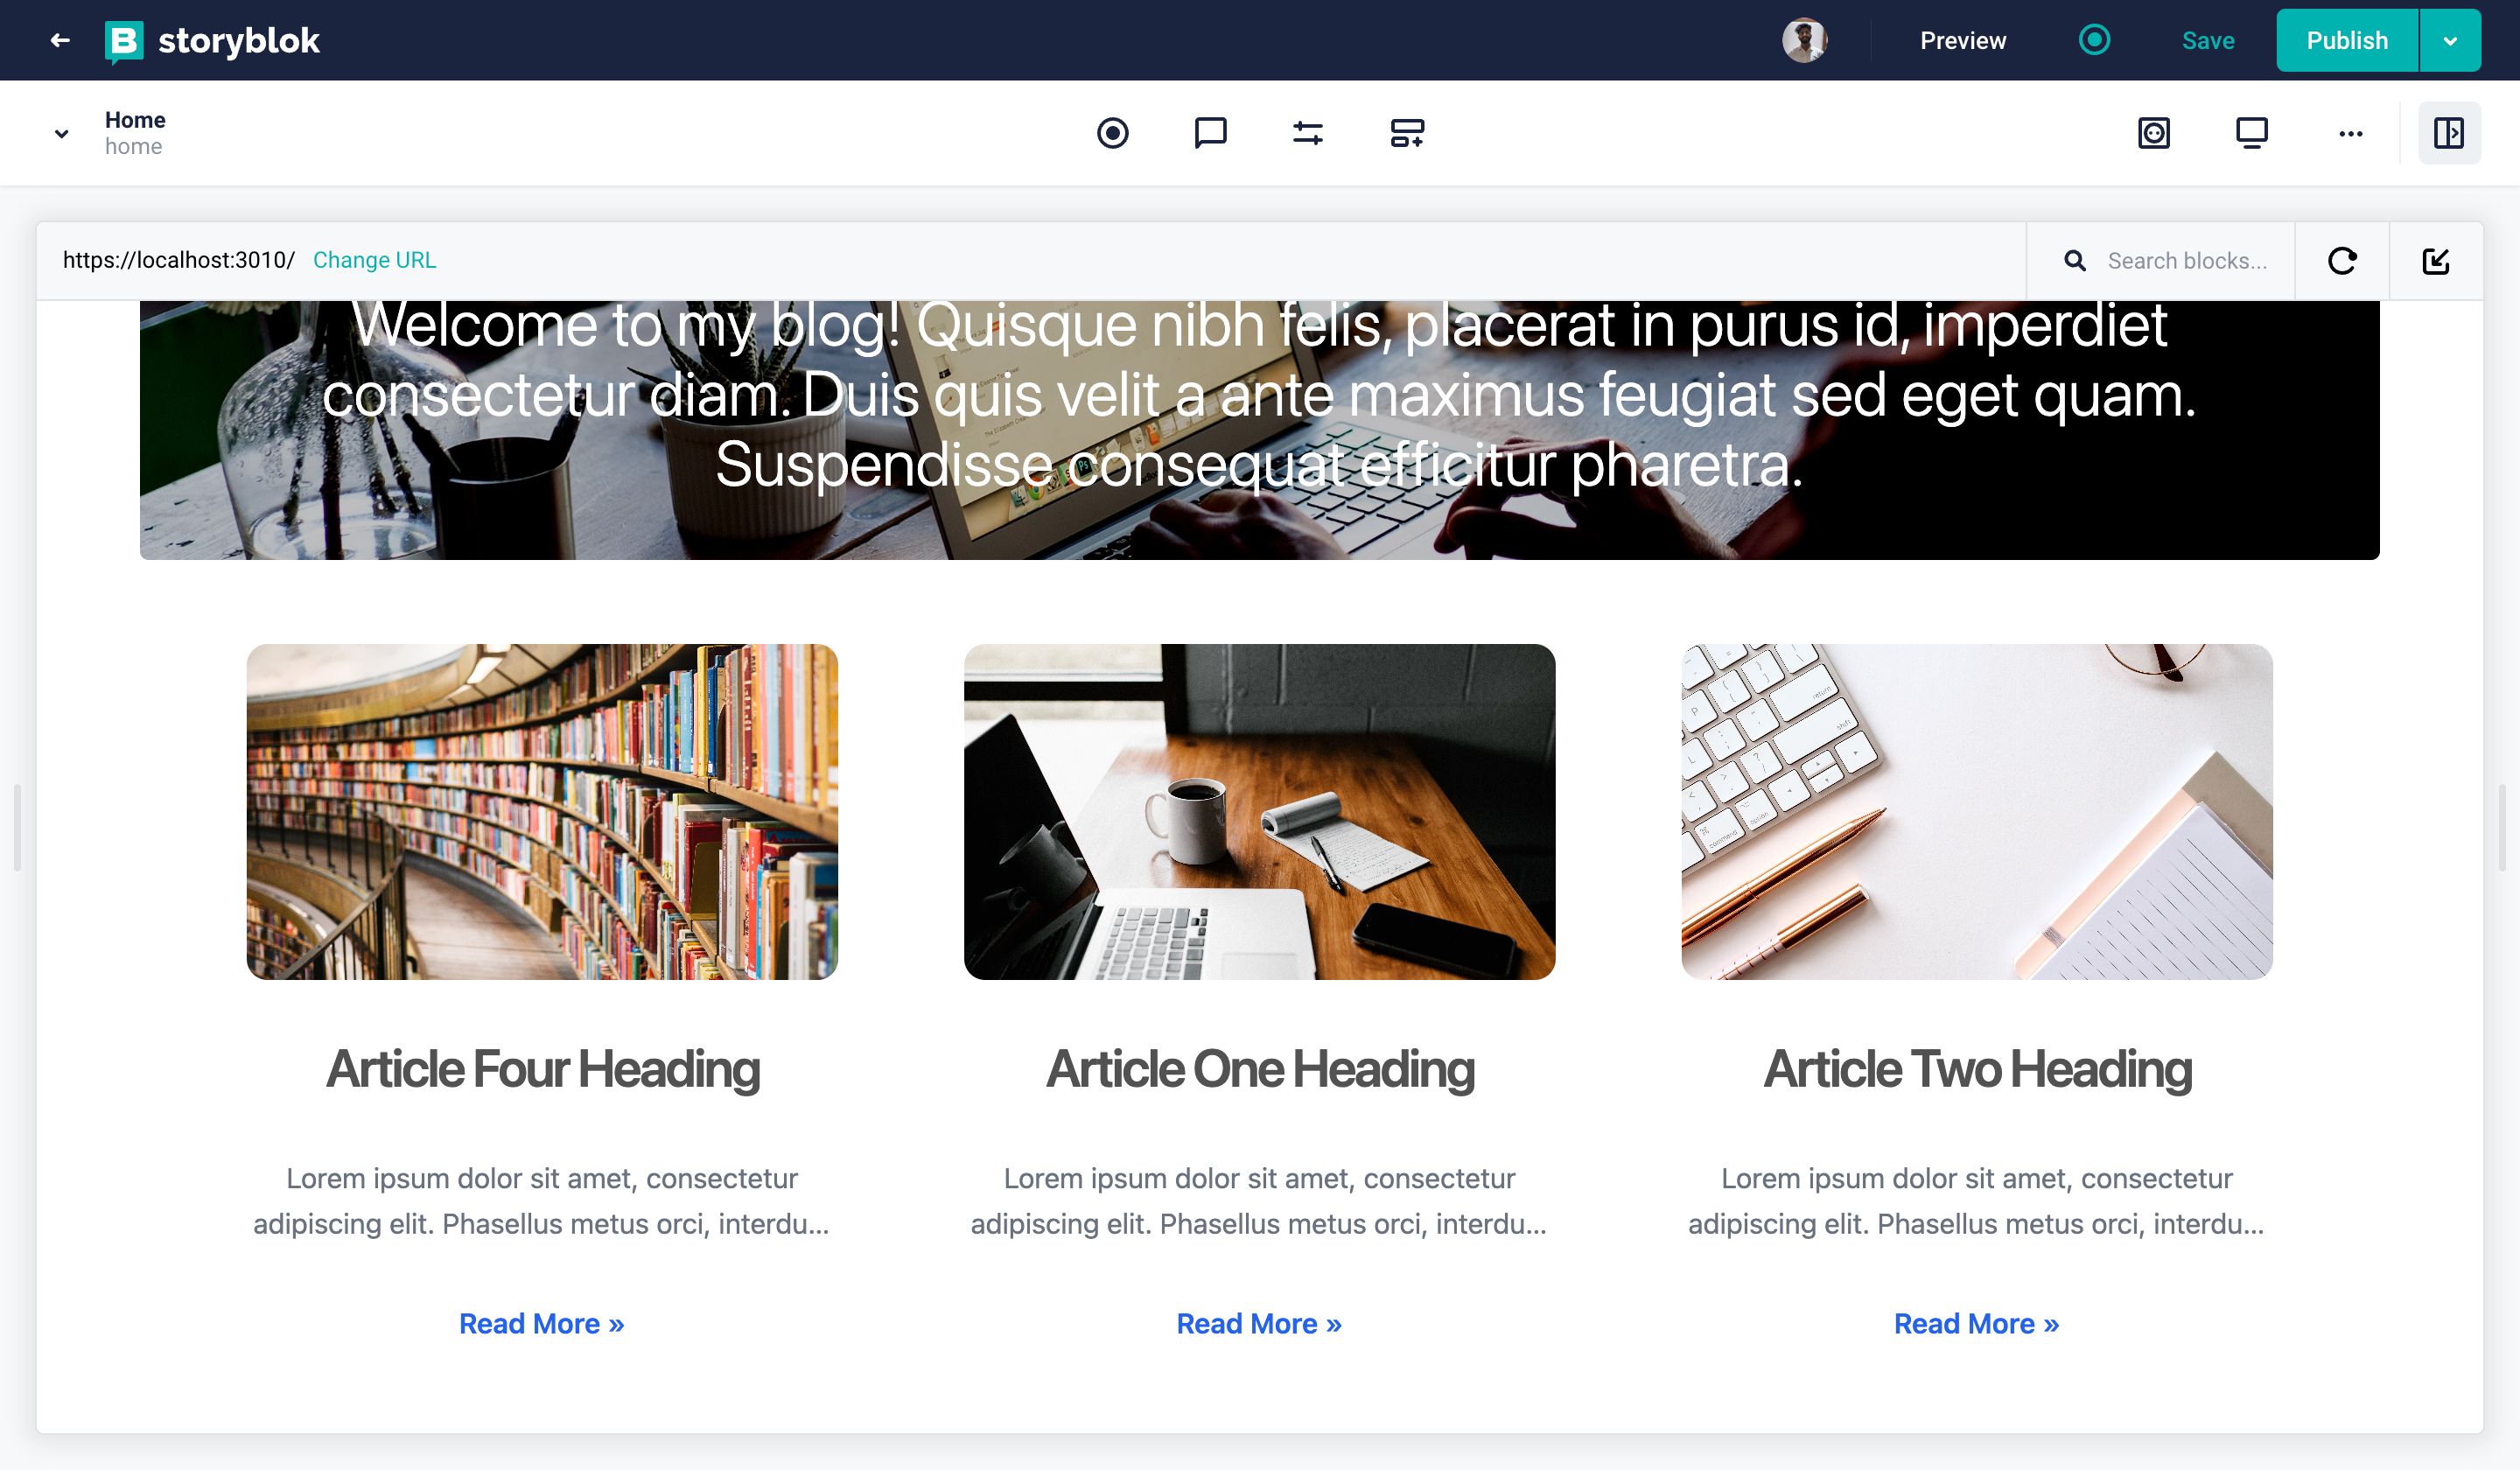
Home Story
To explain why adding resolveRelations in useStoryblokState, this process enables Storyblok Bridge to resolve relations. If the configuration is only on the gatsby-node.js file, you will get an error, and selecting or deselecting articles from the list of popular articles won't work correctly:
story = useStoryblokState(story, {
    resolveRelations: ["popular-articles.articles"],
});
And that's it! Now you can play with article teasers here as well and it will show you the live edits in real-time.
Wrapping Up
In this tutorial, you saw how to create and render blog articles with Storyblok and Gatsby.js. You also saw how to resolve relations when referencing stories in other stories.
| Resource | Link |
|---|---|
| Storyblok Gatsby.js Ultimate Tutorial | https://www.storyblok.com/tp/storyblok-gatsby-ultimate-tutorial |
| Gatsby Boilerplate Repo | https://github.com/storyblok/gatsby-storyblok-boilerplate |
| Create custom components in Storyblok and Gatsby.js | https://www.storyblok.com/tp/create-custom-components-in-storyblok-and-gatsby |
| Storyblok Technologies Hub | https://www.storyblok.com/technologies |
| Gatsby.js Technology Hub | https://www.storyblok.com/tc/gatsbyjs |
| Storyblok Gatsby SDK | storyblok/gatsby-source-storyblok |
