Build Your Personal Blog With Next.js, Storyblok, and Layer0
Storyblok is the first headless CMS that works for developers & marketers alike.
This guide describes how to create & deploy your Personal Blog built with Next.js and Storyblok to Layer0. Clone the repo blog-next-storyblok-layer0-starter to get the entire setup.
Set up Storyblok space
To set up a Storyblok space, log in to your account or create a new one, and click on Create new space
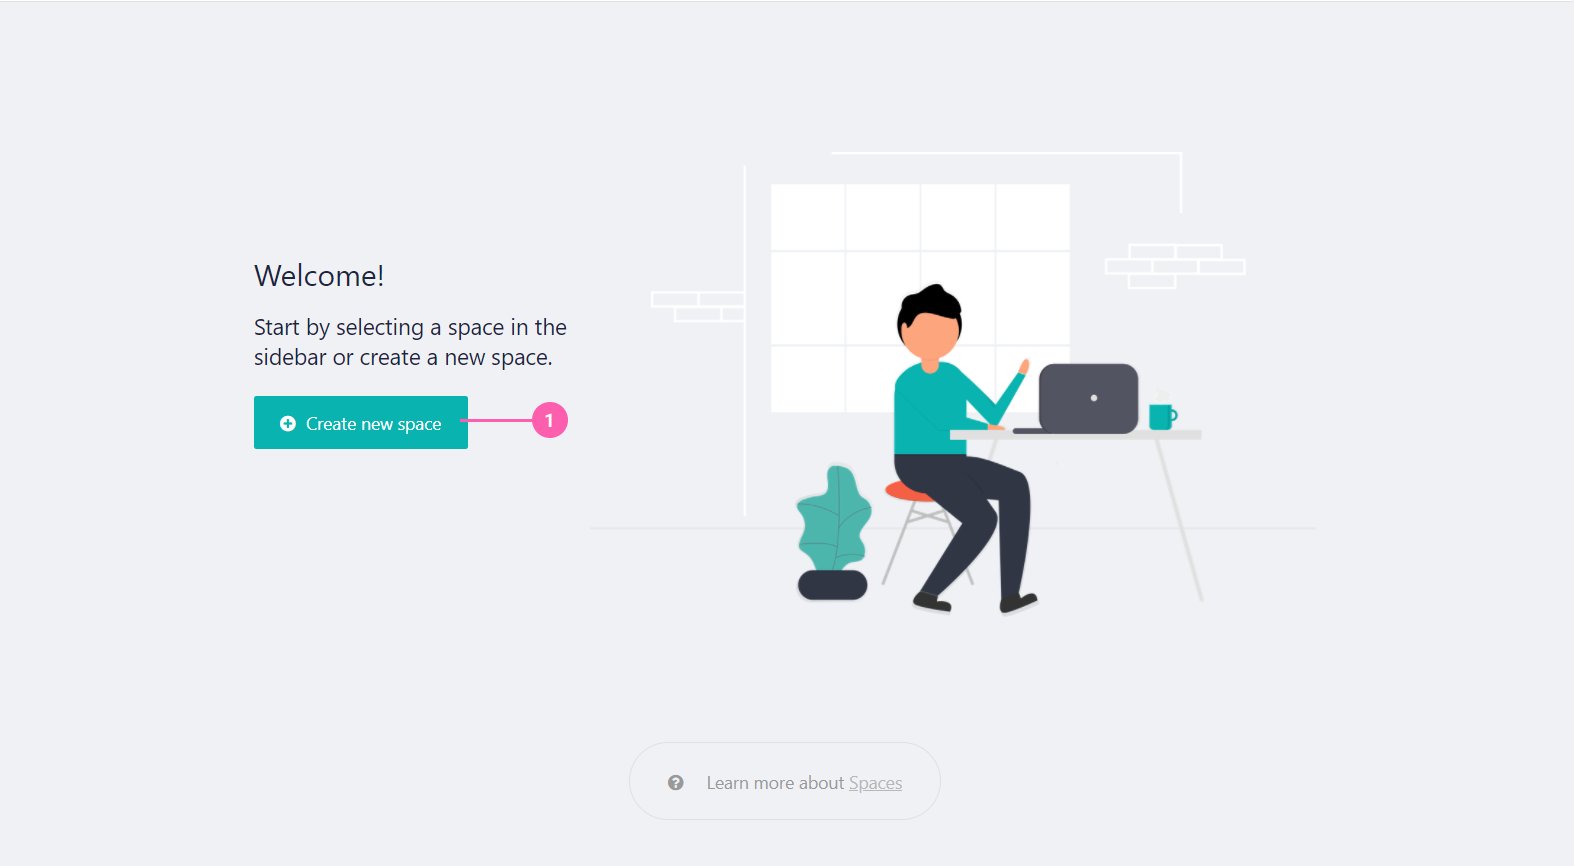
Create new space
Create a new Storyblok space by giving it a name.
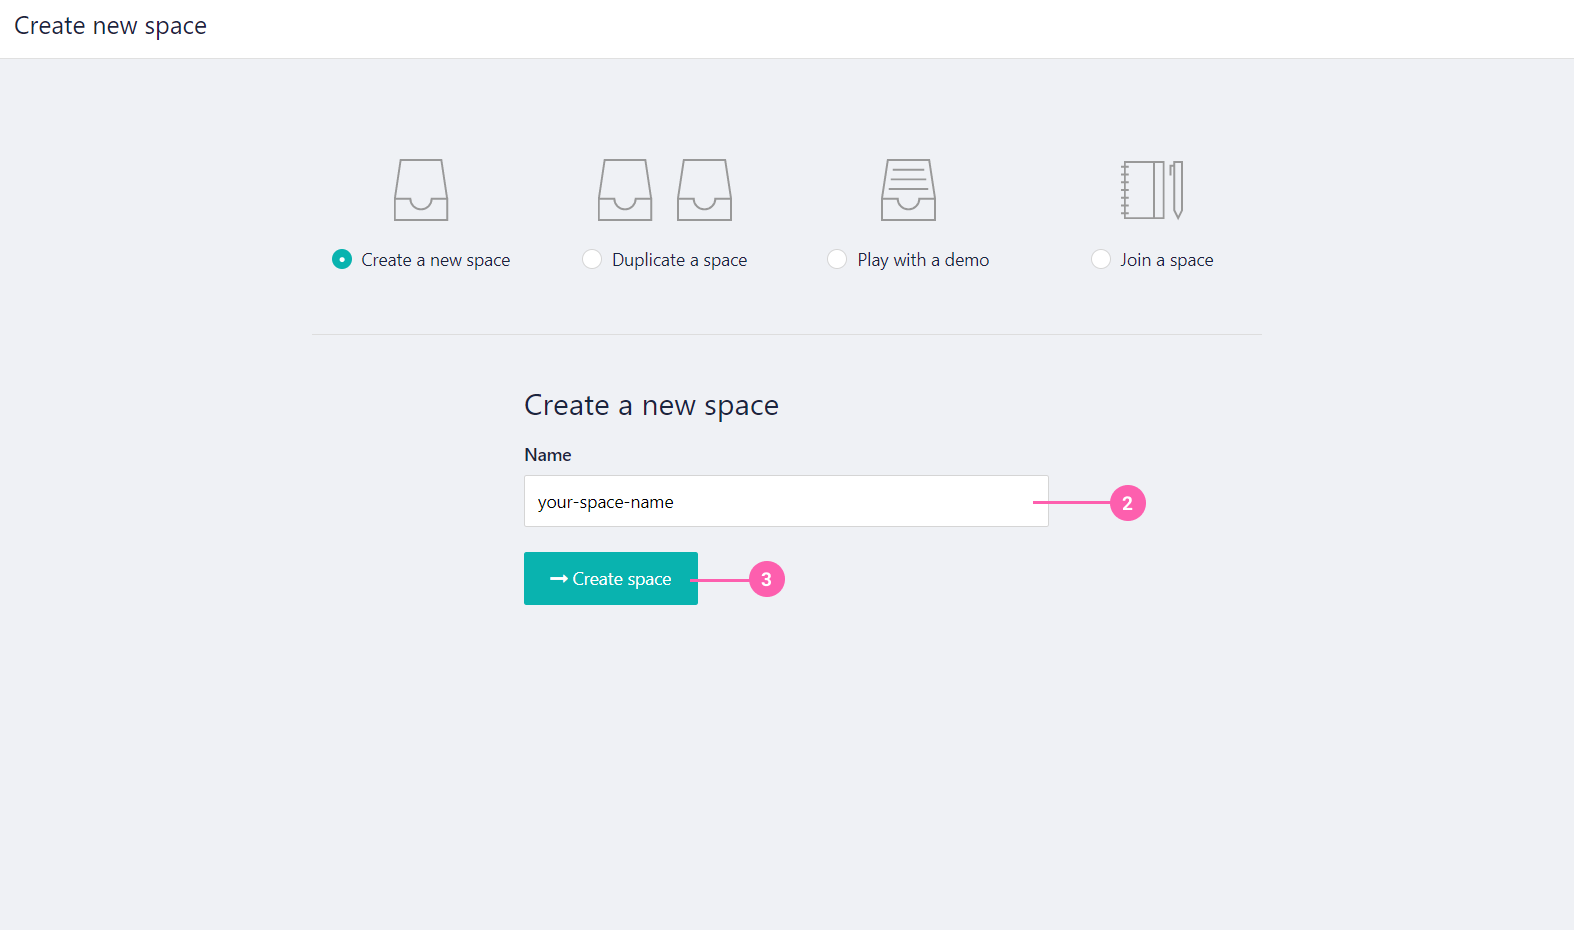
Name your space
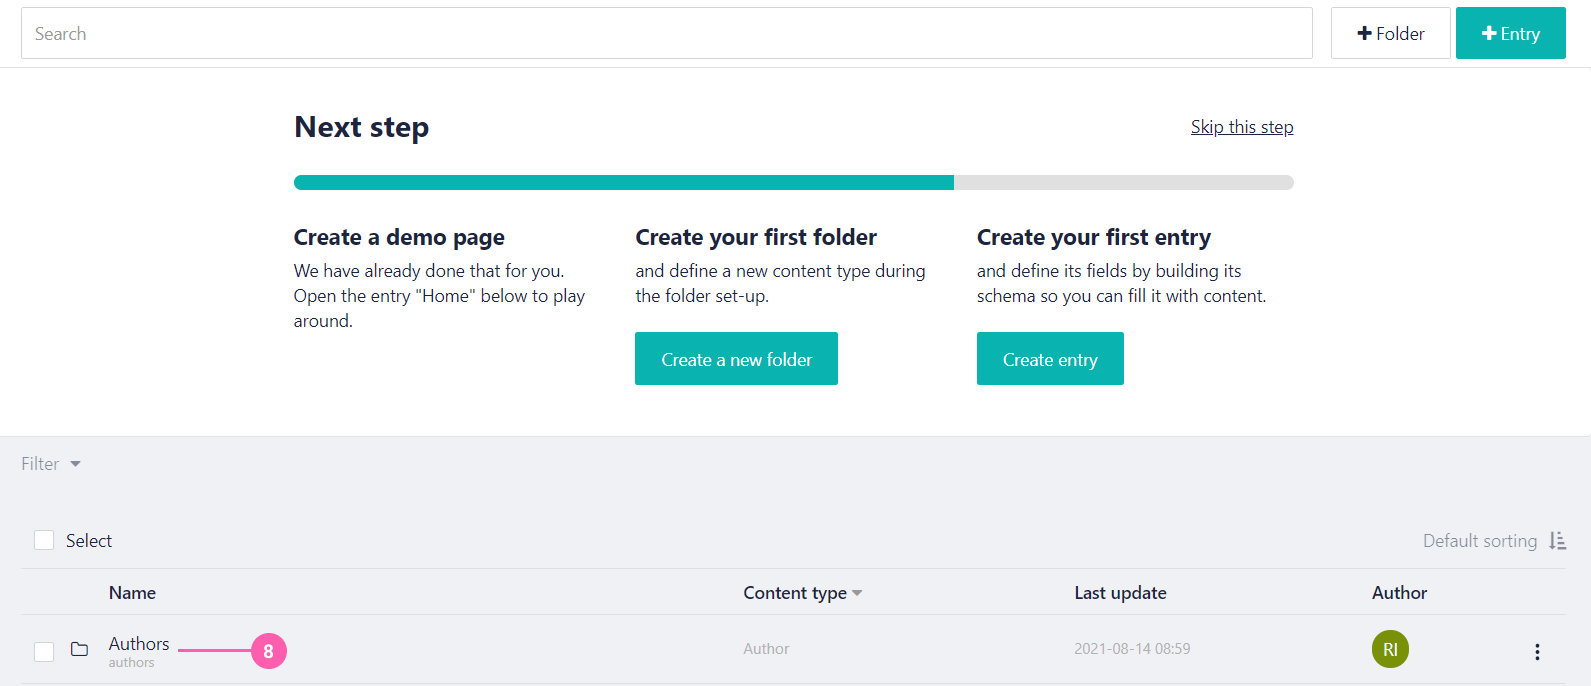
Click on Create a new folder to get started with creating the Authors folder.
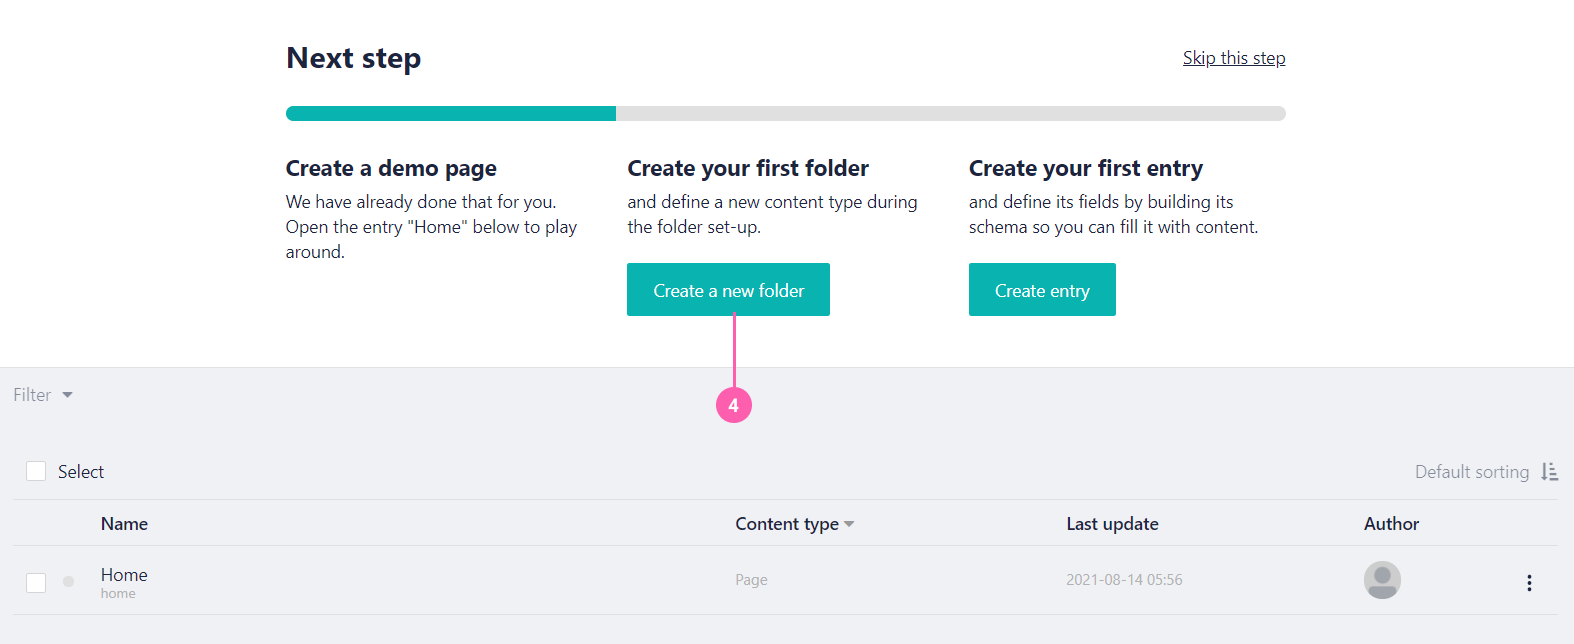
Create a new folder
Imagine Storyblok's folder as a collection of items, and each Storyblok entry being an item itself. We'll be creating two folders: Authors and Posts. Each entry that lives inside Authors or Posts represents an individual Author or a Post.
After typing in the Name, click on Add new as the Default content type and select Blank as we'll be giving it our own blueprint. Click save to create an Author folder.
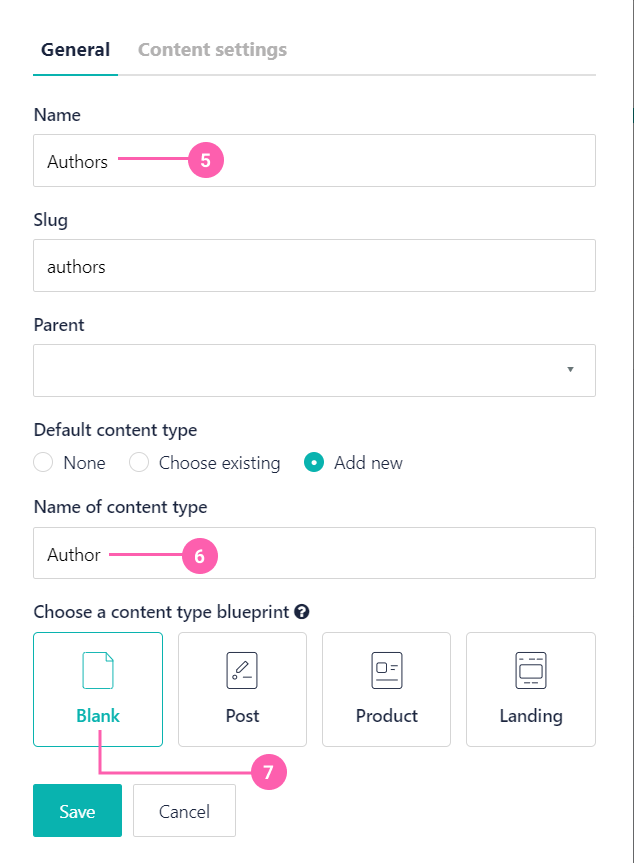
Create Authors folder
Authors folder created
Click on +Entry to create your first Author entry.
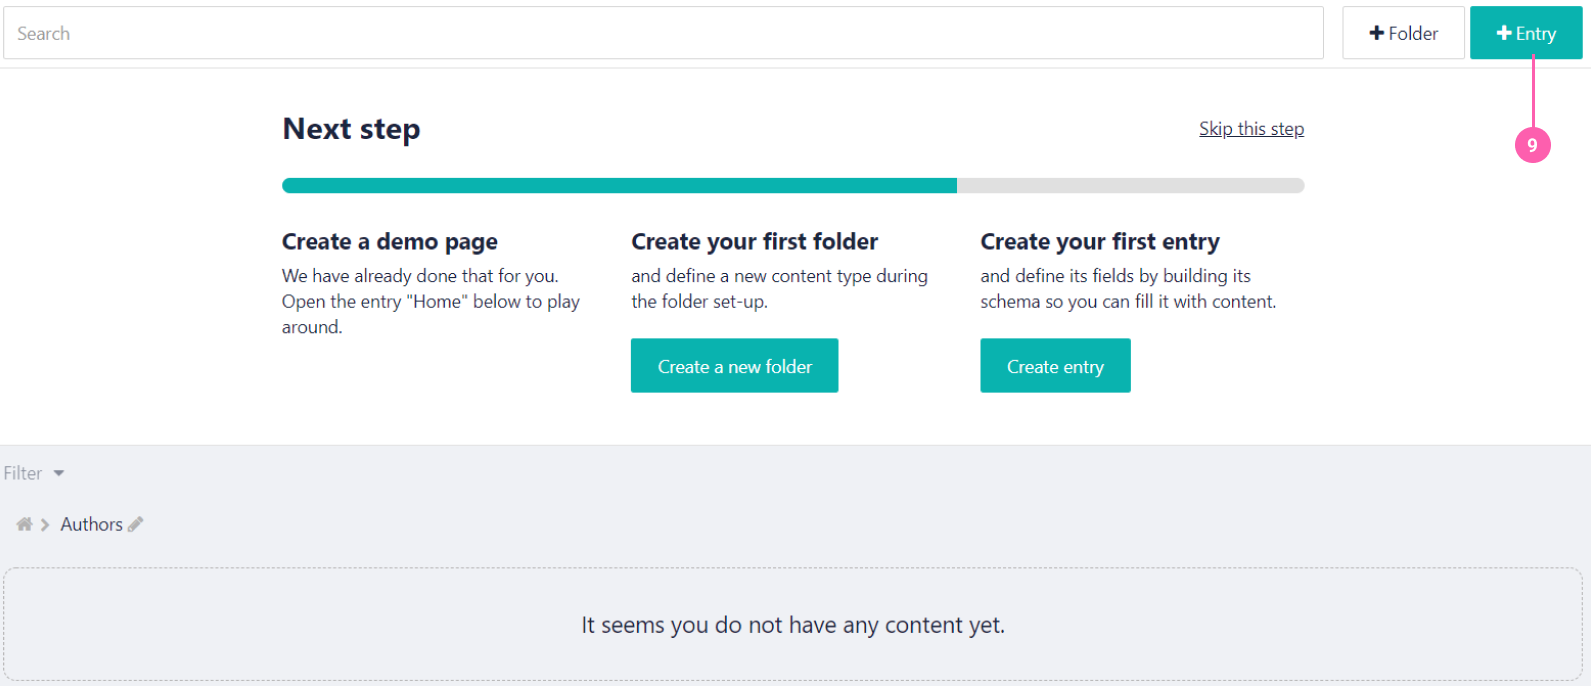
Add Author Entry
After typing in the Name, click on Save (The parent type is already assigned to Author as it was configured while defining the Authors folder).
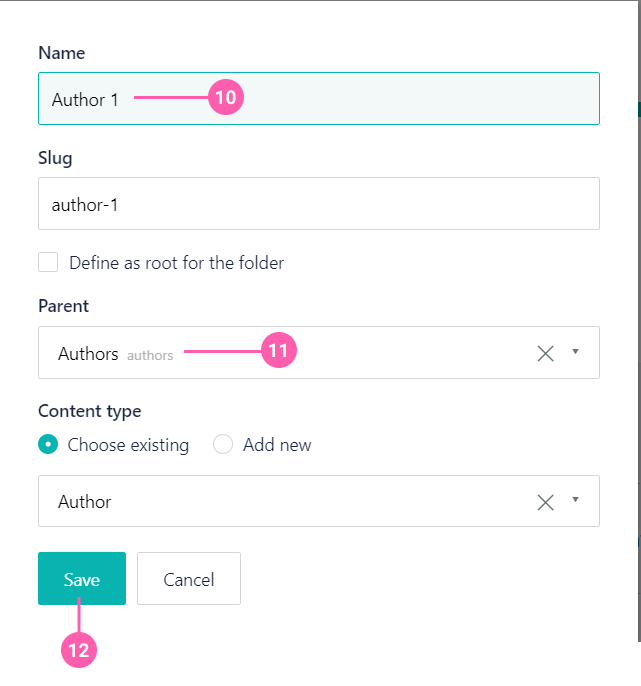
Create Author Entry
The current Author has an empty blueprint. Let's start defining our own schema.
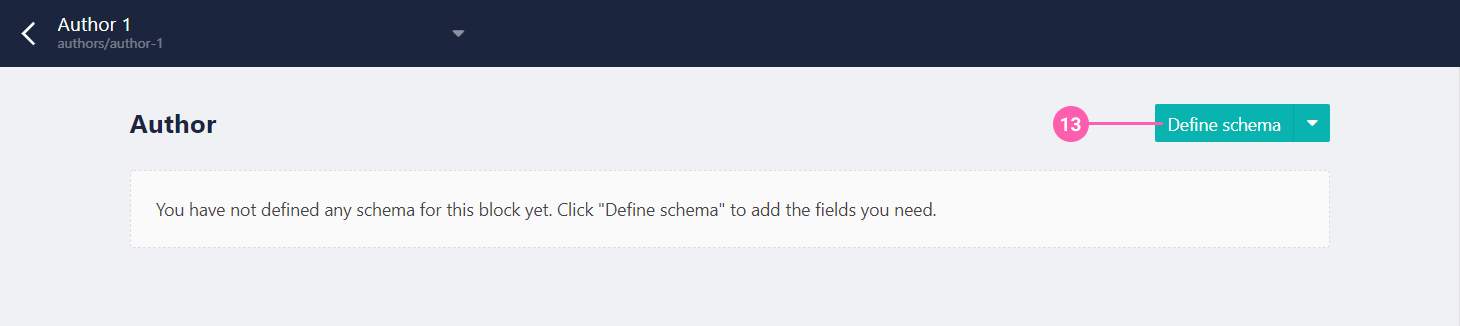
Define Author Schema
Add Name and Image to the schema.

Author Schema
Oops! Image is being considered as text. Don't worry. Click on Image label to change its field type.
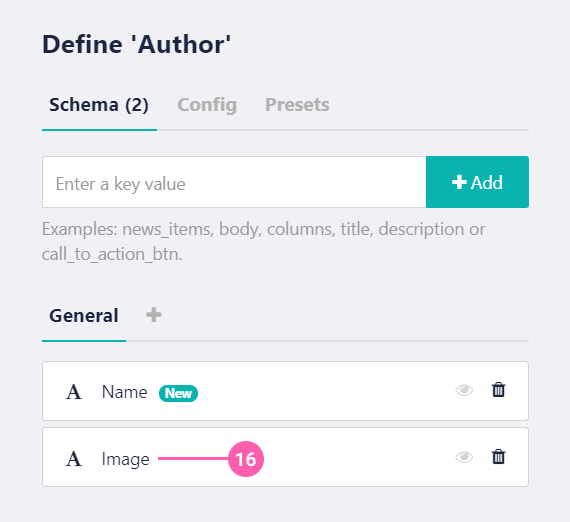
Set Image Field Type
From the Type list of icons, select Asset for the content type of Image in the Author schema.
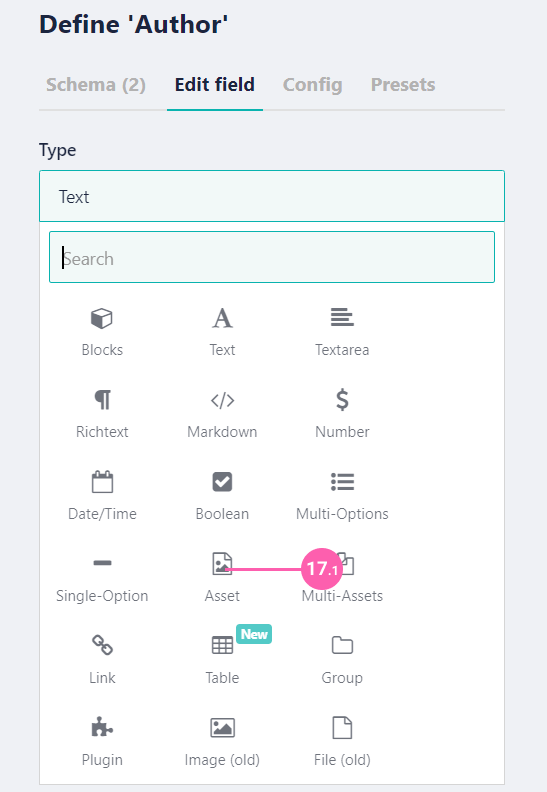
Select Asset Type
To further restrict assets to images, select Images in the Filetypes. Click on Save schema to save the changes made.
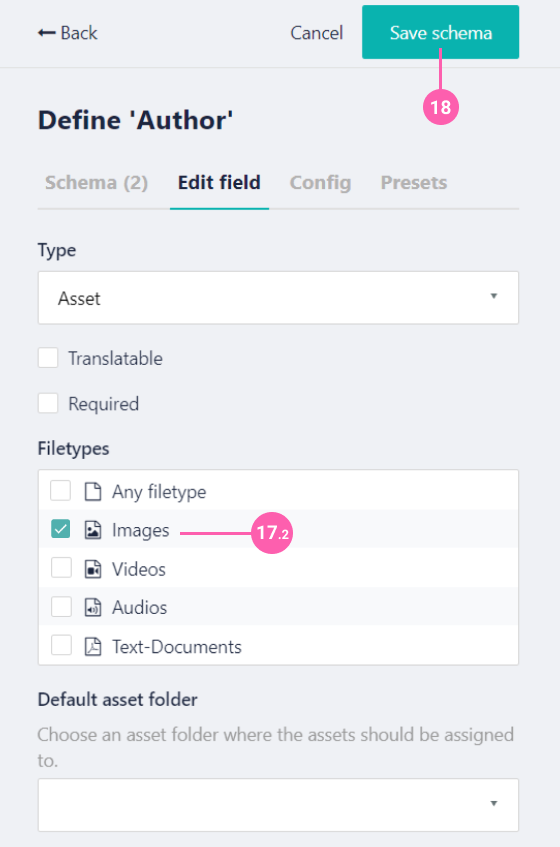
Restrict to Images
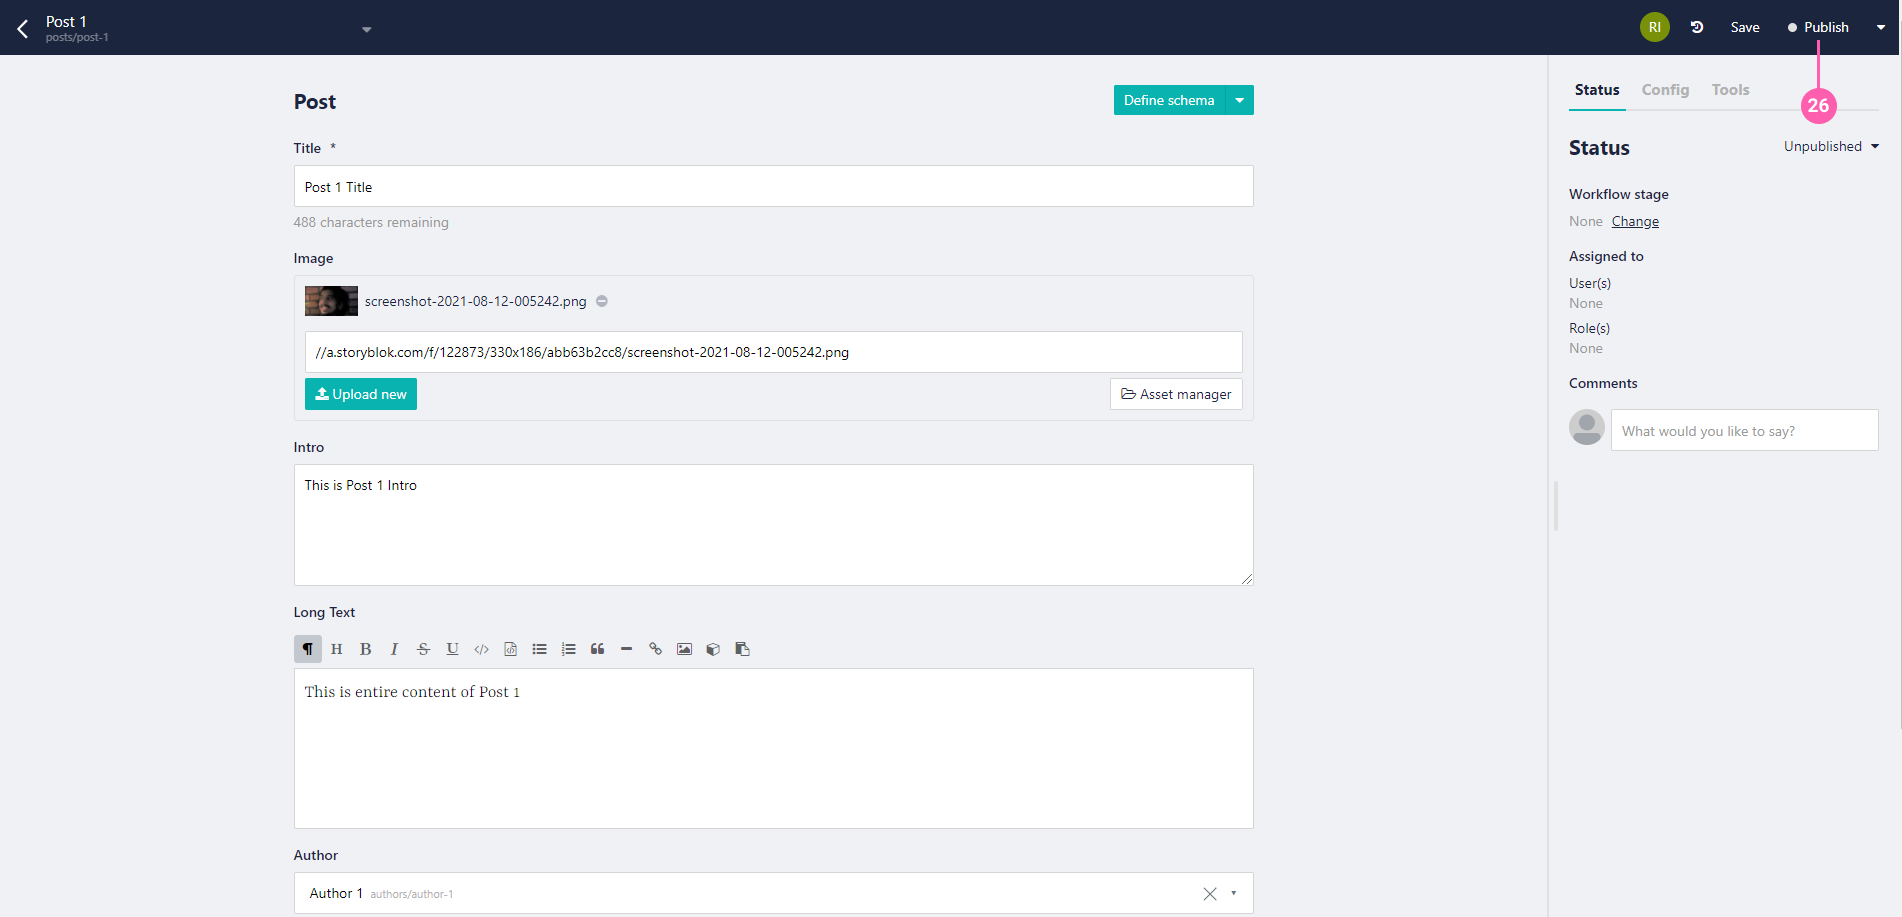
After you've defined the schema, input the data (Name and Image) of the first author, and then hit the Publish button to make Author 1 visible to Storyblok's GraphQL API.
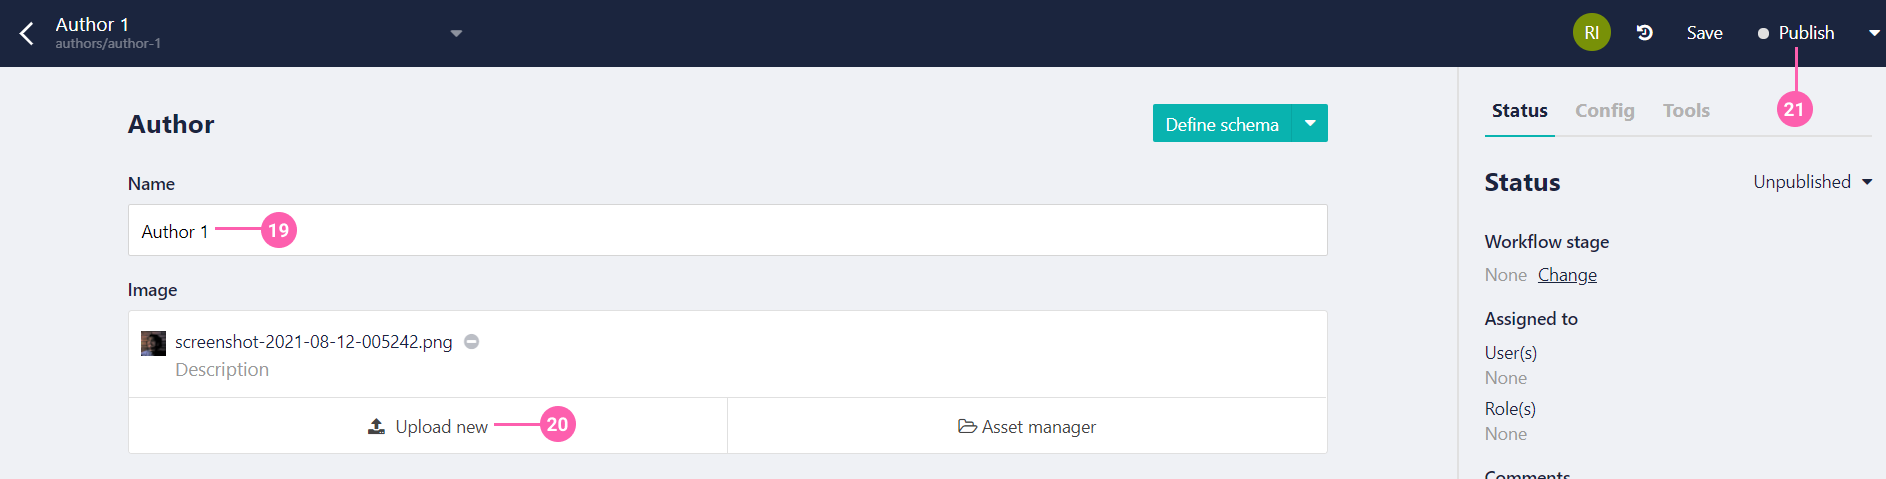
Create Author
Follow the same steps used to create Authors to create Posts. The only change is that the default content type will now be Post. Storyblok's default content type makes it easier for you to get started without defining your own schema again.
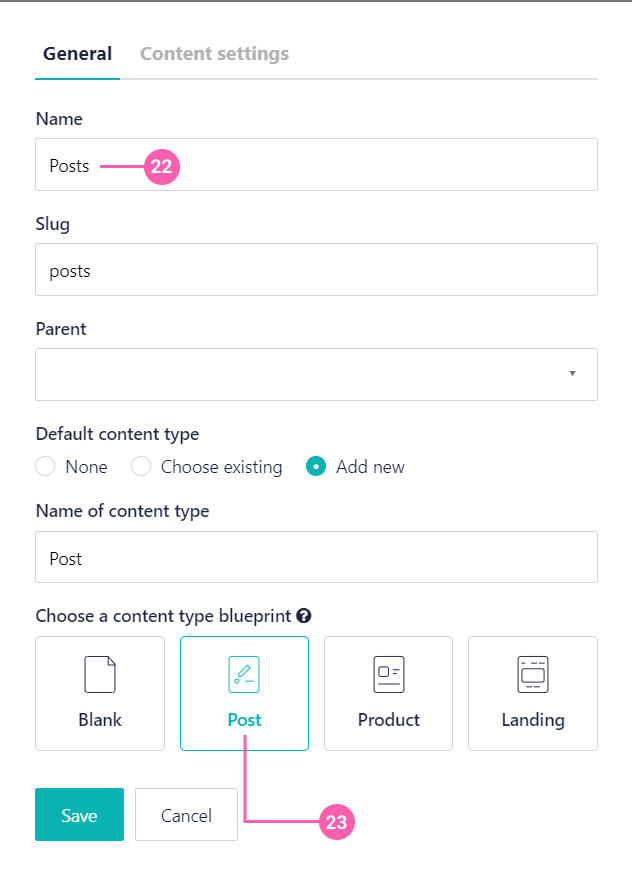
Add Posts Folder
Create a Post entry, and click on Save.
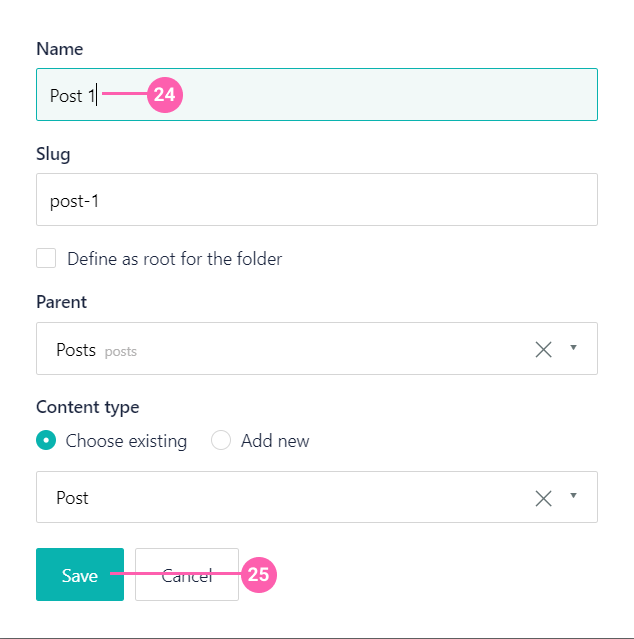
Create Post Entry
Once all of the data is inputted, hit the publish button to make the data ready for the API!
Publish Author
Next, obtain the "public" API key (further referred to as STORYBLOK_API_TOKEN) shown in the tab API-Keys of settings. Then, select Public as access level and press Create token to create a public token for your app. Obtain the token from the list as STORYBLOK_API_TOKEN.
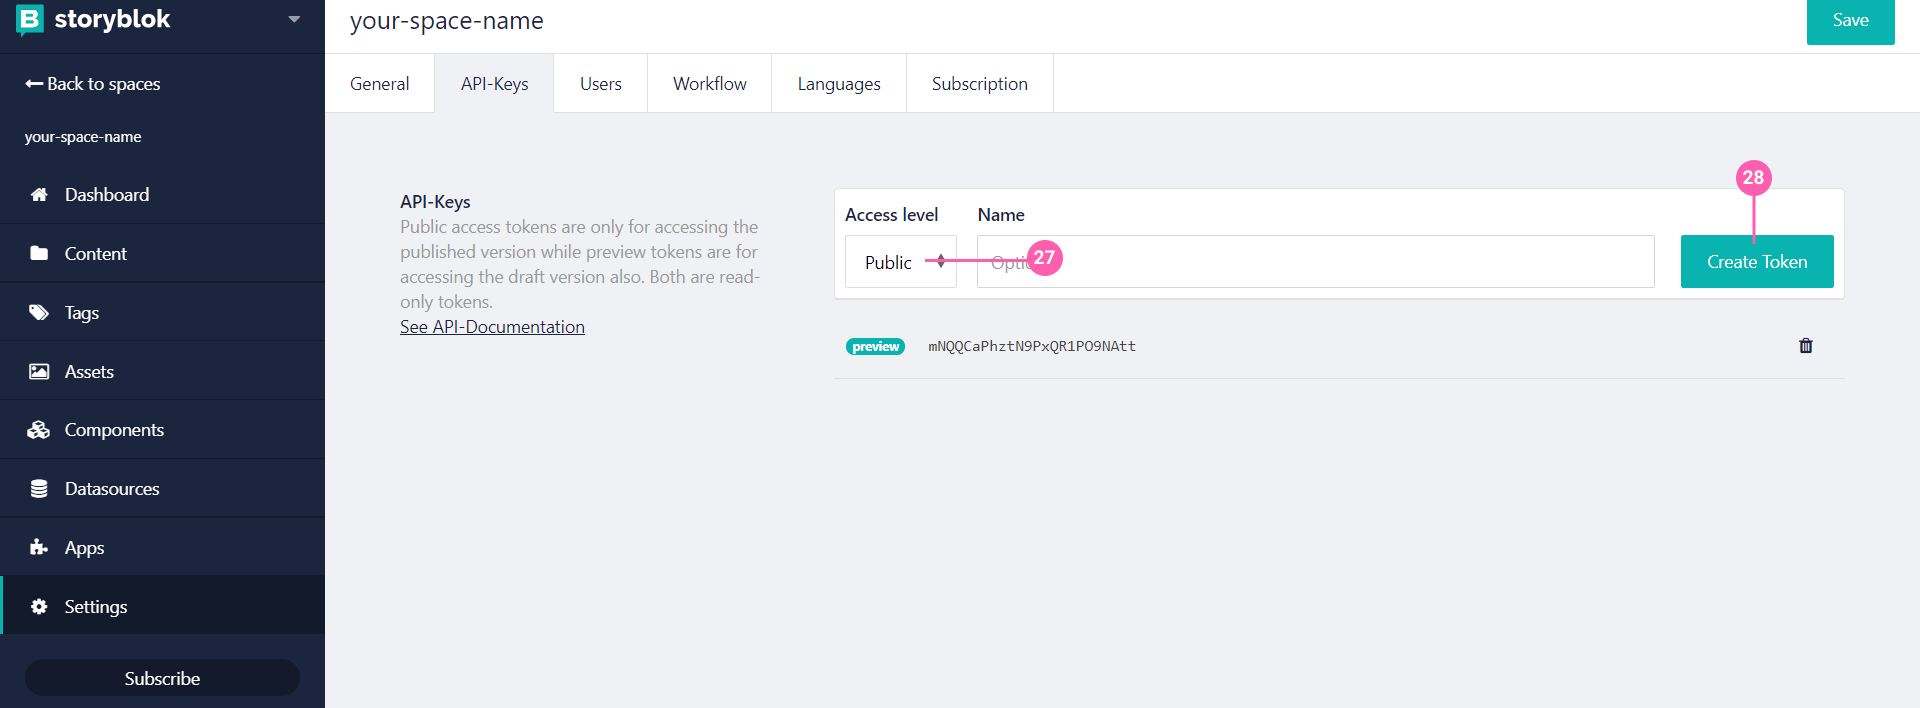
Create Public Token
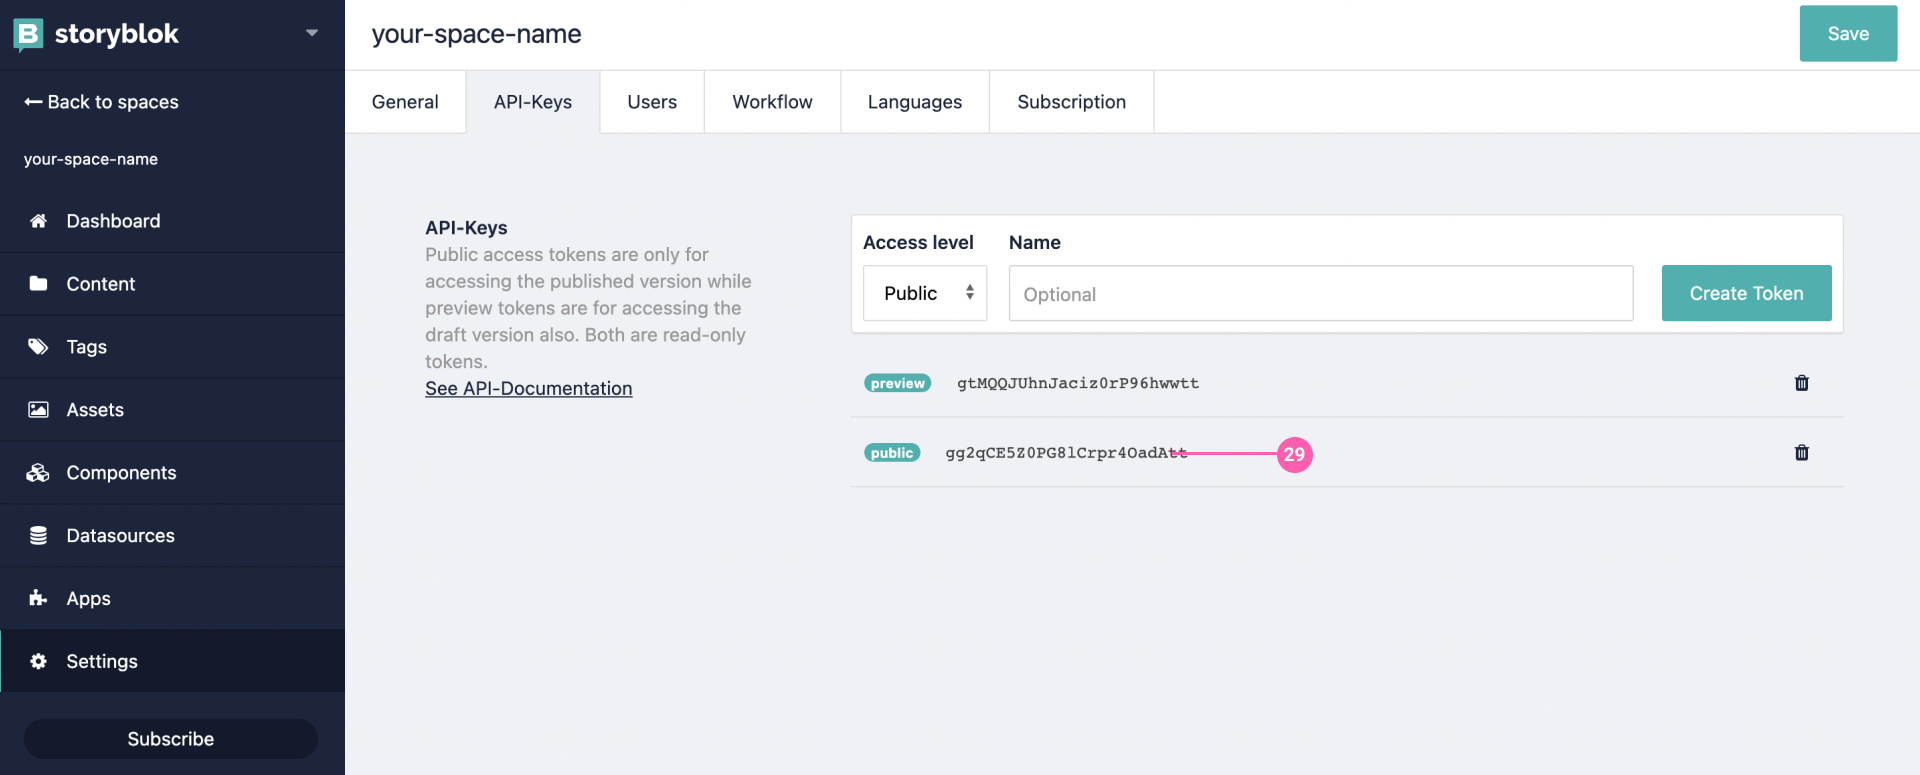
Get Public Token
Set up Next.js with Layer0
To set up, just clone the app repo and follow the blog to learn everything that's in it. To fork the project, run:
git clone https://github.com/rishi-raj-jain/blog-next-storyblok-layer0-starter
cd blog-next-storyblok-layer0-starter
npm install // or yarn install
After these steps, you should be able to start the local environment using the following command.
npm run layer0:devData Fetching
In this section, we'll be diving deep into how the data fetching for the app is done. We make constant use of Incremental Static Regeneration (ISR), and GraphQL queries to fetch and display data statically.
The fetchAPI function
The app uses GraphQL Queries to perform Data Fetching. Browse http://localhost:3000, and you'll see the blog's home page. The first step for you to do now is replace the Storyblok API Token in lib/api.js fetchAPI function as following:
async function fetchAPI(query, { variables, preview } = {}) {
  const res = await fetch('https://gapi.storyblok.com/v1/api', {
    method: 'POST',
    headers: {
      'Content-Type': 'application/json',
      Token: YOUR_API_TOKEN, // Insert your token here!
      Version: preview ? 'draft' : 'published',
    },
    body: JSON.stringify({
      query,
      variables,
    }),
  })
  const json = await res.json()
  if (json.errors) {
    console.error(json.errors)
    throw new Error('Failed to fetch API')
  }
  return json.data
}Do not hardcode the token when deploying a real-world app. Recommended practice is to use environment variables. Refer to Deploy Next SPA with Storyblok to Layer0 for deploying Next.js and Storyblok app with environment variables to Layer0.
Fetching the list of blog posts
On the blog's homepage, we make use of ISR by configuring revalidate property to 1 second. This ensures that the page remains static, and gets regenerated in case you publish or unpublish content on Storyblok. This is done as follows:
export async function getStaticProps() {
  const allPosts = (await getAllPostsForHome()) || []
  return {
    props: { allPosts },
    revalidate: 1, // ensures regeneration
  }
}
getAllPostsForHome function makes use of the fetchAPI function, by passing a GraphQL query to fetch all the PostItems in descending order.
export async function getAllPostsForHome() {
  const data = await fetchAPI(
    `
      {
        PostItems(sort_by: "first_published_at:desc") {
          items {
            slug
            published_at
            first_published_at
            content {
              long_text
              intro
              title
              image
              author {
                name
                content
              }
            }
          }
        }
      }
    `
  )
  return data?.PostItems.items
}
Dynamic blog pages
Next.js makes it super easy to set up dynamic routes. In the app, you'd find blog/[slug].js, which maps pages that start with '/blog/'. Examples include '/blog/blog-1' and '/blog/something-new'.
Incrementally generated blog pages
With the use of getAllPostsWithSlug(), we fetch all of the blog posts that Next.js could prerender while generating static HTML of the app. The use of fallback: 'blocking', will server-render pages on-demand if the path doesn't exist. This configuration ensures that the pages remain static while exporting, whether posts are published, unpublished, or updated.
export async function getStaticPaths() {
  const allPosts = await getAllPostsWithSlug()
  return {
    paths: allPosts?.map((post) => `/blog/${post.slug}`) || [],
    fallback: 'blocking',
  }
}
The GraphQL query for fetching all posts with their slugs is as follows:
export async function getAllPostsWithSlug() {
  const data = await fetchAPI(`
      {
        PostItems {
          items {
            slug
          }
        }
      }
    `)
  return data?.PostItems.items
}
Fetching a post
We fetch the data for the current post by making use of the slug query parameter. First fetch the data for the current post, and then use the values of first_published_at and full_slug to fetch the previous and next blog data.
export async function getStaticProps({ params }) {
	// Get the data for the current post
	const data = await getPost(params.slug)
	// Get the previous blog
  const prevBlog = await getPrevBlog(
    data['post']['first_published_at'],
    data['post']['full_slug']
  )
  if (prevBlog.length > 0) prevBlog[0]['indicator'] = 'Previous'
	// Get the next blog
	const nextBlog = await getNextBlog(
    data['post']['first_published_at'],
    data['post']['full_slug']
  )
  if (nextBlog.length > 0) nextBlog[0]['indicator'] = 'Next'

  return {
    props: {
      post: {
        ...data.post,
        html: data.post?.content?.long_text
          ? new RichTextResolver().render(data.post.content.long_text)
          : null,
      },
      morePosts: [...prevBlog, ...nextBlog],
    },
    revalidate: 1,
  }
}export async function getPost(slug) {
const data = await fetchAPI(
`
query PostBySlug($slug: ID!) {
PostItem(id: $slug) {
slug
full_slug
published_at
first_published_at
id
content {
long_text
intro
title
image
author {
name
content
}
}
}
}
`,
{
variables: {
slug: `posts/${slug}`,
},
}
)
return {
post: data?.PostItem,
}
}Getting Previous and Next Blogs
To get the previous and next posts, use the first_published_at and excluded_slug attributes of the current post that is shown.
To get the previous blog via a GraphQL query, sort the results in descending order, excluding the current slug from the results. Then request the first blog, which has a first_published_at timestamp that is earlier than the current one.
export async function getPrevBlog(first_published_at, excluded_slug) {
  const data = await fetchAPI(
    `
      query ($first_published_at:String!, $excluded_slug: String!) {
        PostItems(
          per_page: 1,
          excluding_slugs: $excluded_slug,
          sort_by: "first_published_at:desc",
          first_published_at_lt: $first_published_at,
        ) {
          items{
            name
            slug
          }
        }
      }
    `,
    {
      variables: {
        first_published_at,
        excluded_slug,
      },
    }
  )
  return data?.PostItems.items
}
To get the next blog via a GraphQL query, sort the results in ascending order, excluding the current slug from the results. Then request the first blog, which has a first_published_at timestamp that is later than the current one.
export async function getNextBlog(first_published_at, excluded_slug) {
  const data = await fetchAPI(
    `
      query ($first_published_at:String!, $excluded_slug:String!) {
        PostItems(
          per_page: 1,
          excluding_slugs: $excluded_slug,
          sort_by: "first_published_at:asc",
          first_published_at_gt: $first_published_at,
        ) {
          items{
            name
            slug
          }
        }
      }
    `,
    {
      variables: {
        first_published_at,
        excluded_slug,
      },
    }
  )
  return data?.PostItems.items
}npm run build && layer0 build
layer0 run --productionDeploying requires an account on Layer0. Sign up here for free. Once you have an account, you can deploy to Layer0 by running the following command in the root folder of your project:
layer0 deployNow we are done with the deployment! Yes, that was all. You should see something like this in the console:
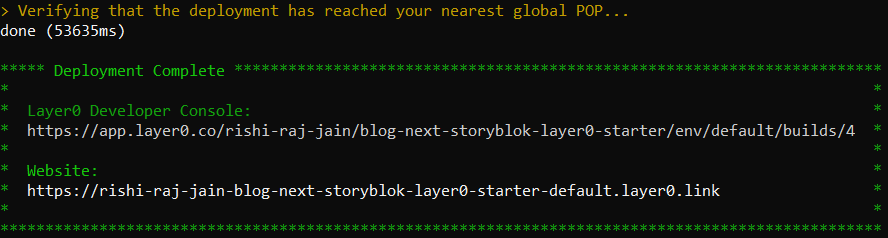
Deployment progress
Go ahead! Change content and publish it on Storyblok, and browse the ‘/’ route of your website to look for changes (yes, Next.js Revalidation works just like that!).
Summary
In this tutorial, we learned how to build a personal blog with Storyblok CMS in a Next.js project and deploy it to Layer0.
| Resource | Link |
|---|---|
| Github Example Repo | blog-next-storyblok-layer0-starter |
| Next.js Documentation | Next.js Docs |
| Layer0 Deploying Guide | Deploying Guide |
Question or Feedback?
Author
